
Are you looking to showcase your photos beautifully on your WordPress site? Adding a NextGEN Gallery to your WordPress page is one of the best ways to do that.
It’s simple, effective, and can make your images stand out instantly. In this guide, you’ll learn exactly how to set up and add a NextGEN Gallery step-by-step, even if you’re not a tech expert. Keep reading, and by the end, you’ll have a stunning gallery ready to impress your visitors and keep them engaged longer.
Let’s get started!
Nextgen Gallery Plugin Basics
Nextgen Gallery is a popular WordPress plugin for managing images. It helps create beautiful galleries easily. Understanding its basics makes adding galleries simple and fast. This section explains what Nextgen Gallery is, its key features, and why it is useful.
What Is Nextgen Gallery
Nextgen Gallery is a tool to organize and display photos on WordPress sites. It lets users upload, manage, and show images in galleries. It offers various gallery styles and layouts. You can add albums and slideshows without coding knowledge.
Key Features
Nextgen Gallery supports multiple gallery types like thumbnails and slideshows. It allows bulk image upload and easy management. You can customize gallery appearance and control image sizes. The plugin supports lightbox effects and social sharing. It also helps with SEO by adding image metadata.
Why Use Nextgen For WordPress
Nextgen Gallery simplifies photo management for WordPress users. It saves time with easy uploads and organization. The plugin fits any website style with flexible gallery options. It improves user experience by displaying images attractively. Nextgen also works well on mobile devices and loads fast.

Credit: www.youtube.com
Installing Nextgen Gallery
Installing Nextgen Gallery is the first step to creating beautiful image galleries on your WordPress site. This plugin lets you organize and display photos easily. The installation process is quick and simple, even for beginners.
Finding The Plugin
Go to your WordPress dashboard. Click on “Plugins” in the left menu. Choose “Add New.” Use the search bar and type “Nextgen Gallery.” Look for the plugin by Imagely. This is the official and trusted version.
Installation Steps
Once you find the plugin, click the “Install Now” button. WordPress will download and prepare the plugin. Wait for a few seconds until the installation finishes. Do not refresh or leave the page during this process.
Activating The Plugin
After installation, click the “Activate” button. This step enables the plugin on your website. Check your dashboard menu. You should see a new “Gallery” option. This means Nextgen Gallery is ready to use.
Creating Your First Gallery
Creating your first gallery in NextGEN Gallery is simple and fun. It helps you display images beautifully on your WordPress page. Follow these easy steps to set up your gallery quickly.
Adding Images
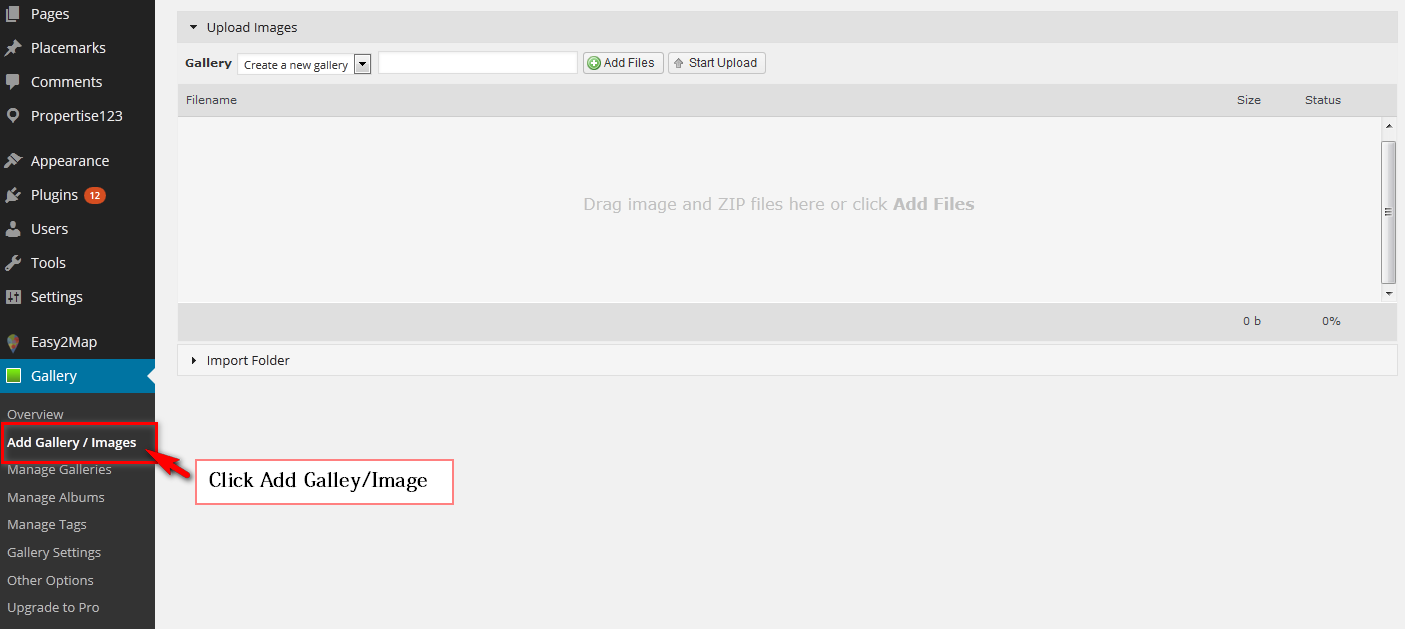
Start by opening the NextGEN Gallery plugin in your WordPress dashboard. Click on “Add Gallery / Images” to create a new gallery. Choose “Create a new gallery” and give it a name. Now, upload images from your computer or select from your WordPress media library. After uploading, click “Add to Gallery.” Your images are ready to be arranged and displayed.
Organizing Albums
Albums help you group galleries for better organization. Go to the “Manage Albums” tab in NextGEN Gallery. Click “Add Album” and name it. Then, add one or more galleries to this album. This makes it easier for visitors to browse collections on your site. You can always edit albums and change the order of galleries.
Gallery Settings Overview
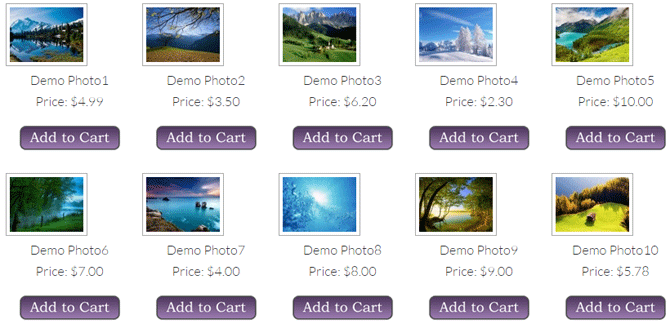
NextGEN Gallery offers many settings to customize your gallery’s look. In the “Gallery Settings” area, you can choose layouts like slideshow, thumbnail, or image browser. Set image size, number of images per page, and transition effects. Adjust lightbox options for viewing images in full size. Save your settings before adding the gallery to your WordPress page.
Credit: wp-ecommerce.net
Inserting Gallery Into A Page
Adding a NextGEN Gallery to your WordPress page is simple. You can display beautiful image collections easily. This helps to make your site more attractive and engaging. Different methods suit different editors in WordPress. Choose the one that fits your editing style.
Using Gutenberg Block
Open the page where you want the gallery. Click the plus (+) icon to add a new block. Search for “NextGEN Gallery” in the block list. Select the NextGEN block to insert it. Pick the gallery you created earlier. The block will show a preview of the gallery. Save or update the page to publish.
Shortcode Method
NextGEN Gallery also works with shortcodes. Copy the shortcode from the gallery settings. It looks like [ngg src="galleries" ids="1" display="basic_thumbnail"]. Paste the shortcode into any text block or widget area. The gallery appears where the shortcode is placed. This method works with most editors.
Classic Editor Integration
Open the page using the Classic Editor. Look for the “Add Gallery” button above the text area. Click it to open the gallery window. Choose the gallery you want to add. Click “Insert Gallery” to embed it in the content. Update the page to save your changes.
Customizing Gallery Appearance
Customizing the appearance of your Nextgen Gallery helps make your photos stand out. It allows you to control how your images look and fit on your WordPress page. Small changes can create a big difference in user experience and site design. Let’s explore how to tailor your gallery’s look to suit your style and needs.
Choosing Gallery Styles
Nextgen Gallery offers several styles to display your images. You can pick from thumbnail, slideshow, or image browser styles. Each style shows your photos in a unique way. Thumbnails create a grid of small images. Slideshows display one photo at a time. Image browser lets visitors scroll through pictures easily. Choose a style that matches your content and page layout.
Adjusting Layout Options
Layout settings let you control the size and spacing of your gallery. You can set the number of columns to organize images neatly. Change the thumbnail size to make pictures bigger or smaller. Adjust spacing between images to avoid clutter. These tweaks improve how your gallery fits into your page design. Play with different options until the gallery looks balanced and clean.
Using Lightbox Effects
Lightbox effects enhance how visitors view your photos. Clicking an image opens it in a larger, focused window. This effect dims the background, keeping attention on the picture. Nextgen Gallery supports multiple lightbox styles. You can choose simple or more animated effects. Lightbox makes browsing images easier and more engaging for users.
Managing Galleries Efficiently
Managing galleries efficiently keeps your WordPress site organized and visually appealing. It helps save time and improves user experience. NextGen Gallery offers simple tools to edit, delete, and update galleries without hassle.
Editing Existing Galleries
To edit a gallery, go to the NextGen Gallery dashboard. Select the gallery you want to change. You can add or remove images easily. Rearrange photos by dragging them in the order you prefer. Editing captions and descriptions is quick and clear. This keeps your gallery fresh and relevant.
Deleting Unwanted Images
Removing images you no longer need is simple. Open the gallery and select the pictures to delete. Click the delete button to remove them permanently. This action frees up space and keeps the gallery tidy. Regular cleanup avoids clutter and speeds up site loading time.
Updating Gallery Settings
Adjusting gallery settings tailors the display to your needs. Change thumbnail sizes, gallery styles, and image effects. Set how many images show per page. Configure lightbox options for better viewing. These settings control the look and feel of your galleries. Updating them ensures galleries fit your site design perfectly.
Troubleshooting Common Issues
Troubleshooting is a key part of using NextGEN Gallery in WordPress. Some common problems can stop your gallery from showing or working correctly. Knowing how to fix these issues saves time and frustration. This section covers simple ways to solve frequent NextGEN Gallery problems.
Gallery Not Displaying
Check if the gallery shortcode is correct. A small typo can prevent the gallery from showing. Make sure the gallery is published and assigned to the page. Clear your site cache and browser cache to refresh the content. Sometimes, a conflict with your theme can hide the gallery. Switch to a default WordPress theme to test this. If the gallery still does not appear, check plugin settings for display options.
Image Upload Problems
Verify that your images meet the size and format requirements. Large files may fail to upload or slow down the process. Use JPG, PNG, or GIF formats for best results. Check your internet connection during uploads. A slow connection can cause timeouts. Increase the PHP upload limit in your hosting settings if uploads stop. Also, confirm that file permissions allow uploads to the server.
Compatibility Conflicts
NextGEN Gallery may conflict with other plugins or your theme. Disable other plugins one by one to find conflicts. Update all plugins and WordPress to the latest version. Outdated software can cause errors. Check the NextGEN Gallery support forums for known conflicts. Use a staging site to test changes safely before applying them live. Compatibility issues often resolve after updates or plugin adjustments.
Credit: www.imarketingonly.com
Optimizing Gallery Performance
Optimizing your Nextgen Gallery ensures your WordPress page loads fast and runs smoothly. Fast galleries improve user experience and keep visitors on your site longer. Slow galleries can make visitors leave quickly. Small changes can make big differences in gallery speed and performance.
Image Compression Tips
Compress images before uploading to reduce file size. Use tools like TinyPNG or JPEG-Optimizer. Smaller images load faster without losing quality. Avoid uploading large, uncompressed photos. Save images in web-friendly formats like JPEG or WebP. Keep image dimensions suitable for your gallery size.
Caching Strategies
Enable caching to store gallery data temporarily. This speeds up page loading on repeat visits. Use caching plugins like W3 Total Cache or WP Super Cache. Clear cache regularly to avoid showing old content. Server-side caching also improves gallery response time. Proper caching reduces server load and boosts speed.
Lazy Loading Setup
Lazy loading delays image loading until they appear on screen. This reduces initial page load time. Nextgen Gallery supports lazy loading natively or through plugins. Enable lazy loading in gallery settings or use plugins like Lazy Load by WP Rocket. This method saves bandwidth and improves user experience.
Frequently Asked Questions
How Do I Install Nextgen Gallery In WordPress?
To install Nextgen Gallery, go to your WordPress dashboard. Navigate to Plugins > Add New. Search for “Nextgen Gallery,” then click Install and Activate. This process sets up the plugin for use on your site quickly and easily.
How Can I Add Nextgen Gallery To A WordPress Page?
Create or edit a WordPress page. Use the block editor and add a “Nextgen Gallery” block. Select your gallery from the list, then publish or update the page. The gallery will display where you placed the block.
Can I Customize Nextgen Gallery Appearance On My Page?
Yes, Nextgen Gallery offers customization options. You can adjust gallery style, thumbnail size, and image spacing. Use the plugin settings or block options to match your site’s design and enhance user experience.
Is Nextgen Gallery Compatible With WordPress Gutenberg Editor?
Yes, Nextgen Gallery fully supports the Gutenberg editor. You can easily add galleries using dedicated blocks. This makes gallery management seamless within the latest WordPress editing environment.
Conclusion
Adding Nextgen Gallery to your WordPress page is simple and useful. You can show your photos in a clean, organized way. Just follow the steps, and your gallery will look great. This helps visitors enjoy your images easily. Keep your site fresh by updating galleries often.
Practice a few times to get comfortable with the process. Soon, adding pictures will feel natural and quick. Enjoy sharing your photos with the world!


