
Are you trying to connect your domain hosted on GoDaddy to the right nameservers but don’t know where to start? Changing nameservers is a crucial step to make sure your website points to the correct hosting service.
If you get this wrong, your site might not load properly, or visitors could end up lost. In this guide, you’ll learn exactly how to add nameservers to your GoDaddy-hosted domain quickly and without confusion. By the end, you’ll feel confident managing your domain settings like a pro, so keep reading to get it done right the first time.
Accessing Godaddy Account
Accessing your GoDaddy account is the first step to manage your domain settings. It allows you to control important details like nameservers. This section guides you through the simple login process.
Having quick access to your account saves time and avoids confusion. You must use the correct credentials to sign in securely. Follow the easy steps below to start managing your domain.
Open The Godaddy Website
Type www.godaddy.com in your browser’s address bar. Press Enter to load the homepage. Make sure you have a stable internet connection.
Click On The Sign In Button
Find the “Sign In” button at the top right corner. Click it to open the login page. This page is where you enter your credentials.
Enter Your Username And Password
Type your GoDaddy username or customer number in the first box. Enter your password in the second box carefully. Check for any typing mistakes before proceeding.
Complete The Sign In Process
Click the “Sign In” button below the password box. Wait a few seconds while the system logs you in. You will land on your account dashboard after successful login.
Credit: www.godaddy.com
Navigating To Domain Settings
Changing nameservers on GoDaddy starts with accessing your domain settings. This step is crucial for managing domain details and DNS configurations. Knowing how to find the right menu saves time and avoids confusion.
Domain settings hold all the options for your domain. You can view, modify, or update nameservers here. The process is simple and follows a clear path on GoDaddy’s website.
Logging Into Your Godaddy Account
First, visit the GoDaddy homepage. Enter your username and password. Click the login button to access your account dashboard. This dashboard is your control center for all domains.
Accessing The Domain Manager
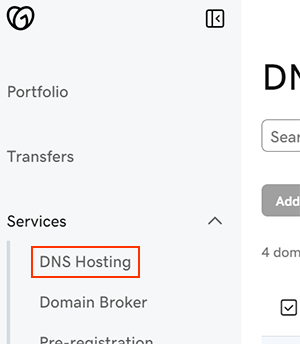
Once logged in, locate the ‘My Products’ section. This area lists all your domains and services. Click on ‘Domain Manager’ or ‘Manage Domains’ to open the list of your domains.
Selecting The Domain To Edit
In the Domain Manager, find the domain you want to update. Use the search or scroll through the list. Click the domain name to open its settings page.
Opening The Domain Settings
On the domain page, find the ‘Settings’ tab or button. Click it to view detailed options. This section includes nameserver settings and other domain controls.
Locating Nameserver Options
Finding the nameserver options on GoDaddy is the first step to change your domain’s DNS settings. These settings control where your domain points to, like your website or email service. Knowing where to find them makes managing your domain easier.
GoDaddy’s interface is user-friendly but can feel tricky if you are new. This guide helps you locate nameserver options quickly and clearly. Follow each step to find the right place to update your domain’s nameservers.
Accessing Your Godaddy Account Dashboard
Start by logging into your GoDaddy account. After signing in, you land on the main dashboard. This page shows all your GoDaddy products and services.
Look for the “My Products” section. This area lists all domains you own. It is the entry point to domain settings.
Finding Your Domain List
Click on “My Products” to see your domains. Scroll through the list to find the domain you want. Domains are usually shown in alphabetical order.
Next to your domain name, you will see a button or link to manage it. Click this to open the domain management page.
Locating The Nameserver Settings
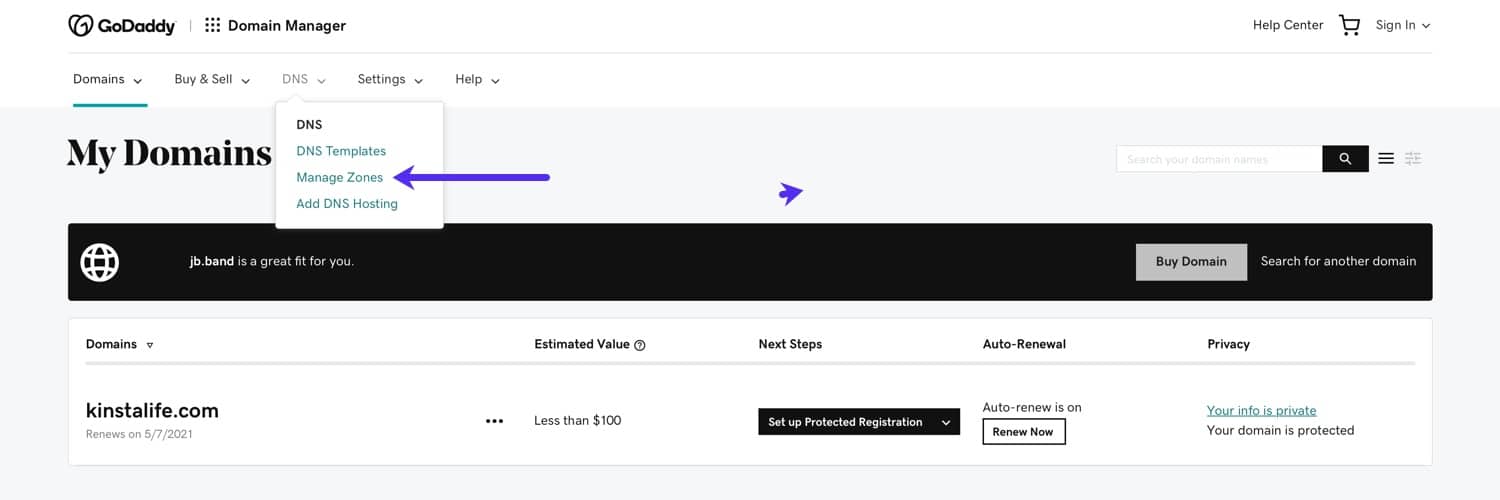
On the domain management page, look for the “DNS” or “Nameservers” option. This section controls your domain’s nameservers.
Click the option to open nameserver settings. Here, you can view or change the current nameservers.
Choosing Custom Nameservers
Choosing custom nameservers lets you control your domain’s DNS settings. It allows your website to use nameservers from another host or service. This can improve your site’s speed, security, or management.
Custom nameservers help link your domain with specific servers. You can use them to point your domain to hosting providers outside GoDaddy. This gives flexibility in managing your website and email services.
Understanding Custom Nameservers
Custom nameservers are unique addresses for your domain’s DNS. They tell the internet where to find your website. Using custom nameservers means your domain uses a different DNS provider than GoDaddy.
This setup is useful if your hosting company offers better DNS features. It also helps if you want to keep all services in one place.
Benefits Of Using Custom Nameservers
Custom nameservers give more control over DNS records. You can set up advanced features like email forwarding or security settings. They often improve website loading times by using optimized servers.
This setup may also provide better support for your hosting needs. It keeps your domain and hosting services separate, making management easier.
How To Choose The Right Custom Nameservers
Select nameservers provided by your hosting provider or DNS service. Check that the nameservers are reliable and fast. Confirm they support the features your website needs.
Write down the exact nameserver addresses. They usually look like ns1.example.com and ns2.example.com. Using the correct addresses avoids connection problems.
Adding New Nameserver Details
Adding new nameserver details is a key step to manage your domain on GoDaddy. It lets you point your domain to the right server. This controls where your website or email services operate from.
Changing nameservers is simple but needs careful attention. Incorrect entries can cause your site or email to stop working. Follow the steps below to enter new nameserver details correctly and safely.
Accessing Your Domain Settings
Log in to your GoDaddy account first. Go to the “My Products” page. Find the domain name you want to update. Click on “DNS” or “Manage DNS” next to it. This opens the domain’s DNS management page.
Locating The Nameserver Section
Scroll down to the “Nameservers” area on the DNS page. You will see the current nameservers listed here. Choose the option to “Change” or “Edit” these nameservers. This lets you enter new nameserver information.
Entering New Nameserver Details
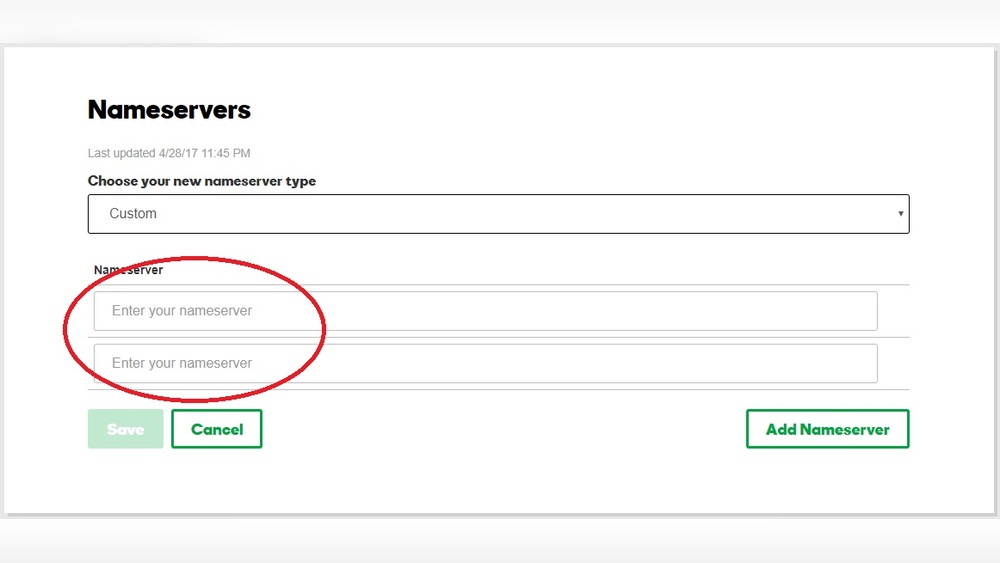
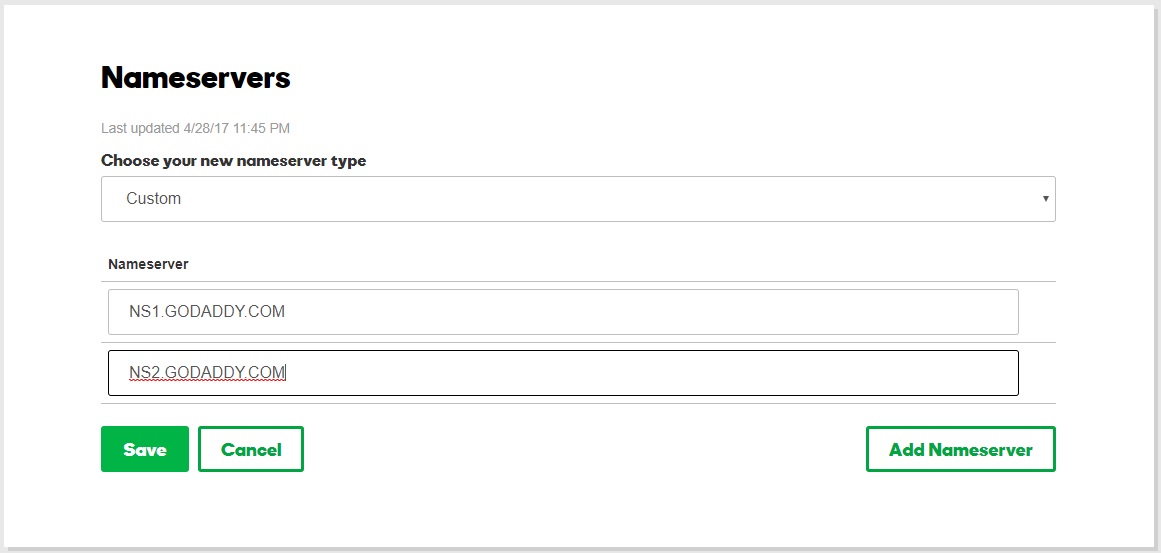
Select “Custom” nameserver type if available. Type the new nameserver addresses carefully. Usually, you need at least two nameservers. Enter each nameserver on a separate line or field. Double-check for typos or mistakes.
Saving And Confirming Changes
After entering all nameserver details, click “Save” or “OK.” GoDaddy may ask you to confirm the changes. The update can take up to 48 hours to apply worldwide. Your website and emails will start working with the new servers once propagation is complete.
Saving And Verifying Changes
Saving and verifying your nameserver changes is an essential step after updating your domain settings at GoDaddy. These steps make sure your domain points correctly to the new hosting service. Without saving, changes will not take effect. Verifying helps confirm that everything works as expected.
This process usually takes a few minutes but can sometimes require up to 48 hours. Patience is key to avoid confusion and errors. Let’s explore how to save and check your nameserver updates.
Saving Your Nameserver Changes
After entering the new nameserver details, look for the “Save” or “Save Changes” button. Click it to store the updates in your GoDaddy account. Without this action, the system will not apply your new settings.
Make sure to double-check the nameserver addresses for typos before saving. Incorrect entries can cause your website to stop working. Once saved, GoDaddy will begin updating the domain records.
Verifying Nameserver Updates
Verification confirms your domain uses the new nameservers. Use online tools like “whois” lookup or DNS checkers to view current nameservers. The displayed nameservers should match the ones you entered.
You can also refresh your domain’s DNS information via GoDaddy’s dashboard. This helps confirm if propagation has started. Keep in mind, full global update can take some time.
Common Errors And Fixes
Changing nameservers on GoDaddy can sometimes cause errors. These errors stop your website from working properly. Knowing common mistakes helps fix problems fast. This saves time and avoids frustration.
Errors often happen due to wrong details or delays in the system. Fixing these mistakes is simple with the right steps. Below are common errors and how to solve them.
Incorrect Nameserver Entries
Entering nameservers wrongly is the most common error. Make sure to copy the exact nameserver address. Even one wrong letter causes issues. Double-check spelling and format before saving.
Nameservers Not Updated Yet
Nameserver changes can take time to update worldwide. It may take up to 48 hours. Wait patiently after updating nameservers. Check again after some time before trying other fixes.
Using Old Nameservers
Some users keep using old nameservers by mistake. Confirm you removed old nameservers and added the new ones. Remove any outdated entries to avoid conflicts.
Domain Locked Or Not Verified
A locked domain stops nameserver changes. Unlock the domain in your GoDaddy account. Also, verify your email address if required. This ensures changes go through smoothly.
Dns Propagation Delays
DNS propagation causes a delay after updating nameservers. This is normal and takes time to spread. Use online tools to check propagation status. Avoid making repeated changes during this time.
Credit: kinsta.com
Propagation Time Expectations
Changing nameservers on a GoDaddy hosted domain does not take effect instantly. The update needs time to spread across the internet. This process is called propagation. Understanding propagation time helps set the right expectations.
Propagation depends on many factors. These include your domain registrar, DNS servers, and internet service providers. It can take from a few minutes to up to 48 hours. Patience is key during this period.
What Happens During Nameserver Propagation?
Nameserver changes tell the internet where to find your website. When you update nameservers, DNS servers around the world must receive this new information. Each server updates at different speeds. This causes the delay in seeing changes everywhere.
Typical Propagation Time For Godaddy Domains
GoDaddy usually updates nameserver changes quickly on their end. Most changes start reflecting within a few hours. Full propagation often completes within 24 to 48 hours. Some locations may take longer to update.
How To Check Propagation Status
Several online tools let you check propagation progress. They show if your new nameservers are active worldwide. Checking helps confirm if changes reached your region. This can reduce confusion during the waiting time.
Tips To Manage Propagation Delay
Try clearing your browser cache and DNS cache. This forces your device to fetch new DNS information. Avoid making more DNS changes during propagation. Frequent updates can slow down the process.
Credit: www.godaddy.com
Frequently Asked Questions
How Do I Find Godaddy Nameservers For My Domain?
Log in to your GoDaddy account and go to the Domain Manager. Select your domain, then find the nameservers under the DNS settings tab. GoDaddy provides default nameservers or custom nameservers if you’ve set any.
Can I Add Custom Nameservers To My Godaddy Domain?
Yes, you can add custom nameservers. In your GoDaddy account, open DNS Management for your domain. Select “Change” under Nameservers, choose “Custom,” and enter your desired nameserver addresses.
How Long Does Godaddy Nameserver Update Take?
Nameserver changes on GoDaddy typically take 24 to 48 hours to propagate worldwide. This delay depends on DNS caching and internet service providers updating their records.
What Happens If I Don’t Add Nameservers To My Godaddy Domain?
Without nameservers, your domain won’t resolve to any website or email service. Visitors will see an error, and your domain won’t work properly online.
Conclusion
Adding nameservers to your GoDaddy hosted domain is simple and quick. Just follow the steps carefully to avoid errors. Double-check the nameserver details before saving. Changes may take some time to update across the internet. Keep your login information safe for future updates.
This process helps direct your domain to the right hosting service. Stay patient while waiting for the changes to take effect. You can manage your domain settings anytime through your GoDaddy account.


