

Want to make your WordPress site more engaging and memorable? Adding a music player can transform your visitors’ experience instantly.
Imagine your audience staying longer, feeling the vibe you want to create, and coming back for more. It’s easier than you think, and you don’t need to be a tech expert to do it. In this guide, you’ll discover simple, step-by-step ways to add a music player to your WordPress site.
Ready to turn up the volume on your website? Let’s dive in!
Credit: www.wpbeginner.com
Choosing The Right Music Player
Choosing the right music player for your WordPress site is important. It affects your site’s look, speed, and user experience. A good player fits your style and works well with your site’s setup. It should be easy to use and load quickly. Think about your needs before picking one. This helps avoid problems and keeps visitors happy.
Free Vs Premium Plugins
Free music player plugins offer basic features. They are good for simple needs and tight budgets. Premium plugins have more options and support. They may include playlists, custom skins, and advanced controls. Premium versions often get updates faster. Choose based on your budget and feature needs. Sometimes free versions are enough. Other times, premium tools save time and effort.
Compatibility With WordPress Themes
Not all music players work well with every theme. Some plugins may break your site’s design or cause errors. Test the plugin with your theme first. Choose players known for good compatibility. Read user reviews and developer notes. This ensures the player matches your site’s style. A compatible player keeps your site stable and professional.
Mobile Responsiveness
Many visitors use phones or tablets. Your music player must look good on small screens. A responsive player adjusts to different devices. It avoids cutting off controls or text. Mobile-friendly players improve user experience. They keep visitors on your site longer. Check the player’s demo on mobile before installing.
Credit: wordpress.org
Installing A Music Player Plugin
Installing a music player plugin on WordPress is a simple way to share audio content. It lets visitors listen to music directly on your site. This process does not require coding skills. The plugin handles everything for you. Follow clear steps to find and install the right plugin for your needs.
Accessing The WordPress Plugin Directory
Start by logging into your WordPress dashboard. On the left menu, find and click “Plugins.” Then select “Add New.” This opens the WordPress Plugin Directory. It contains thousands of plugins for various purposes. Here, you can search for music player plugins easily.
Searching And Selecting Plugins
Use the search bar in the Plugin Directory. Type keywords like “music player” or “audio player.” You will see many plugin options. Look at ratings and reviews to find trustworthy plugins. Check how many active installations each plugin has. Choose a plugin that fits your site style and needs.
Step-by-step Installation Process
After choosing a plugin, click the “Install Now” button. WordPress downloads and installs the plugin automatically. When done, click “Activate” to enable it on your site. You can now access the plugin settings from the dashboard. Configure the player to add your music files. Save changes to make the player visible on your pages.
Configuring The Music Player
Configuring the music player is an important step to make your audio content work well. This part helps you control how your music plays and looks on your site. Proper configuration ensures visitors enjoy a smooth listening experience.
Each music player plugin or tool may have different settings. You will adjust these settings to fit your site’s style and needs. Focus on uploading files, customizing the player’s look, and setting playback options.
Uploading Audio Files
Start by uploading your audio files to WordPress. Use the Media Library to add MP3 or other audio formats. Keep file sizes small for faster loading. Name files clearly to stay organized. After uploading, copy the file URL for use in the player.
Customizing Player Appearance
Most players let you change colors, size, and controls. Match the player’s look to your website’s design. Choose simple colors and easy-to-read buttons. Some plugins offer themes or skins. Preview changes before saving to ensure a good fit.
Setting Playback Options
Playback options control how music plays for visitors. Decide if tracks play automatically or on click. Choose whether the player loops songs or stops after one. Enable or disable shuffle mode if available. Adjust volume settings and show progress bars for better user control.
Credit: verpex.com
Embedding The Music Player On Your Site
Embedding a music player on your WordPress site makes your content more lively. Visitors can listen to your music without leaving the page. This can boost engagement and keep users on your site longer. There are simple ways to place the player exactly where you want it.
Using Shortcodes
Shortcodes are small pieces of code that insert features like music players. Many music plugins generate shortcodes automatically. Copy the shortcode and paste it into any page or post. The player appears right where you place the code. This method is quick and needs no coding skills.
Adding To Widgets And Sidebars
Widgets allow you to add content to sidebars or footers. Most music player plugins include a widget option. Go to Appearance > Widgets in your dashboard. Drag the music player widget to your chosen area. Customize the settings, then save. Your player will show on all pages with that sidebar.
Inserting Into Pages And Posts
Edit the page or post where you want the music player. Use the block editor or classic editor. In the block editor, add a shortcode block and paste the player shortcode. In the classic editor, paste the shortcode directly into the text area. Update or publish the page to see the player live.
Optimizing Music Player Performance
Optimizing the music player on your WordPress site improves user experience. A smooth player keeps visitors engaged and reduces site lag. Focus on speed, compatibility, and solving common problems. These steps help your music player perform well on all devices.
Minimizing Load Times
Choose lightweight music player plugins that load quickly. Avoid players with many extra features you don’t need. Compress audio files to reduce their size without losing quality. Use caching plugins to store player data temporarily. This speeds up loading for repeat visitors.
Ensuring Cross-browser Compatibility
Test the music player on popular browsers like Chrome, Firefox, Safari, and Edge. Make sure the player’s controls work the same on all browsers. Use HTML5 audio players, which have wide browser support. Update plugins regularly to fix compatibility issues.
Troubleshooting Common Issues
Check for conflicts with other plugins if the player breaks. Clear the browser cache to see recent changes. Disable caching temporarily to find caching problems. Verify audio file formats are supported by your player. Contact plugin support for persistent issues.
Alternative Methods To Add Music
Adding music to your WordPress site can enhance user experience. There are various ways to do this beyond plugins. These alternative methods offer flexibility and control. Choose the one that fits your needs and skills.
Embedding From External Services
Many websites let you share music easily. Platforms like SoundCloud, Spotify, and YouTube offer embed codes. Copy the code and paste it into your WordPress post or page. This method requires no technical skills. The music player will appear directly on your site. Visitors can play music without leaving your page.
Using Html5 Audio Player
WordPress supports the HTML5 audio tag. Upload your audio file to the media library first. Then use the
Integrating Playlists
Playlists let you share multiple songs together. You can create playlists using WordPress’s built-in audio shortcode. Upload all audio files to the media library. Then use the shortcode with file URLs to display a playlist. Visitors can listen to songs in order or skip tracks. Playlists keep your site organized and engaging.
Frequently Asked Questions
How Do I Add A Music Player To WordPress?
You can add a music player using plugins like AudioIgniter or Compact WP Audio Player. Install, activate, and embed it via shortcode or widget.
What Is The Best Music Player Plugin For WordPress?
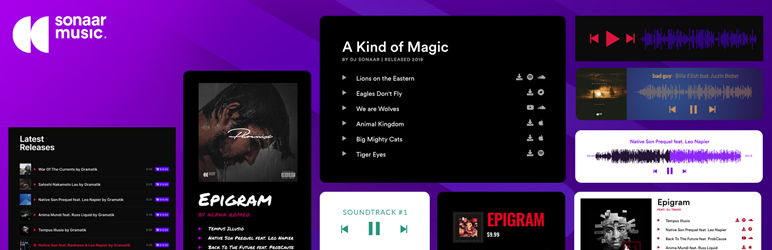
AudioIgniter and MP3 Music Player by Sonaar are popular. They offer easy setup, customization, and responsive design for all devices.
Can I Add A Playlist To My WordPress Music Player?
Yes, most plugins allow playlist creation. You can upload multiple tracks and organize them for seamless playback on your site.
Is It Possible To Embed Spotify In WordPress?
Yes, you can embed Spotify playlists by copying the embed code from Spotify and pasting it into a WordPress post or widget.
Conclusion
Adding a music player to your WordPress site is simple and effective. Choose the right plugin that fits your needs. Customize the player to match your website’s style. Test it to make sure it works well on all devices. A music player can make your site more engaging and fun.
Keep your content fresh by updating playlists regularly. Enjoy sharing your favorite music with your visitors easily.


