
Are you looking to make your WordPress site more dynamic with JavaScript but not sure where to start? Adding JavaScript to your Elementor pages can unlock new features and improve user experience, but it might seem tricky at first.
Don’t worry—this guide will walk you through simple, step-by-step methods to add JavaScript to your WordPress Elementor site without any hassle. By the end, you’ll know exactly how to make your website more interactive and engaging, even if you’re not a coding expert.
Keep reading to discover how easy it can be!
Why Add Javascript In Elementor
Adding JavaScript to Elementor lets you create more dynamic websites. It helps you go beyond the basic design features. You can make interactive buttons, animations, and custom effects. This makes your site more engaging for visitors.
JavaScript also allows you to control how elements behave. You can show or hide content based on user actions. This improves user experience and keeps visitors on your site longer. Small touches like these make your site feel unique.
Enhance User Interaction
JavaScript helps your site respond to user actions quickly. You can create clickable menus, pop-ups, or sliders. These features guide visitors and make navigation easier. Interactive sites keep users interested and reduce bounce rates.
Customize Design Beyond Defaults
Elementor offers many design options. JavaScript lets you customize things that Elementor can’t. Add special animations or effects that fit your brand. This helps your site stand out from others built with Elementor alone.
Improve Website Functionality
JavaScript adds useful functions like form validation or dynamic content. It checks user input before sending forms. This prevents errors and saves time. You can also load content without refreshing the page for smoother browsing.

Credit: www.wpcrafter.com
Methods To Insert Javascript
Adding JavaScript to your WordPress site using Elementor can improve its features and user experience. There are several ways to insert JavaScript code. Choose the method that fits your skill level and site needs. Each method has its benefits and uses.
Using Html Widget
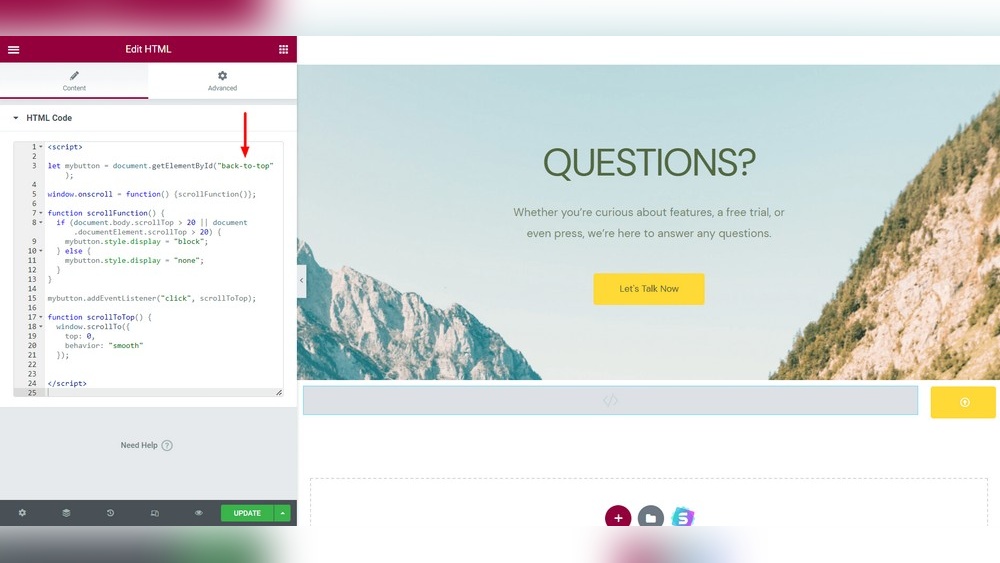
The HTML widget in Elementor lets you add JavaScript directly on a page. Drag the widget to your desired section. Paste your JavaScript code inside the widget. This method is quick and works well for small scripts.
It is ideal for page-specific scripts. The code runs only on the page where you place the widget.
Adding Via Theme Functions
You can add JavaScript in your theme’s functions.php file. Use the wp_enqueue_script function to load scripts properly. This method is better for site-wide scripts. It keeps your code organized and separate from content.
Be careful when editing theme files. Always back up your site to avoid issues.
Using Plugins For Custom Scripts
Plugins simplify adding JavaScript without coding. Many plugins let you insert scripts in headers, footers, or specific pages. This method is user-friendly and safe for beginners. It also helps manage multiple scripts easily.
Choose a plugin that is updated and well-reviewed for best results.
Embedding In Header Or Footer
JavaScript can be added to your site’s header or footer areas. This works for scripts that need to load on every page. You can do this via the theme customizer or plugins. Place the code between the tags in the chosen area.
This method ensures your script loads early or late, based on location. Use it for analytics, chat widgets, or other essential scripts.
Step-by-step Guide With Html Widget
Adding JavaScript to your WordPress site using Elementor is simple with the HTML widget. This method lets you insert custom scripts directly into your page. It gives you control over interactive features and dynamic content without extra plugins.
This step-by-step guide shows how to do it quickly. You will learn to access the Elementor editor, insert the HTML widget, and write or test JavaScript code. Follow these clear steps to enhance your site’s functionality.
Accessing The Elementor Editor
Log in to your WordPress dashboard. Find the page or post to edit. Click “Edit with Elementor” to open the page builder. The Elementor editor loads with all editing tools visible. You can now customize your content easily.
Inserting The Html Widget
In the Elementor editor, look for the “HTML” widget in the sidebar. Drag the HTML widget to the section where you want your JavaScript to run. Drop the widget in place. This widget allows you to add custom HTML or scripts.
Writing And Testing Javascript Code
Click inside the HTML widget’s code box. Type or paste your JavaScript code here. Keep your script simple to avoid errors. Use basic JavaScript or jQuery as needed. After entering your code, click the “Preview” button to test it. Check if your script works on the page.
Credit: www.wpcrafter.com
Adding Javascript Through Theme Functions
Adding JavaScript through theme functions is a clean way to include scripts in WordPress Elementor. This method keeps your code organized and safe from being overwritten during updates. It also helps load scripts only when needed, improving site speed.
Using the theme’s functions.php file, you can add custom JavaScript easily. This file controls many aspects of your WordPress theme. Editing it lets you manage scripts with more control and precision.
Locating Functions.php File
To start, find the functions.php file in your theme folder. Access it via your WordPress dashboard or through FTP. Inside the dashboard, go to Appearance > Theme Editor. Then, select the active theme and look for functions.php in the list.
Be careful when editing this file. A small mistake can break your website. Always back up your site before making changes.
Enqueuing Javascript Correctly
Do not insert JavaScript directly into functions.php. Use the wp_enqueue_script function instead. This method loads your script properly and avoids conflicts.
Here is a simple example:
function custom_enqueue_scripts() { wp_enqueue_script('custom-js', get_template_directory_uri() . '/js/custom.js', array(), null, true); } add_action('wp_enqueue_scripts', 'custom_enqueue_scripts');This code loads a custom.js file from your theme’s js folder. The last argument true places the script in the footer for better performance.
Best Practices For Theme Edits
Never edit the parent theme directly. Use a child theme to keep your changes safe after updates. A child theme inherits the parent’s design but allows custom code additions.
Always test your JavaScript on a staging site first. This avoids errors on your live website. Keep your scripts small and focused. Avoid loading unnecessary files.
Clear your cache after adding scripts. This ensures your changes appear to all visitors immediately.
Utilizing Plugins For Custom Scripts
Adding custom JavaScript to your WordPress site built with Elementor can enhance its functionality. Using plugins is a simple and safe way to insert scripts without touching theme files. Plugins help keep your code organized and easy to manage.
Many plugins offer user-friendly interfaces. They let you add scripts to specific pages or site-wide. This method reduces the risk of errors and improves site performance.
Popular Plugins Overview
Several plugins allow easy JavaScript insertion. “Insert Headers and Footers” is a favorite for adding code snippets. “Simple Custom CSS and JS” gives more control over where scripts load. “Header Footer Code Manager” offers options for script placement and conditions.
Installing And Activating Plugins
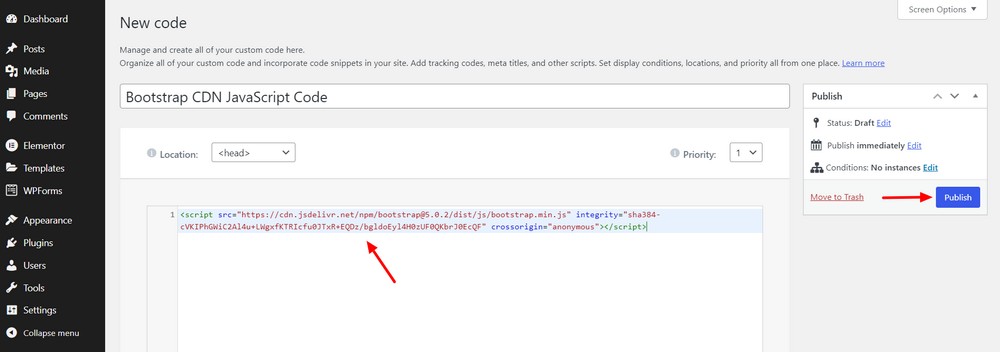
Go to your WordPress dashboard. Navigate to “Plugins” and click “Add New.” Search for the plugin by name. Click “Install Now” and then “Activate.” The plugin is now ready to use. This process takes only a few minutes.
Adding Scripts Via Plugin Interface
Open the plugin settings from your dashboard. Find the section to add new JavaScript. Paste your script into the provided box. Choose where to display the script—header, footer, or specific pages. Save the changes to activate your script. Check your site to confirm it works well.
Tips For Troubleshooting Javascript Issues
JavaScript problems can stop your Elementor site from working well. Fixing these issues makes your site smooth and user-friendly. Try simple steps to find and fix errors fast. This saves time and keeps your site running strong.
Checking Console Errors
Open your browser’s console to see errors. Press F12 or right-click and choose “Inspect.” Go to the “Console” tab. Look for red messages. These show JavaScript problems. Note the file and line number. This helps you find the error spot quickly.
Ensuring Script Compatibility
Check if your JavaScript works with Elementor and WordPress. Old scripts may cause conflicts. Use scripts made for your WordPress version. Avoid scripts that need jQuery if it’s not loaded. Test your script on a simple page first. This prevents crashes on your main site.
Clearing Cache And Refreshing
Clear your browser cache to remove old files. Use Ctrl + Shift + R to reload without cache. Also, clear any caching plugins on WordPress. Cached scripts may block new changes. Refresh your page after clearing cache. This shows the latest script version.

Credit: developers.elementor.com
Frequently Asked Questions
How Do I Add Javascript In Elementor Easily?
You can add JavaScript in Elementor using the HTML widget. Simply drag it to your page and paste your script inside. This method is quick and doesn’t require extra plugins, perfect for small scripts or tracking codes.
Can I Add Javascript To Specific Elementor Pages?
Yes, you can add JavaScript to specific Elementor pages using the HTML widget or page-specific custom code plugins. This ensures your scripts run only where needed, improving site performance and organization.
Is Adding Javascript In Elementor Safe For Beginners?
Adding JavaScript via Elementor’s HTML widget is safe if you use trusted scripts. Avoid harmful or complex codes. Always test on a staging site to prevent errors or conflicts with other plugins or themes.
Which Plugins Help Add Javascript In Elementor?
Popular plugins like “Header Footer Code Manager” or “Insert Headers and Footers” let you add JavaScript easily. They provide user-friendly interfaces to insert scripts site-wide or on specific pages without editing theme files.
Conclusion
Adding JavaScript to WordPress Elementor can improve your site’s features. You just need to follow simple steps carefully. Use Elementor’s custom HTML or code widget to insert your script. Test your site to make sure everything works well. Keep your code clean and organized for easy updates.
This way, your website stays functional and user-friendly. Practice a few times to get comfortable with the process. Your site can become more interactive with little effort. Small changes can create a big difference in user experience. Keep learning and experimenting to improve your skills.


