
Are you ready to make your website live but unsure how to connect your GoDaddy domain with hosting? Adding hosting to your GoDaddy domain is a crucial step that brings your online presence to life.
Without hosting, your domain is just a name without a home. In this guide, you’ll discover simple, clear steps to link your hosting to your domain quickly and confidently. By the end, you’ll have the power to get your website up and running, attracting visitors and growing your online brand.
Let’s dive in and make your website a reality!
Choosing The Right Hosting Plan
Choosing the right hosting plan for your GoDaddy domain is important. It affects your website’s speed, security, and reliability. Picking a plan that fits your needs saves money and avoids future problems.
Shared Vs Dedicated Hosting
Shared hosting means your website shares server space with others. It costs less and suits small sites or beginners. Dedicated hosting gives you a whole server. It offers better speed and control. Ideal for large sites or businesses with high traffic.
Comparing Pricing And Features
Shared hosting usually has lower prices and basic features. Dedicated hosting costs more but includes advanced tools and resources. Look at storage, bandwidth, security, and support. Choose a plan that balances price and necessary features.
Selecting Based On Website Needs
Think about your website type and goals. A blog or small business site works well with shared hosting. Online stores or sites with many visitors need dedicated hosting. Consider future growth to avoid switching plans soon.
Accessing Your Godaddy Account
Accessing your GoDaddy account is the first step to add hosting to your domain. You need to sign in and find your domain settings. This lets you manage your domain and link it to hosting services.
Follow clear steps to log in and navigate the dashboard. This makes managing your domain simple and fast.
Logging In
Go to the GoDaddy website. Click the “Sign In” button at the top right corner. Enter your username or customer number. Then type your password carefully. Click “Sign In” again to enter your account. If you forgot your password, use the “Forgot Password” link to reset it.
Navigating To Domain Management
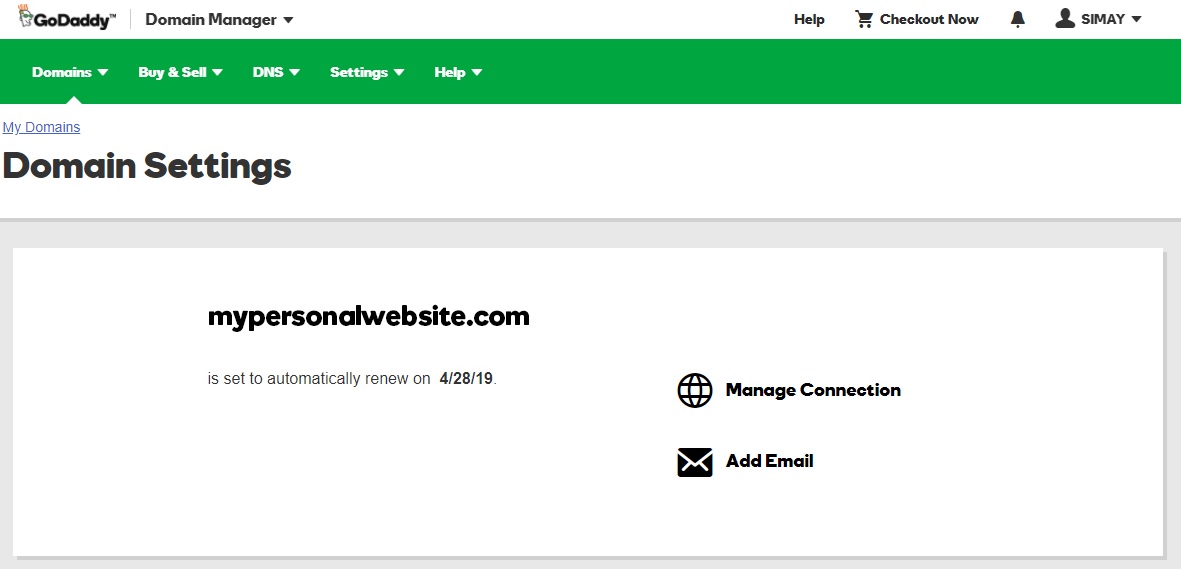
After logging in, look for the “My Products” section. This shows all your GoDaddy products including domains. Find the domain you want to add hosting to. Click on “Manage” next to your domain name. This opens the Domain Management page. Here, you can change settings and connect hosting easily.
Purchasing Hosting From Godaddy
Purchasing hosting from GoDaddy is a simple step after buying your domain. Hosting gives your website a home on the internet. It lets your site show up to visitors anytime. GoDaddy offers many hosting plans to fit different needs. You can choose based on your website size and traffic.
Follow the steps to select and buy hosting that suits your domain. This guide helps you complete the process smoothly.
Browsing Hosting Options
Start by visiting GoDaddy’s hosting page. You will see various plans like shared, VPS, and dedicated hosting. Shared hosting is good for small sites. VPS offers more control and power. Dedicated hosting suits large websites with heavy traffic.
Read the features of each plan carefully. Check storage space, bandwidth, and support options. Choose a plan that fits your website needs and budget.
Adding Hosting To Cart
After picking a plan, click the button to add it to your cart. You may be asked to link the hosting to your existing domain. Make sure your domain name appears correctly. Double-check the plan details before moving forward.
GoDaddy may offer extra services like security or backups. You can add these if you want, but they are optional.
Completing The Purchase
Review your order carefully. Confirm the hosting plan and any extra services. Enter your payment details and billing information. Submit the order to complete the purchase.
Once the payment is successful, you will get an email confirmation. Your hosting will be ready to use within minutes. You can then start building or uploading your website.
Linking Hosting To Your Domain
Linking your hosting to your GoDaddy domain is a key step to make your website live. It connects your domain name with the space where your website files are stored. This process makes your website accessible on the internet.
The steps below will guide you through the simple process of linking your hosting to your domain.
Assigning Domain To Hosting
Start by logging into your GoDaddy account. Go to your hosting dashboard. Find the option to assign a domain to your hosting plan. Select your domain name from the list. Confirm the assignment to link the domain with your hosting.
Updating Dns Settings
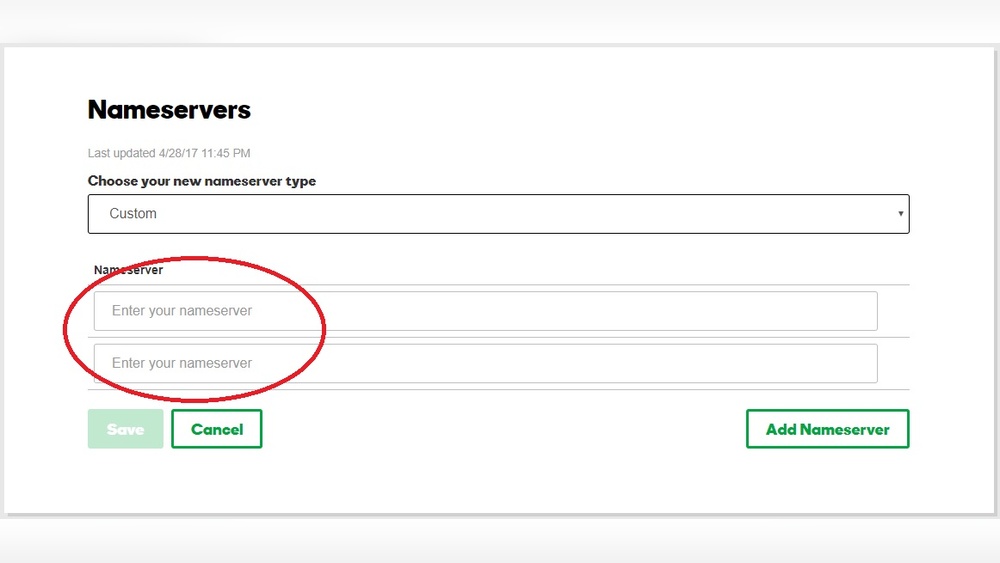
Next, update the DNS settings for your domain. Access the DNS management page on GoDaddy. Replace the current nameservers with those provided by your hosting company. Save your changes. This step directs internet traffic to your hosting server.
Verifying Domain Connection
After updating, wait a few minutes for the changes to take effect. Use online tools or GoDaddy’s interface to check your domain’s status. Confirm that your domain points to your hosting server. Once verified, your website is ready to go live.
Setting Up Your Website
Setting up your website after adding hosting to your GoDaddy domain is the next key step. This process makes your site live and ready for visitors. The setup includes installing software, uploading files, and managing email accounts. Each step is simple and important for a smooth website launch.
Installing Content Management Systems
Content Management Systems (CMS) help you build and manage your website easily. Popular CMS options include WordPress, Joomla, and Drupal. GoDaddy hosting often offers one-click installers for these systems. Just log in to your hosting account, find the control panel, and choose the CMS to install. Follow the instructions to set up your site quickly without technical skills.
Uploading Website Files
Uploading your website files puts your content online. Use GoDaddy’s File Manager or an FTP client like FileZilla. Connect to your hosting server using the details provided by GoDaddy. Then, upload your HTML, CSS, images, and other files to the root directory, usually named public_html. Check your site by entering your domain in a browser to see your pages live.
Configuring Email Accounts
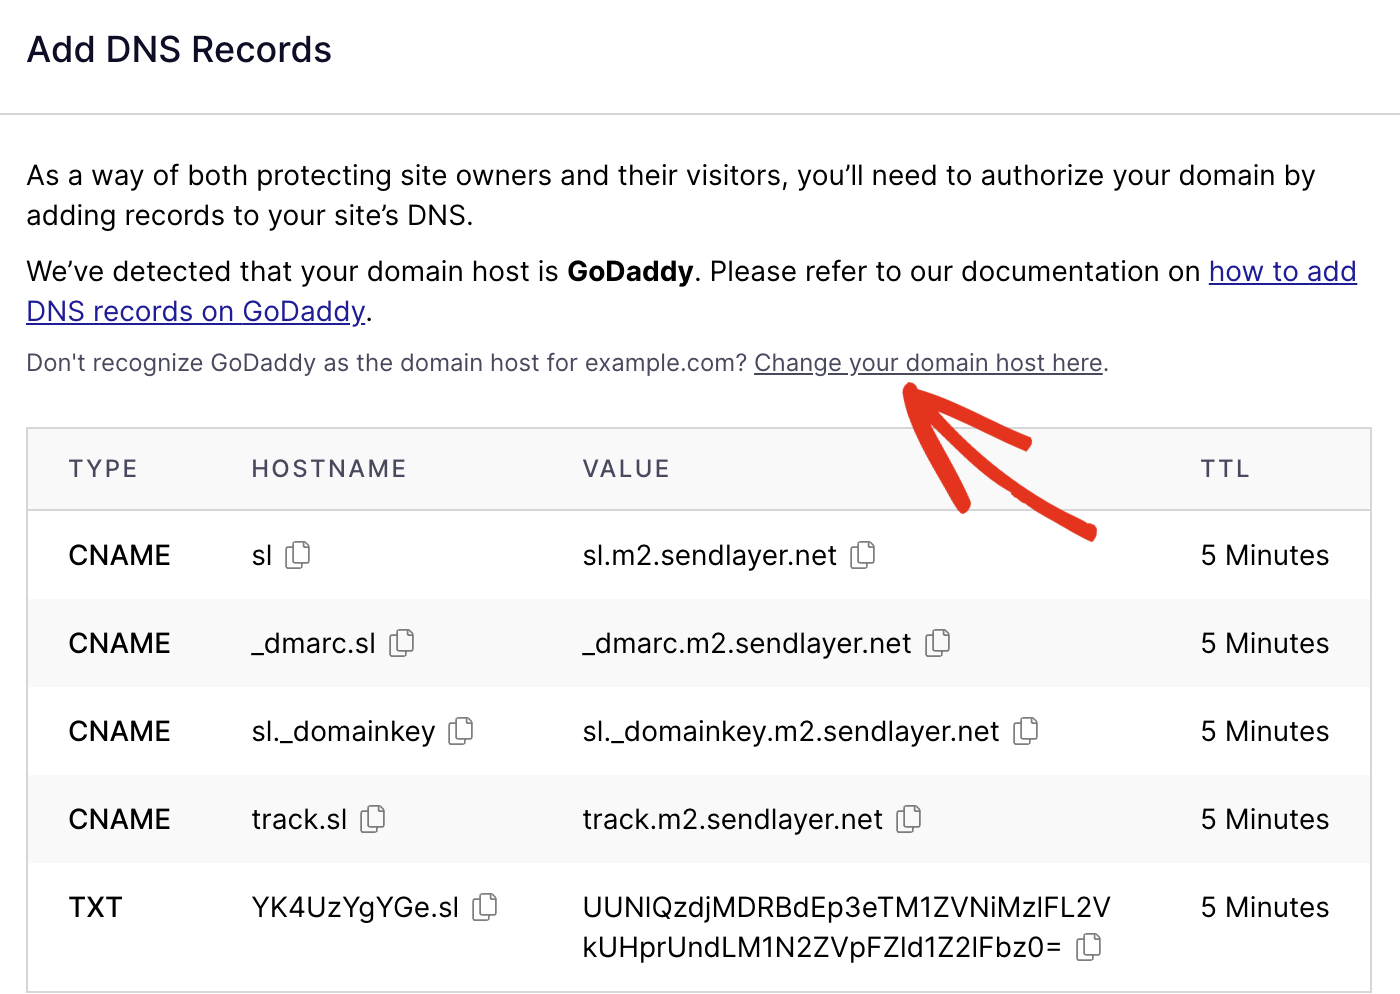
Email accounts linked to your domain improve communication with visitors and customers. GoDaddy hosting allows you to create custom email addresses. In your hosting control panel, find the email section and create new accounts. Set passwords and manage settings like forwarding and autoresponders. Access your email through webmail or email clients like Outlook for smooth communication.
Credit: sendlayer.com
Managing Hosting Settings
Managing your hosting settings is important to keep your website running smoothly. It helps you control your site’s resources and performance. You can easily make changes or check your hosting status anytime.
Understanding how to manage these settings helps you maintain a healthy website. It also saves time and prevents issues before they start.
Accessing Control Panel
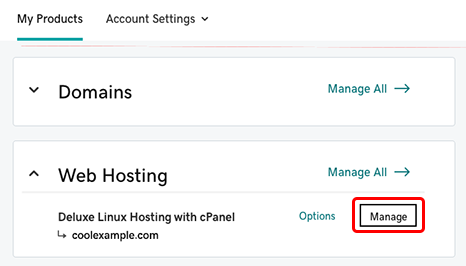
Log in to your GoDaddy account to start. Find the “My Products” section. Click on “Manage” next to your hosting plan. This opens the control panel.
The control panel lets you handle files, databases, and emails. It shows your hosting details clearly. Use it to adjust settings as needed.
Monitoring Usage And Performance
Check your bandwidth and storage regularly. The control panel displays usage statistics. Watch out for limits to avoid downtime.
Look at CPU and memory use too. High usage can slow your website. Monitor performance to keep your site fast and reliable.
Upgrading Or Changing Plans
GoDaddy offers different hosting plans. You can upgrade to get more resources. This helps your site grow without issues.
Changing plans is simple. Visit your account dashboard and select the desired plan. Confirm the change and enjoy improved service.
Troubleshooting Common Issues
Troubleshooting common issues can save time and reduce stress when adding hosting to your GoDaddy domain. Many users face simple problems that are easy to fix. Knowing these issues helps you stay calm and solve problems faster.
Most issues come from connection errors or configuration mistakes. Patience and following clear steps usually solve them. Below are common problems and ways to fix them.
Domain Not Connecting
Check if your domain’s DNS settings point to the correct hosting server. Incorrect DNS records cause connection problems. Make sure the A record or CNAME matches your hosting details.
Wait for DNS changes to spread. This can take a few hours. Clear your browser cache before trying again. Use online tools to verify DNS status.
Website Loading Errors
Errors like 404 or 500 often mean files are missing or server issues exist. Confirm your website files are uploaded to the right folder in hosting.
Check your .htaccess file for errors. Disable plugins or themes that might cause conflicts. Restart your hosting server if possible.
Contacting Godaddy Support
Support helps when problems persist or feel complex. Use live chat or phone for quicker answers. Prepare your account details and error messages before contacting.
Explain your issue clearly and step-by-step. Follow their instructions carefully. Keep notes of the solutions provided for future reference.
Credit: www.godaddy.com
Credit: www.godaddy.com
Frequently Asked Questions
How Do I Add Hosting To My Godaddy Domain?
Log in to your GoDaddy account. Select your domain, then choose “Add Hosting. ” Follow the prompts to purchase and link hosting to your domain. This process connects your website files to your domain name.
Can I Use Godaddy Hosting With Any Domain?
Yes, GoDaddy allows hosting for domains registered with them or other providers. You must update the domain’s DNS settings to point to GoDaddy’s hosting servers.
How Long Does It Take To Add Hosting To Godaddy?
Adding hosting is usually instant after purchase. DNS changes may take up to 48 hours to propagate fully worldwide.
What Hosting Plans Does Godaddy Offer For Domains?
GoDaddy offers shared, VPS, and dedicated hosting plans. Choose based on your site’s size, traffic, and technical needs.
Conclusion
Adding hosting to your GoDaddy domain is simple and fast. Follow each step carefully to avoid mistakes. You can manage your website and domain in one place. This saves time and keeps things organized. Now, your site can go live and reach visitors online.
Keep your login details safe and check settings regularly. Starting your website journey has never been easier. Take control and enjoy your online presence today.


