
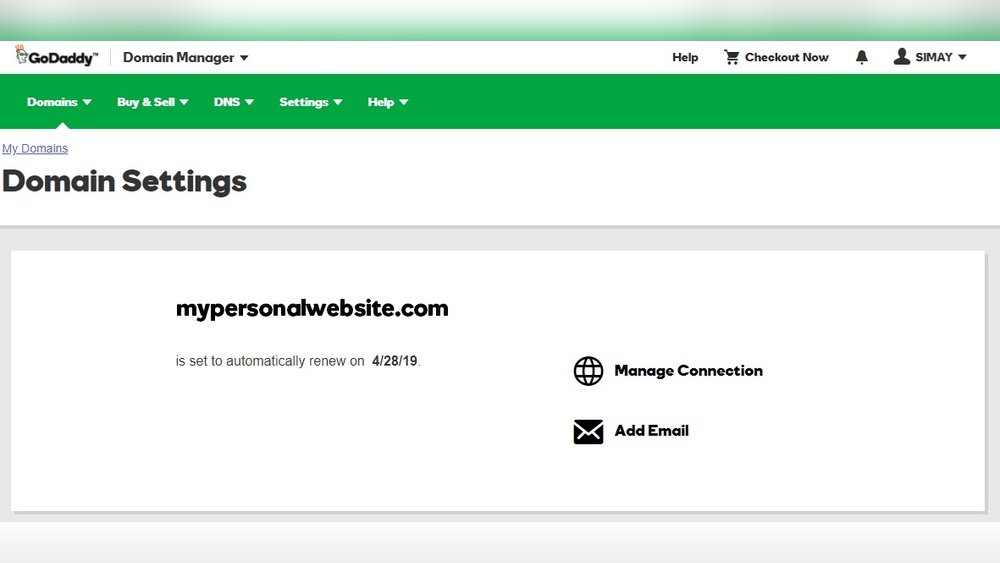
Are you ready to bring your website to life but unsure how to connect your GoDaddy domain with hosting? You’ve got your perfect domain name, but without hosting, your site won’t be visible to the world.
Don’t worry—adding hosting to your GoDaddy domain is easier than you think. In this guide, you’ll learn simple, step-by-step actions to get your website up and running quickly. Keep reading, and soon you’ll have everything set up to showcase your ideas, business, or passion online.
Choosing The Right Hosting Plan
Choosing the right hosting plan for your GoDaddy domain is important. The plan affects your website’s speed, security, and performance. It also impacts how much you pay monthly. Understanding different hosting types helps you make a smart choice. Here are the main options and key points to consider.
Shared Hosting Options
Shared hosting means many websites share one server. It is the cheapest option. Good for small websites and blogs. Limited resources can slow down your site during high traffic. Easy to manage and comes with basic tools. Ideal for beginners or sites with low traffic.
Vps And Dedicated Hosting
VPS hosting gives you a virtual private server. More power than shared hosting. You get dedicated resources like RAM and CPU. Suitable for medium-sized websites needing better speed and control. Dedicated hosting means a whole server for your site. Best for large businesses or high-traffic sites. More expensive but offers maximum performance and security.
Factors To Consider
Think about your website’s size and traffic. Choose hosting that fits your budget and needs. Check for easy control panels and good customer support. Look at uptime guarantees to keep your site online. Security features are important to protect your data. Also consider room to grow your website in the future.
Credit: www.godaddy.com
Accessing Your Godaddy Account
Accessing your GoDaddy account is the first step to adding hosting to your domain. It allows you to manage your services in one place. Understanding how to log in and find your dashboard is crucial for a smooth setup process.
Logging In
Go to the GoDaddy website. Click the “Sign In” button at the top right corner. Enter your username or customer number and password. Press the “Sign In” button to access your account. If you forget your password, use the “Forgot Password” link to reset it. Keep your login details safe for future use.
Navigating The Dashboard
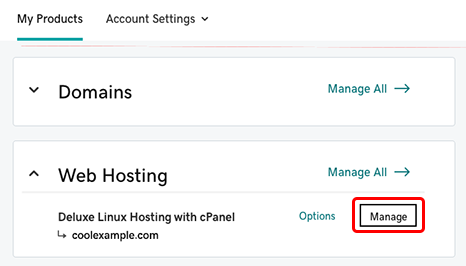
After logging in, you will see your account dashboard. It shows all your products and services. Find the “My Products” section to view your domains and hosting. Use the search bar if you have many items. The dashboard helps you manage domains, hosting, and billing easily.
Purchasing Hosting On Godaddy
Purchasing hosting on GoDaddy is a simple process that connects your domain to a web server. This step is essential to make your website live. Hosting stores your website files and delivers them to visitors online.
GoDaddy offers various hosting plans to fit different needs. Choose the right one based on your website size and traffic. The next steps guide you through selecting a hosting package and completing the purchase.
Selecting A Hosting Package
Start by visiting GoDaddy’s hosting section. You will see several hosting options like shared, VPS, and dedicated hosting. Shared hosting is best for small websites and beginners. VPS and dedicated hosting suit larger sites with more traffic.
Look at the features each package offers. Check storage space, bandwidth, and email accounts. Choose the plan that matches your website requirements. Keep your budget in mind while comparing options.
Completing The Purchase
After selecting a package, click “Add to Cart.” Review your order summary carefully. You may see additional services such as backups or security. Decide if you want to include these extras.
Next, create or log into your GoDaddy account. Enter your payment details and billing information. Confirm everything is correct before submitting the order. Once payment is complete, your hosting is active and ready to use.
Credit: www.godaddy.com
Linking Hosting To Your Domain
Linking your hosting to your GoDaddy domain is a key step to make your website live. Without this connection, visitors cannot reach your site. This process connects your domain name to the server where your website files are stored. Follow the steps below to link your hosting successfully.
Updating Dns Settings
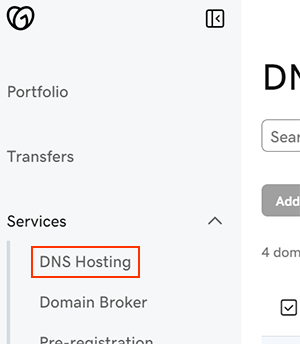
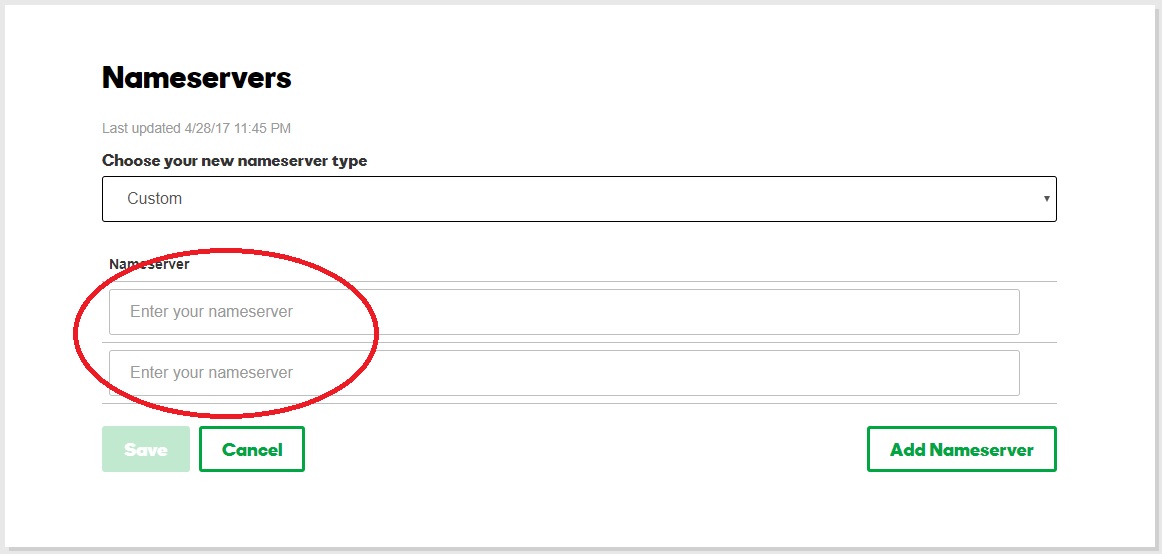
Start by logging into your GoDaddy account. Go to the Domain Manager section and select your domain. Find the DNS settings or Manage DNS option. Here, update the nameservers to point to your hosting provider. Your hosting provider gives you these nameserver details. Enter the new nameservers carefully. Save the changes. DNS updates can take some time to spread across the internet. Be patient while the changes take effect.
Assigning The Domain To Hosting
Next, log into your hosting control panel. Look for the option to add a domain or assign a domain. Enter your GoDaddy domain name here. Confirm the domain points to your hosting account. This step links your files to your domain name. It allows the web server to serve your website correctly. Check your website by typing your domain into a browser. Your site should now load from your hosting server.
Setting Up Your Website
Setting up your website is the key step after linking hosting to your GoDaddy domain. This process makes your site live and ready for visitors. It involves installing software or uploading files that create the pages users see. The steps are simple and clear, even for beginners.
Choose between using a content management system (CMS) or uploading your own website files. Both methods lead to a fully functional website. Each option fits different needs and skills. Understanding these helps you build your site quickly.
Installing Cms Or Website Builder
Using a CMS or website builder simplifies website creation. GoDaddy often offers one-click installs for popular CMS like WordPress. This tool lets you add pages, images, and text without coding. Follow the GoDaddy dashboard instructions to start the install. After installation, log into your CMS to design and manage your site.
Website builders come with templates and drag-and-drop features. They save time and reduce technical work. Choose a template that matches your site’s purpose. Customize colors, fonts, and layouts easily. This option fits users who want a fast, visual way to build.
Uploading Website Files
Uploading files is another way to set up your website. This method fits users with custom sites or static pages. Use an FTP client or GoDaddy’s File Manager to upload files. Place all files in the public_html or www folder. This folder hosts files that visitors access online.
Ensure your homepage file is named index.html or index.php. This file loads first when visitors open your site. Double-check file paths and links to avoid errors. After uploading, visit your domain to see the website live.
Credit: www.godaddy.com
Testing And Managing Your Hosting
After adding hosting to your GoDaddy domain, it is important to test and manage your hosting properly. This ensures your website runs smoothly and visitors can access it without issues. Regular checks help catch problems early and keep your site reliable.
Managing your hosting features allows you to control important settings. This helps improve your website’s performance and security. Staying on top of these tasks saves time and avoids bigger problems later.
Verifying Website Connectivity
Check if your website loads correctly after linking hosting. Open a web browser and enter your domain name. The website should appear without errors. If you see a loading error or a blank page, check your hosting setup again.
Use online tools to verify your website is reachable worldwide. These tools test your site from different locations. They help ensure your hosting is working well everywhere.
Test your website on different devices like phones and tablets. This confirms your site looks good and works well on all screens. Fix any layout or speed issues you find.
Managing Hosting Features
Log in to your GoDaddy account to access hosting controls. You can manage files, databases, and email settings from here. Keep your software updated to avoid security risks.
Set up backups regularly. This protects your site data in case of accidents. Backups make it easy to restore your website quickly.
Monitor your website’s performance using built-in tools. These show site speed and visitor stats. Use this info to improve your site’s experience for visitors.
Frequently Asked Questions
How Do I Link Hosting To My Godaddy Domain?
To link hosting, log into your GoDaddy account and go to your domain settings. Select “Manage DNS” and update the A record or nameservers to point to your hosting provider’s server. Save changes and allow propagation time.
Can I Add Hosting After Buying A Godaddy Domain?
Yes, you can add hosting anytime. Simply purchase a hosting plan from GoDaddy or another provider. Then connect it to your domain by updating DNS settings in your GoDaddy account.
What Hosting Types Work With Godaddy Domains?
GoDaddy domains support various hosting types including shared, VPS, and dedicated hosting. You can also use third-party hosting services by updating domain DNS records accordingly.
How Long Does Dns Update Take After Adding Hosting?
DNS updates typically take 24 to 48 hours to fully propagate worldwide. Sometimes it can be faster, but allow up to two days for changes to reflect properly.
Conclusion
Adding hosting to your GoDaddy domain is simple and quick. Follow each step carefully to avoid mistakes. Check your domain settings before starting. Choose the right hosting plan for your needs. Keep your login details safe and ready. Contact GoDaddy support if you face issues.
Your website will be online and ready soon. Start building your site with confidence today. Small efforts lead to big results. Stay patient and learn as you go.


