
Are you looking to make your WordPress site easier to navigate? Adding a header menu is one of the best ways to guide your visitors right where you want them to go.
But if you’ve never done it before, it might feel tricky. Don’t worry—this guide will show you exactly how to add a header menu step-by-step. By the end, you’ll have a clean, professional menu that helps your site stand out and keeps your visitors coming back.
Ready to improve your site’s navigation and boost user experience? Let’s dive in!
Credit: www.sangfroidwebdesign.com
Choose A Suitable Theme
Choosing the right theme is the first step to add a header menu in WordPress. The theme controls how your website looks and works. A good theme supports header menus easily. This saves time and effort in setting up your site.
Many themes come with built-in header menu options. Some themes allow you to customize the menu’s style and placement. Picking a theme with these features makes your site user-friendly and neat.
Explore Themes With Header Menu Support
Start by searching themes that mention header menu support. WordPress has many free and paid themes to choose from. Check theme descriptions or demos to see menu options clearly.
Focus on themes that show a clear and easy-to-navigate header menu. Themes made for blogs, business, or portfolios often include this feature. This helps visitors find pages fast.
Install And Activate Your Theme
After choosing a theme, install it on your WordPress site. Go to the dashboard, then Appearance > Themes > Add New. Upload the theme file or search for it in the WordPress directory.
Click “Install” and then “Activate” to apply the theme. Your site will now use the new design. The header menu should be ready for customization in the next steps.
Create Your Menu
Creating a menu in WordPress is simple and quick. You can build a clear and easy-to-use header menu for your visitors. Menus help users find pages and important links fast. Follow these steps to create your menu and organize it the way you want.
Navigate To Menu Settings
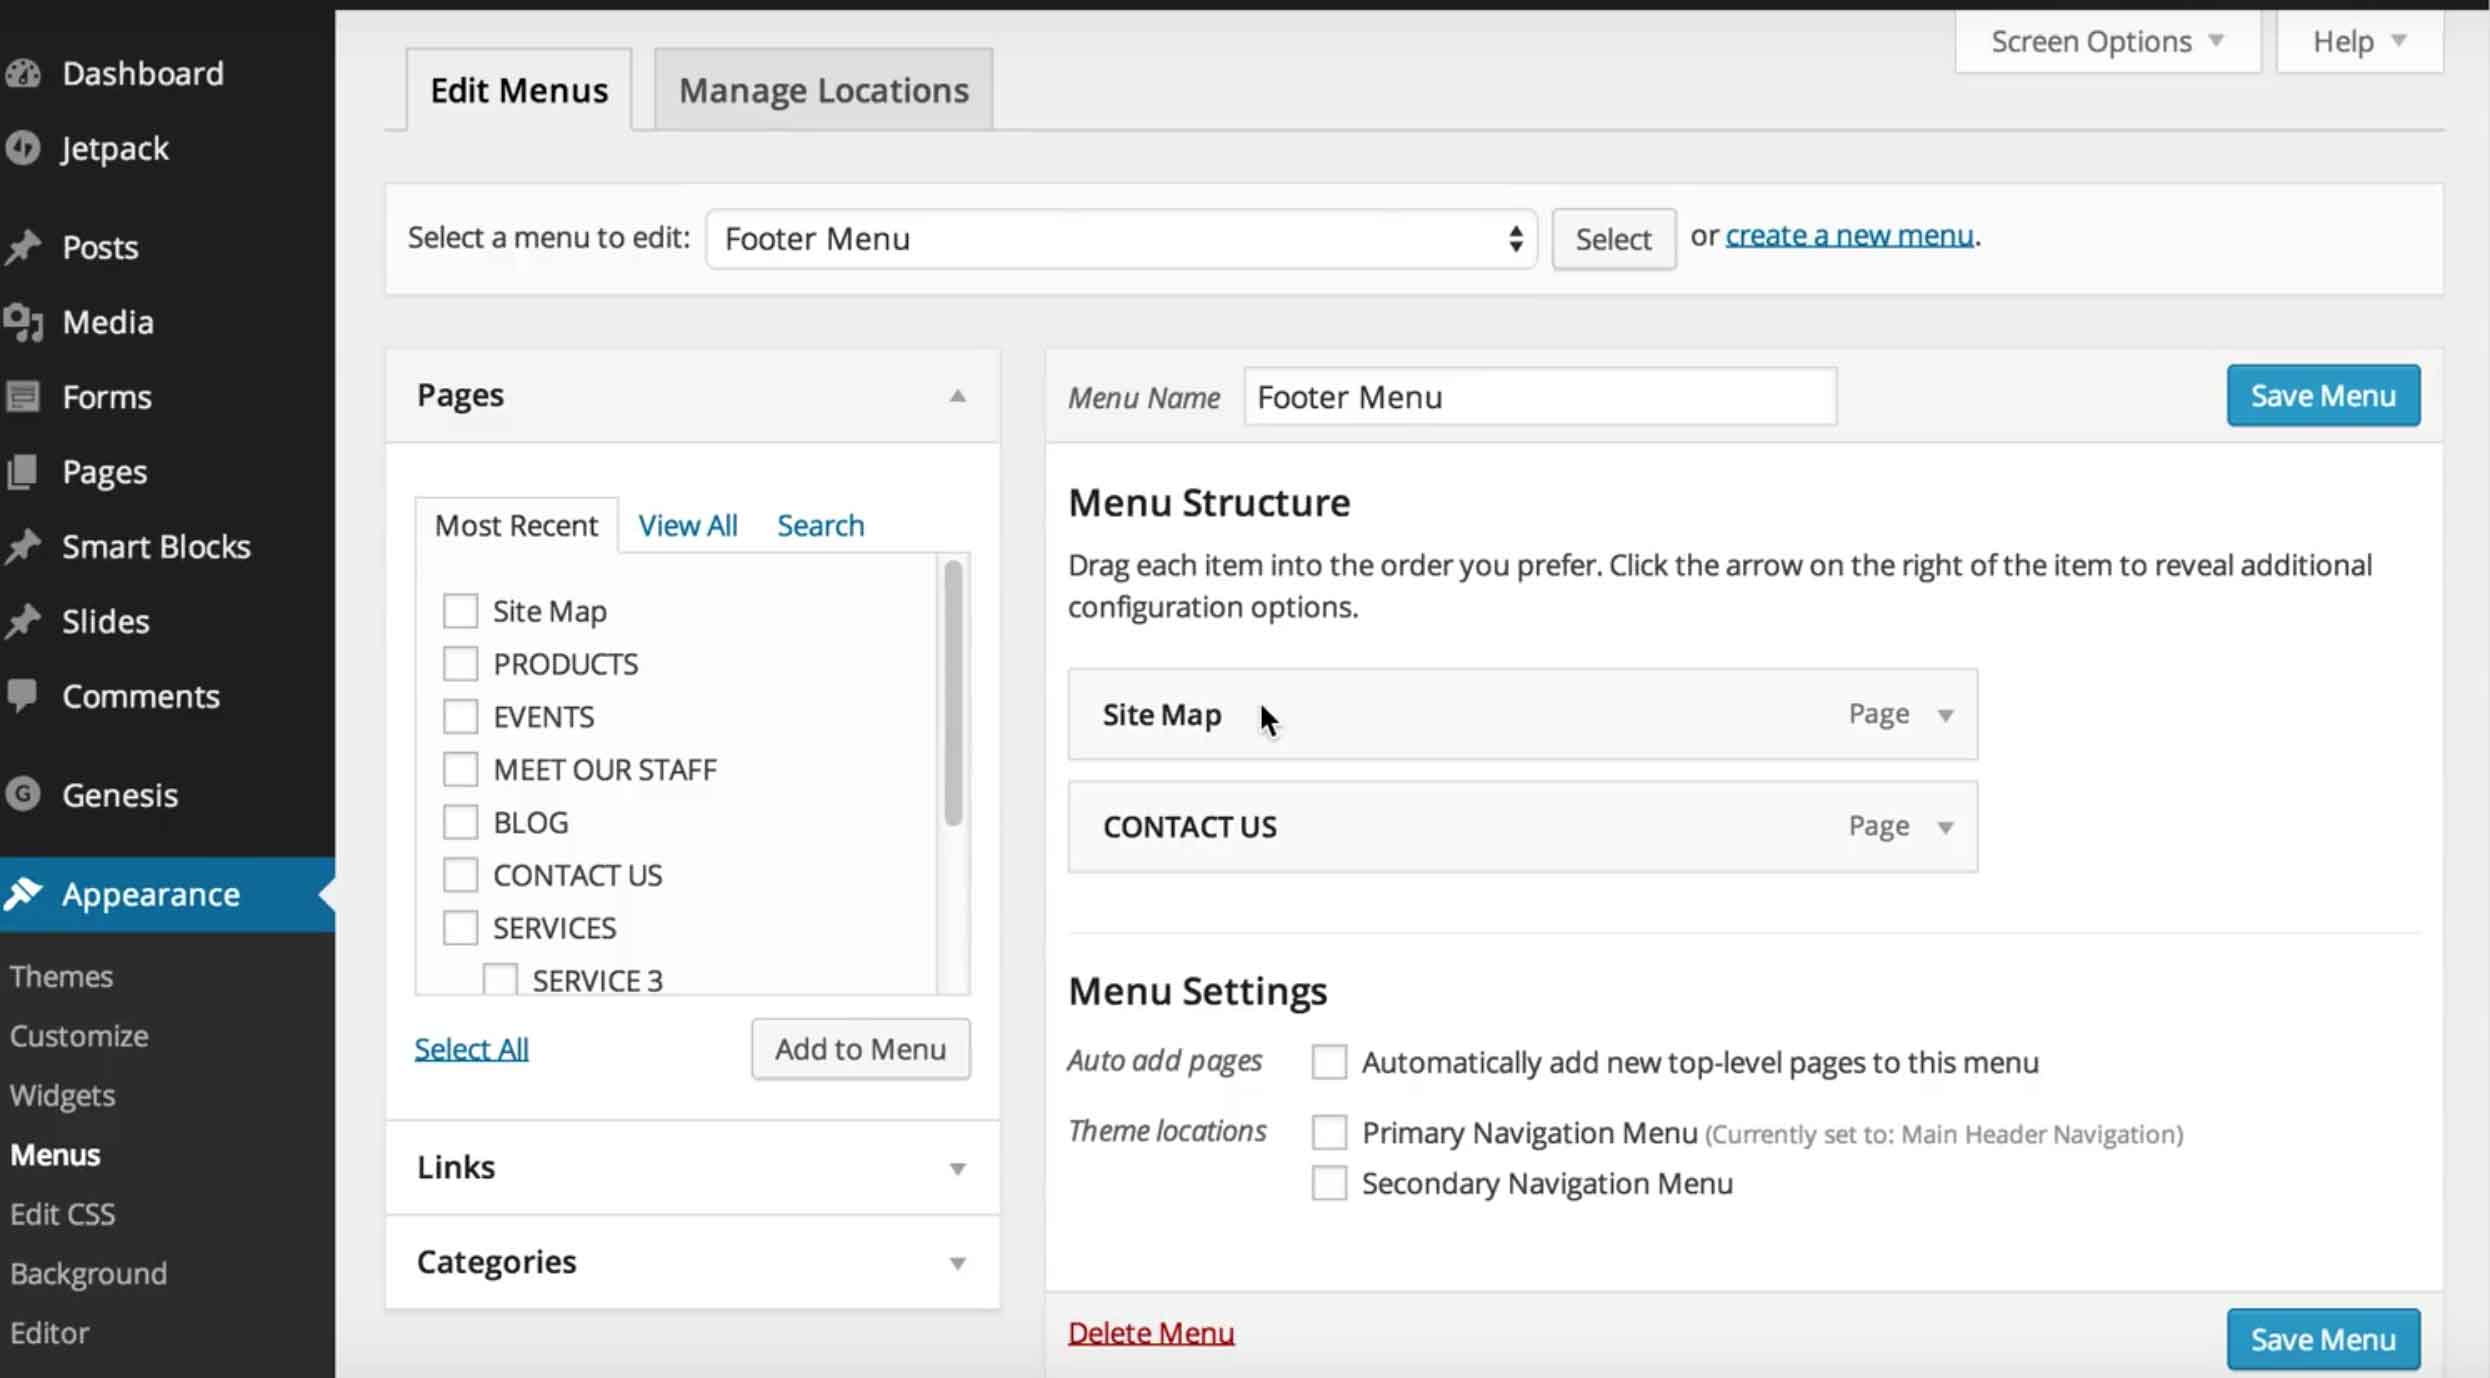
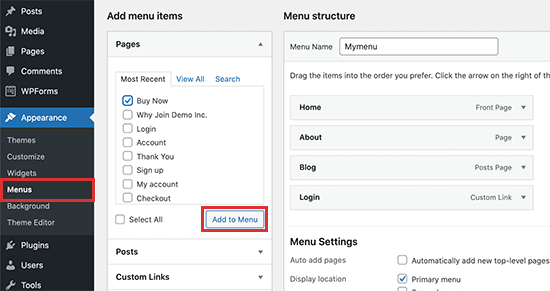
First, log in to your WordPress dashboard. On the left side, find and click on “Appearance.” Then, choose “Menus.” This takes you to the menu settings page. Here, you can start creating a new menu or edit an existing one. Give your menu a name to keep things organized.
Add Pages And Links
Next, add the pages you want in your menu. On the left, you see a list of your pages, posts, and custom links. Check the boxes for the pages you want to include. Click “Add to Menu” to add them to the menu structure. You can also add custom links like social media or external websites.
Organize Menu Items
Drag and drop menu items to arrange them in your preferred order. You can create sub-menus by moving items slightly to the right under a main item. This makes your menu clean and easy to follow. When done, choose the display location, usually “Header Menu,” and click “Save Menu.”
Assign Menu To Header
Assigning your menu to the header is a key step in building your WordPress site. It places your navigation in a visible spot. Visitors can easily find links to important pages. This improves site usability and visitor experience.
The process involves choosing the menu location in your theme settings. Then, you set your created menu as the primary header menu. These steps are simple and quick. Follow along to get your menu showing in the header.
Locate Header Menu Location
Start by logging into your WordPress dashboard. Go to Appearance and select Menus. Here, find the Manage Locations tab. This shows all menu spots your theme supports. Look for the option named Header or Primary Menu.
Note the exact name of this menu location. It is where your header menu will appear. This step is necessary to assign your menu correctly.
Set Your Menu As Primary
On the same Manage Locations page, find the dropdown next to the header menu location. Select the menu you want to use from the list. This is the menu you created earlier.
Click Save Changes to confirm. Your selected menu is now set as the primary header menu. Visit your site to see the menu in the header area. This gives your visitors easy navigation access.

Credit: learn.wordpress.org
Customize Menu Appearance
Customizing the header menu’s look helps match your website’s style. It improves user experience and keeps visitors interested. WordPress offers easy tools and options to change colors, fonts, and layout. Simple changes can make your menu stand out.
Use Theme Customizer
The Theme Customizer lets you change your menu’s appearance without coding. Access it from your WordPress dashboard under Appearance > Customize. Here, you can adjust colors, fonts, and sizes for your menu items. Many themes also allow you to change the menu layout. Preview your changes live before saving them. This tool is user-friendly and perfect for beginners.
Add Css For Advanced Styling
Adding custom CSS lets you style your menu beyond basic options. Use CSS to change spacing, add hover effects, or adjust the menu’s position. You can add CSS in the Customizer under Additional CSS or in a child theme. Make sure to test your changes on different devices. This method gives you full control over your menu’s design.
Add Menu With Plugins
Adding a header menu with plugins in WordPress makes the process simple and flexible. Plugins offer extra features that default menus might not have. You can customize your menu style, layout, and behavior easily.
Many menu plugins let you create responsive menus that look good on all devices. You do not need coding skills to use these tools. Just install, configure, and publish your menu.
Install Menu Plugins
Start by going to your WordPress dashboard. Click on “Plugins” and then “Add New.”
Type “menu” in the search box. Find a plugin that suits your needs. Popular choices include “Max Mega Menu” and “WP Mega Menu.”
Click “Install Now” on the plugin you want. After installation, click “Activate.” The plugin is now ready to use.
Configure Plugin Settings
Open the plugin’s settings from the WordPress menu. Each plugin has different options to explore.
Choose where to place your menu in the header. Set colors, fonts, and menu animations if available.
Create new menu items or import existing WordPress menus. Save changes and check how the menu looks on your site.
Adjust settings until the menu fits your website style perfectly.
Troubleshoot Common Issues
Troubleshooting common issues with your WordPress header menu helps keep your site user-friendly. Simple problems can stop your menu from working. Fixing these quickly improves site navigation and visitor experience.
Menu Not Showing
Sometimes, the header menu does not appear on the site. Check if you assigned the menu to the correct location in the WordPress dashboard. Go to Appearance > Menus > Manage Locations and confirm the menu is set as the header menu.
Clear your browser cache to see recent changes. Disable plugins that might conflict with your menu. Some themes require you to enable menus in their settings. Review your theme’s documentation for extra steps.
Responsive Menu Problems
The menu might not work well on mobile devices. Test your site on different screen sizes. If the menu is hard to use or disappears on small screens, your theme’s responsive settings may need adjustment.
Try switching to a default theme like Twenty Twenty-Three to check if the problem persists. Update your theme and plugins to the latest versions. Use a plugin designed for responsive menus if your theme lacks this feature.
Credit: www.wpbeginner.com
Frequently Asked Questions
How Do I Create A Header Menu In WordPress?
To create a header menu, go to WordPress Dashboard > Appearance > Menus. Click “Create New Menu,” name it, then add pages or links. Finally, assign it to the “Header” location and save.
Can I Customize My WordPress Header Menu Style?
Yes, you can customize the menu style using your theme’s options or custom CSS. Some themes offer built-in styling settings for fonts, colors, and layout.
Why Is My WordPress Header Menu Not Showing?
If your header menu isn’t showing, check if it’s assigned to the correct menu location. Also, clear cache and ensure your theme supports header menus.
How To Add Dropdowns In A WordPress Header Menu?
To add dropdowns, drag a menu item slightly to the right under a parent item in Appearance > Menus. This creates a nested submenu or dropdown.
Conclusion
Adding a header menu in WordPress is simple and useful. It helps visitors find pages quickly. You can organize links to show your site’s main parts. Just follow the steps clearly and take your time. Editing menus lets you change items anytime.
This keeps your site fresh and easy to use. Try it now and see the difference. Your website will look neat and work better for users. Enjoy creating menus that fit your style and needs.


