
Have you ever felt overwhelmed trying to add a header menu to your WordPress theme? You’re not alone.
Many WordPress users face this challenge, but the good news is that it’s easier than you think. A well-structured header menu is crucial for enhancing user experience and navigating your website seamlessly. Imagine your visitors effortlessly finding what they need, leading to longer visits and potentially more conversions.
In this guide, we’re going to break down the process step-by-step, ensuring you can confidently customize your website’s header menu. Stick with us, and you’ll discover that adding a header menu is not just a task—it’s an opportunity to elevate your site’s functionality and appeal. Ready to transform your website? Let’s dive in.
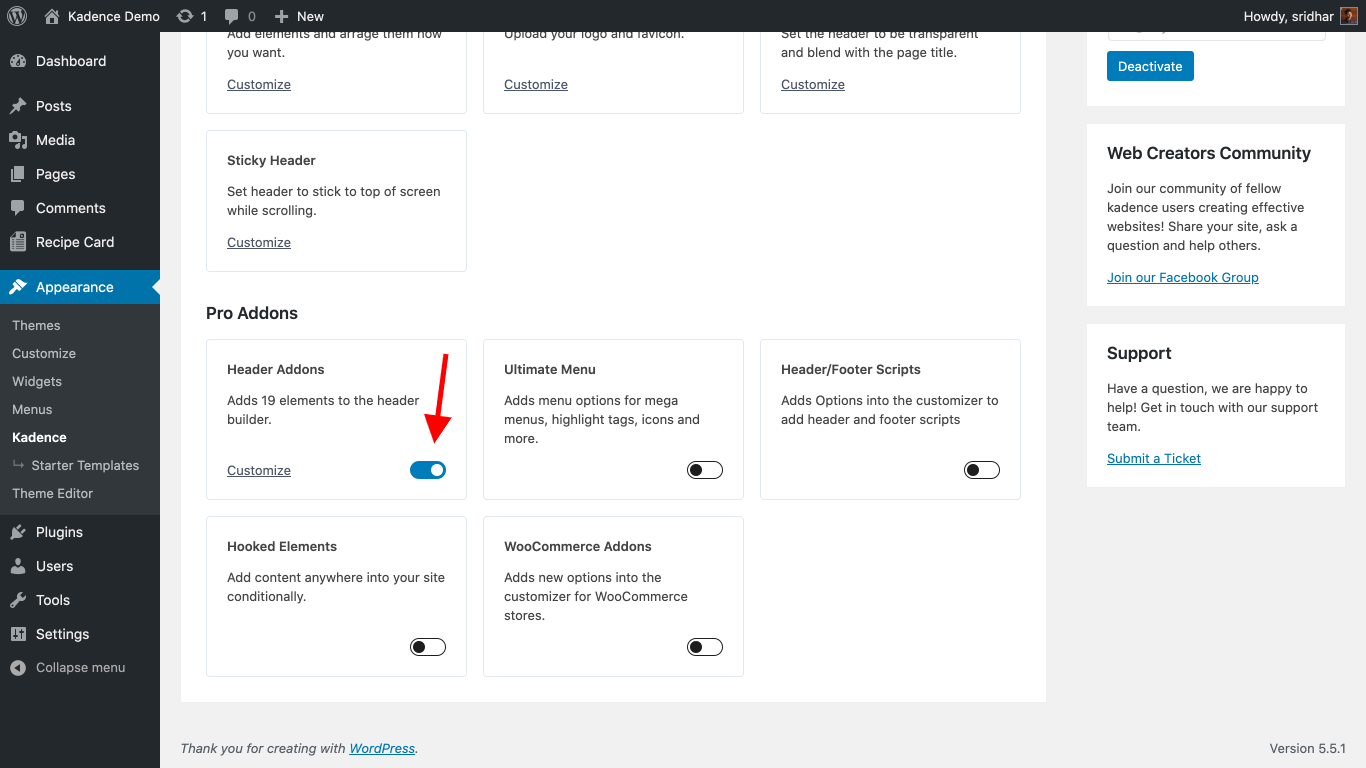
Credit: www.kadencewp.com
Choosing The Right Theme
Selecting the right theme is key to easily adding a header menu in WordPress. A well-chosen theme simplifies customization, enhancing navigation and user experience on your site.
Check Theme Compatibility
Ensure the theme supports header menus. Some themes may lack this feature. Visit the theme’s documentation. Look for any notes on menu compatibility. This saves time later. It’s easier to choose wisely now. Confirm the theme works with your WordPress version. Check recent updates for compatibility. Outdated themes can cause issues. Read user reviews about menu use. This helps gauge functionality. Compatible themes ensure smooth menu setup.
Understand Theme Options
Explore the theme settings. Check if you can customize the menu. Some themes offer flexible menu options. Others may be limited. Look for options to add links and pages. Customization helps create a unique site. Experiment with different settings. See how changes affect the header menu. Use the theme demo for practice. Try adding a menu in the demo. This helps understand the process. A theme with many options allows creativity.
Accessing The WordPress Dashboard
Enter your username and password. Click the login button. Wait for the dashboard to appear. You have now accessed your site.
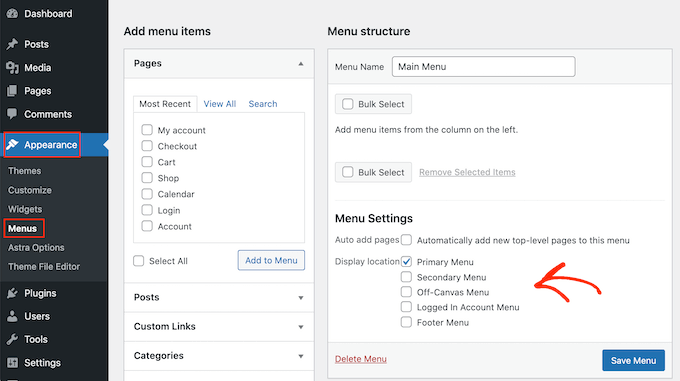
Find the Appearance option on the left menu. Click Appearance. Choose Menus. This is where you set your header menu. You can add or remove items. Drag items to rearrange them. Click Save Menu to apply changes. Your header menu will update.
Creating A Custom Menu
First, go to the WordPress dashboard. Find the Appearance option. Click on it. Then, select Menus. You will see a button that says Create a new menu. Click on this button. Give your menu a name. Make it easy to remember. After naming, click the Create Menu button. Now, you have a new menu.
Look for the Pages section. You can add pages to your menu here. Tick the box next to each page you want. After selecting, click Add to Menu. Your pages will appear in the menu structure. You can drag and drop them. This changes their order. Once done, click Save Menu. Your menu is ready.
Adding The Menu To Header
First, go to the WordPress dashboard. Look for the Appearance option on the left. Click on it. Find the Menus option. Click it to open the menu settings.
Once there, you will see menu settings. Find the location to place the menu. Choose Header from the list. This will add the menu to the top of your site.
After selecting the header location, look for the Save Menu button. Click it to save your changes. Check your website to see the new header menu. Make sure everything looks good.
If you like what you see, your changes are ready. The header menu is now live. Visitors will see it when they visit your site.
Customizing The Header Menu
The header menu is the website’s navigation. Change its style to match the theme. Choose colors that fit the design. Use fonts that are clear and easy to read. Size of text matters too; make it big enough to see. The menu should be simple. Users should find links easily. Consistency is key.
Custom links make your menu unique. They can direct users to specific pages. Use relevant titles for links. Keep them short and clear. Add links that users need often. Think of contact pages or services. Always check links. Broken links annoy users. Functionality matters most.
Credit: www.wpbeginner.com
Testing The Header Menu
View Menu on Live Site is important to check if the header is right. Open your site. Look at the top. Make sure the menu shows correctly. Check all links. They should work and lead to the right pages.
Ensure Mobile Responsiveness is necessary for users on phones. Use a small screen to test. The menu should fit well. It must be easy to tap and scroll. Check every page. Users should not have problems finding things.
Troubleshooting Common Issues
Easily add a header menu to your WordPress theme by accessing the Appearance section in your dashboard. Navigate to Menus, select a menu, and assign it to the header location. Save changes to see the menu in action.
Resolve Display Problems
Menus sometimes don’t show up. Ensure the menu is active. Visit the menu settings. Check if the menu is assigned to a location. Clear your browser cache. This helps refresh the page view. Use a different browser to test the menu.
Plugins can also cause display problems. Deactivate plugins one by one. Check if the menu appears. Reactivate them after testing. Themes can affect menu display. Switch themes to see changes.
Fix Menu Alignment
Menu alignment is important. Misalignment makes a site look bad. Check the theme’s settings for alignment options. Some themes have built-in tools. Use them to align your menu.
CSS can help align menus. Go to the custom CSS area. Add CSS code to adjust the menu.
Sometimes, padding or margin settings cause issues. Adjust these settings to fix alignment. Use a developer tool to inspect the menu. Find and fix alignment errors.

Credit: learn.wordpress.org
Frequently Asked Questions
How Do I Customize My WordPress Header Menu?
To customize your WordPress header menu, navigate to the Appearance section. Click on Menus and select the menu you want to edit. You can add, remove, or reorder items. Save changes to update your header menu with your desired layout and links.
Can I Add A Dropdown Menu In WordPress?
Yes, you can easily add a dropdown menu in WordPress. Go to Appearance > Menus. Create a parent menu item, then add sub-items under it. Drag sub-items slightly to the right to create a dropdown effect. Save your changes to see the dropdown in action.
How Do I Change Menu Order In WordPress?
To change menu order in WordPress, go to Appearance > Menus. Drag and drop menu items to your preferred positions. Ensure you save the changes to update the menu order on your site. This lets you control the navigation flow effectively.
Why Is My WordPress Menu Not Appearing?
Your WordPress menu might not appear due to incorrect theme settings. Check if the menu is assigned to the correct location. Go to Appearance > Menus and ensure the menu is linked to the header location. Save changes to make your menu visible.
Conclusion
Adding a header menu in WordPress is simple. Follow the steps shared above. Customize your menu to fit your site’s needs. This enhances navigation and improves user experience. Remember to save changes after editing. Check your website to see the updates.
A well-structured menu guides visitors easily. Regular updates keep your menu fresh. This ensures visitors find information quickly. Keep practicing to get more comfortable with WordPress. Happy designing, and enjoy your improved website!


