

Want to make your WordPress site look professional and stand out? Adding a custom header with Elementor is the perfect way to do that.
But if you’re unsure where to start or worried it might be complicated, you’re in the right place. This guide will walk you through each step clearly and simply, so you can create a header that grabs attention and keeps visitors engaged.
Ready to give your website the upgrade it deserves? Let’s dive in!
Why Add A Custom Header
Adding a custom header in WordPress Elementor changes how your website looks and works. A header is the first thing visitors see. It shows your brand and helps visitors find important parts of your site quickly. Custom headers make your site unique and easier to use. They fit your style and needs perfectly.
Benefits Of Custom Headers
Custom headers give your site a clear identity. They show your logo and menu in the best way. You can control colors, fonts, and layout to match your brand. This makes your site look professional and trustworthy. A well-designed header can also help with SEO. Search engines notice good site structure and clear navigation.
Impact On User Experience
A good header guides visitors smoothly through your site. It helps them find pages or information fast. Clear menus and buttons reduce confusion and frustration. Visitors stay longer and explore more. Custom headers improve mobile usability too. Responsive headers adapt to different screen sizes easily. This keeps users happy and coming back.
Preparing Elementor For Header Design
Preparing Elementor for header design is the first step in creating a custom website header. It sets the stage for a smooth design process. Proper preparation helps avoid errors and saves time. This guide shows how to get Elementor ready for building headers.
Installing Elementor And Elementor Pro
Start by installing the free Elementor plugin from the WordPress plugin directory. This plugin offers basic page-building tools. To design headers, install Elementor Pro. It unlocks the Theme Builder feature needed for headers. Upload the Elementor Pro plugin and activate it. Ensure both plugins are active for full functionality.
Setting Up A Header Template
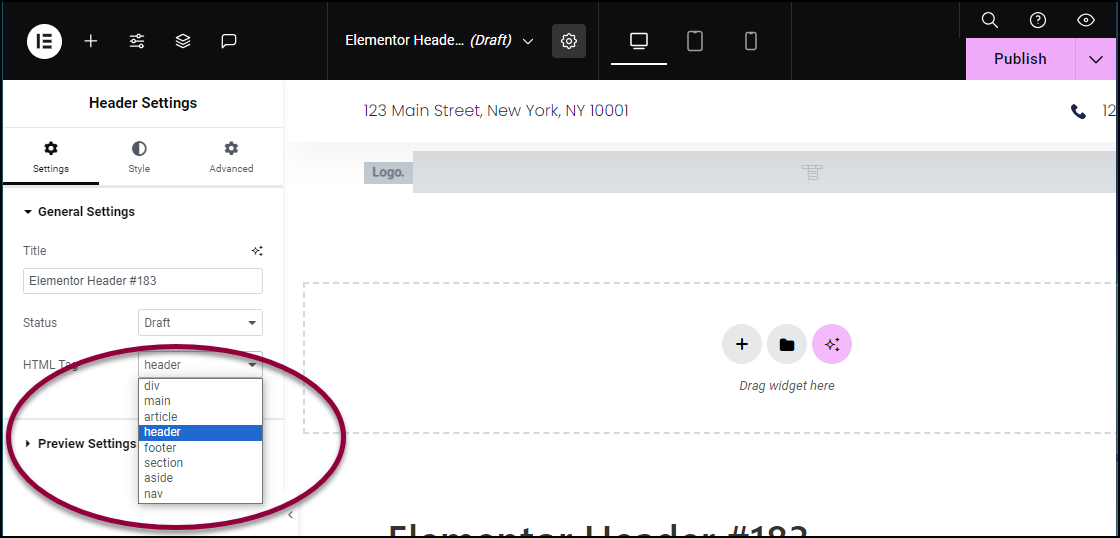
Open the WordPress dashboard and go to Templates. Click on Theme Builder, then select Header. Click Add New to create a header template. Choose a name for your header template. Elementor will open the editor where you can design the header. Save your template and assign display conditions to show the header site-wide or on specific pages.
Creating Your Header Layout
Creating your header layout in Elementor shapes your website’s first impression. A clear, simple header helps visitors find what they need fast. It also sets the tone for your brand.
Focus on structure and key elements. These parts build a strong header that looks good and works well on all devices.
Choosing Header Structure
Start with the basic layout. Decide if your header will be centered, left-aligned, or split. Think about how much space each part needs.
Use Elementor’s drag-and-drop tools. Create sections and columns to organize your header neatly. Keep it balanced and easy to scan.
Keep mobile users in mind. Your header should look good on phones and tablets. Adjust column widths and spacing for smaller screens.
Adding Key Elements
Include your logo first. Place it where visitors expect it, usually on the left. The logo links back to your homepage.
Add a navigation menu next. Make it simple with clear labels. Use Elementor’s menu widget to customize style and layout.
Consider adding a call-to-action button. This guides visitors to important pages or actions. Use bright colors to make it stand out.
Don’t forget contact info or social icons. These help visitors connect with you quickly. Place them in a visible spot but keep the header clean.
Customizing Header Style
Customizing the header style is key to creating a unique website. The header is the first thing visitors see. It needs to look clean and match your site’s theme. Elementor offers easy tools to adjust your header’s appearance. You can change fonts, colors, spacing, and alignment. These small changes improve user experience and make your site stand out.
Typography And Colors
Choose fonts that are easy to read. Use simple, clear typefaces for your header text. Adjust font size to fit your design. Bigger fonts work well for main titles. Use bold or italic styles to highlight important words.
Pick colors that match your brand. Use contrasting colors for text and background. This helps the text stand out. Stick to two or three colors for a clean look. Avoid bright or clashing colors that distract users.
Spacing And Alignment
Spacing creates balance in your header. Add padding around text to prevent crowding. Space elements evenly to keep the layout neat. Proper spacing improves readability and appeal.
Align header items to create harmony. Left alignment is common and easy to follow. Center alignment works well for minimal designs. Right alignment can highlight special elements. Choose alignment based on your site’s style and goals.
Making The Header Responsive
Making the header responsive is key for a good website. It ensures your header looks great on all devices. A responsive header adapts to screen sizes like phones and tablets.
This makes your site easy to use and keeps visitors happy. Elementor has tools to help you create a flexible header. You can change settings for different devices in just a few steps.
Adjusting For Mobile And Tablets
Start by opening the header in Elementor. Switch to the mobile view mode using the responsive settings. Adjust the size of logos, menus, and text to fit smaller screens.
Use padding and margins to create space around elements. Hide items that are not important on mobile to keep the design clean. Make buttons bigger for easy tapping on touchscreens.
Testing Responsiveness
After adjusting, check your header on different devices. Use Elementor’s preview tool to see how it looks on phones and tablets. Test the header on real devices if possible.
Look for any overlapping items or hard-to-read text. Make sure navigation works well on all screen sizes. Keep testing until the header looks good everywhere.

Credit: elementor.com
Adding Advanced Features
Adding advanced features to your WordPress Elementor header can improve user experience. These features make your site more interactive and user-friendly. You can create headers that stay visible or show different content based on user actions.
Sticky Headers
Sticky headers stay at the top of the page while users scroll down. This keeps important navigation links always accessible. In Elementor, enable sticky header by selecting the header section. Then, set the motion effects to “sticky” and choose where it should stick—top, bottom, or both.
This feature helps users find menus quickly without scrolling back up. It also gives your website a modern, professional look. You can customize the sticky header’s background and size for a smooth appearance.
Dynamic Content Integration
Dynamic content changes based on user data or site conditions. Elementor allows you to add dynamic text, images, and menus in your header. Use dynamic tags to show the user’s name, latest posts, or custom fields.
This keeps your header fresh and personalized. For example, you can greet returning visitors or highlight new content automatically. Dynamic content makes your site feel alive and more engaging for visitors.
Publishing And Managing Headers
Publishing and managing headers in Elementor is simple and effective. Once you create a header, you need to publish it so visitors can see it on your site. Managing headers means assigning them to the right pages and updating them when needed. This process helps keep your site organized and your design consistent.
Assigning Header To Pages
After creating your header, assign it to specific pages or your entire site. Elementor lets you choose where the header appears. You can select all pages, only the homepage, or certain sections. This control ensures your header fits perfectly with each part of your site. Select the display conditions to set this up. This step helps maintain a uniform look throughout your website.
Editing And Updating
You can edit your header anytime through Elementor’s editor. Open the header template and make changes easily. Update text, images, menus, or style as needed. After editing, save and publish the updated header. Your changes show immediately on assigned pages. Regular updates keep your site fresh and user-friendly. Always preview changes before publishing to avoid errors.
Credit: wpastra.com
Troubleshooting Common Issues
Adding a header in WordPress Elementor can sometimes lead to issues. These problems can stop your header from showing correctly. Troubleshooting common issues helps fix these problems fast. Understanding the usual causes makes solving them easier. Below are key tips for fixing common header issues in Elementor.
Fixing Display Problems
Headers may not show up due to theme or layout conflicts. Check if your header is set to display on the right pages. Sometimes, the header is hidden by page settings or Elementor conditions. Clear your website cache to refresh changes. Also, update Elementor and WordPress to the latest versions. This avoids bugs that can block header display.
Try switching to a default WordPress theme. This step helps identify if your current theme blocks the header. If the header appears, the theme might need adjustments. Use Elementor’s preview mode to see if the header looks right on different devices. Fix any alignment or sizing problems there.
Resolving Plugin Conflicts
Plugins can clash and cause your header to disappear or break. Deactivate all plugins except Elementor and Elementor Pro. Check if the header works properly now. Reactivate plugins one by one to find the problematic one. Once identified, look for plugin updates or alternatives.
Conflicts often happen with caching or security plugins. Adjust their settings to exclude Elementor pages. This prevents interference with header loading. Regularly update all plugins to reduce compatibility issues. Keep your site simple to avoid many plugin conflicts.
Credit: elementor.com
Frequently Asked Questions
How Do I Create A Header Using Elementor?
To create a header in Elementor, open your WordPress dashboard. Navigate to Templates > Theme Builder, then select Header. Click “Add New,” design your header using Elementor’s widgets, and publish it to apply across your site.
Can I Customize My Header With Elementor Widgets?
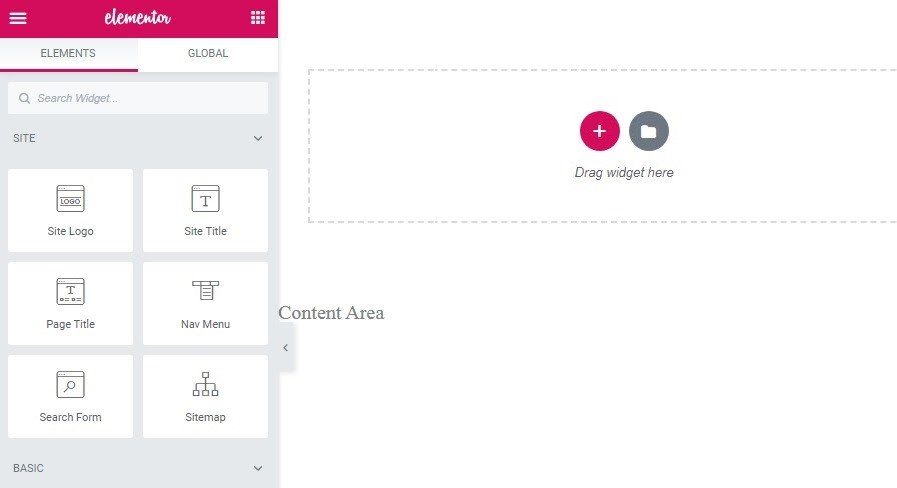
Yes, Elementor offers various widgets like Nav Menu, Site Logo, and Search to customize your header. You can drag and drop these elements, adjust styles, and create a unique header design that matches your brand.
How To Make My Elementor Header Responsive?
Elementor allows you to adjust header settings for mobile, tablet, and desktop views. Use the responsive mode tool in Elementor editor to customize header layout and style for different devices ensuring a seamless user experience.
Is Adding A Sticky Header Possible In Elementor?
Yes, Elementor Pro supports sticky headers. You can enable sticky behavior in the Advanced tab by setting the header to “Sticky” and choosing the devices where it should remain visible while scrolling.
Conclusion
Adding a header in WordPress Elementor is simple and quick. You can create a clear, attractive header that fits your site’s style. Just follow the steps carefully and use the tools Elementor provides. This helps visitors find what they need easily.
A good header improves your website’s look and usability. Keep practicing, and you will get better each time. Start building your header today and make your website stand out.



