
Are you tired of seeing the same old fonts on your WordPress site? Do you want to give your blog a fresh look that stands out and captivates your audience?
Adding new fonts to your WordPress theme can transform your site’s appearance and enhance readability, making it more engaging for your visitors. Imagine your content presented in a font that perfectly matches your brand’s personality, drawing readers in and keeping them hooked.
You’re just a few steps away from making your website more visually appealing and professional. You’ll discover a simple, step-by-step guide on how to add fonts to your WordPress theme, unleashing a whole new level of customization and creativity. Dive in to learn how to make your site truly yours!
Credit: www.greengeeks.com
Choosing The Right Font
Ensure your font works on all devices. Some fonts look different on phones. Others on computers. Check compatibility before choosing. This will help your site look good everywhere. Some popular fonts are Arial and Verdana. These work well on most devices.
Readability is key for your website. Choose fonts that are easy to read. Avoid very fancy fonts. They can be hard to understand. Keep the size regular. Too small or too big can be hard on the eyes.
Your font should match your brand. Consistency is important. Use the same font style everywhere. It helps your site look neat. People remember your brand better this way. Choose colors that match your brand too.
Locating Font Files
Free Font Resources offer a great way to find new fonts. Websites like Google Fonts and DaFont provide many options. You can download fonts in different styles. Always read the terms before downloading. Some fonts are free for personal use only. Others might require a fee for commercial projects. Remember to check compatibility with your theme.
Premium Font Options give more choices. Websites like Adobe Fonts have paid fonts. These fonts often have unique styles. They can make your website look special. Buying a font means you own it. You can use it in many projects. Check the license before purchasing. Make sure it fits your needs.
Legal Considerations are important. Always respect copyright laws. Using a font without permission can cause trouble. Make sure you have the right to use any font. Read the license terms carefully. Avoid using fonts illegally. It’s safer to use fonts from trusted sources.
Uploading Fonts To WordPress
Start by logging into your WordPress Dashboard. Navigate to Appearance then click Customize. Find the section labeled Fonts or Typography. You can upload new fonts here. Choose the font file from your computer. Click Upload to add it. Ensure the font file format is TTF or OTF. These are common formats. Check how the font looks on your site. Adjust settings if needed. Save your changes.
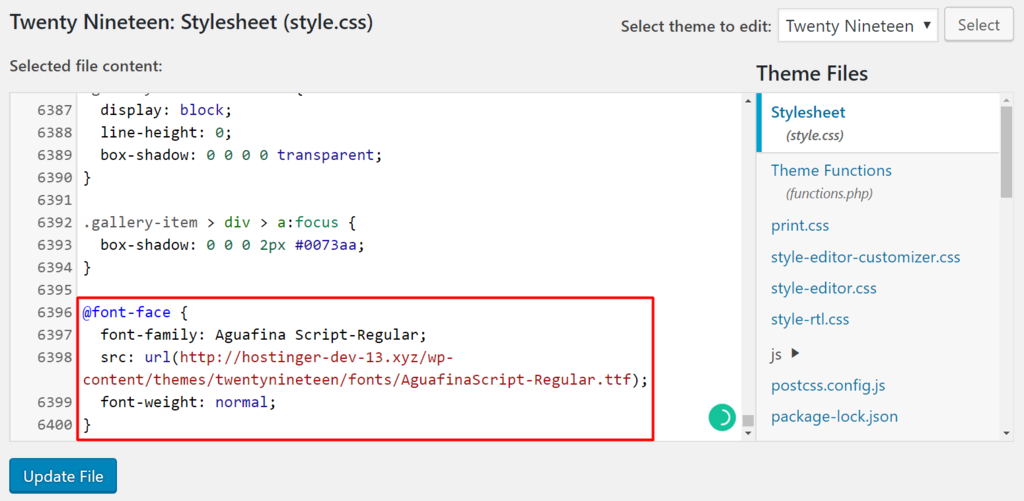
Open your FTP client. Connect to your website’s server. Locate the wp-content folder. Open the themes directory. Find your active theme folder. Create a new folder named fonts. Upload your font files here. Use CSS to apply the fonts. Edit the style.css file. Add @font-face code to link the font. Save the changes. Refresh your website to see the new fonts.
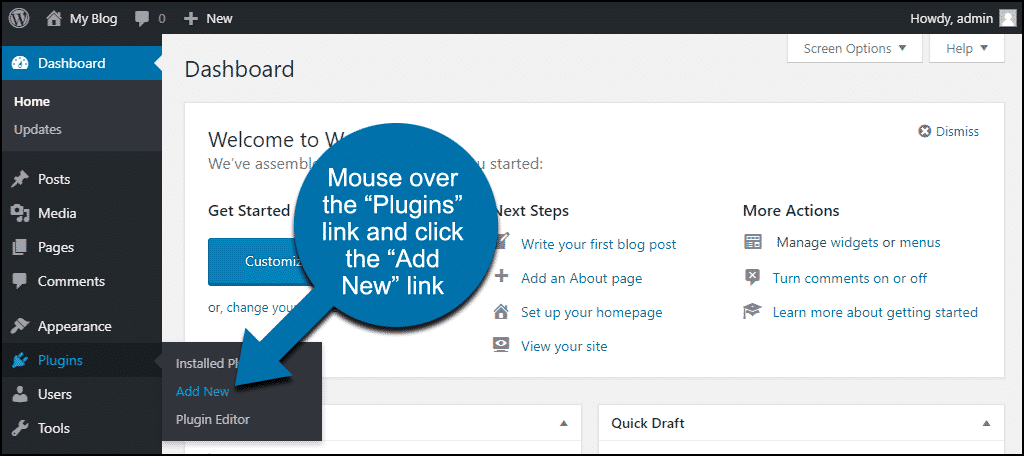
Search for font plugins in the Plugins section. Many plugins offer free fonts. Install a font plugin of your choice. Activate the plugin after installation. Go to the plugin settings. Choose fonts from a large library. Apply the fonts to headings or text. Some plugins offer Google Fonts. These are popular and easy to use. Save your settings. Check your site for the new look.
Editing Theme Files
Enhance your WordPress theme by adding custom fonts. Access the theme editor and locate the CSS file. Insert font links and adjust the stylesheet to reflect your desired typography.
Accessing The Theme Editor
First, go to your WordPress dashboard. Find the Appearance section. Click on Theme Editor. You’ll see your theme files here. Be careful while editing. Small mistakes can break your site. Always back up your site first.
Adding Fonts To Css
Locate the style.css file in the editor. To add a font, use the @font-face rule. You can add fonts from Google Fonts. Copy the font link from Google. Paste it into the top of the CSS file. Make sure to write the font name correctly. Use the font in your CSS rules by specifying font-family.
Ensuring Font Fallbacks
Always include fallback fonts. They ensure text is readable if a font fails. List multiple fonts in your font-family rule. Start with your desired font. Follow with generic fonts like serif or sans-serif. This way, your site remains usable and looks good.
Using Google Fonts
Google Fonts makes your site look nice. First, go to Google Fonts. Pick a font you like. Then, copy the embed code. Paste this code in your theme’s HTML files. Look for “ tag. Add the code there. Now, the font is ready to use. You can change text styles in your CSS files. Use the font name in the `font-family` property. This will change how text looks on your site. Simple!
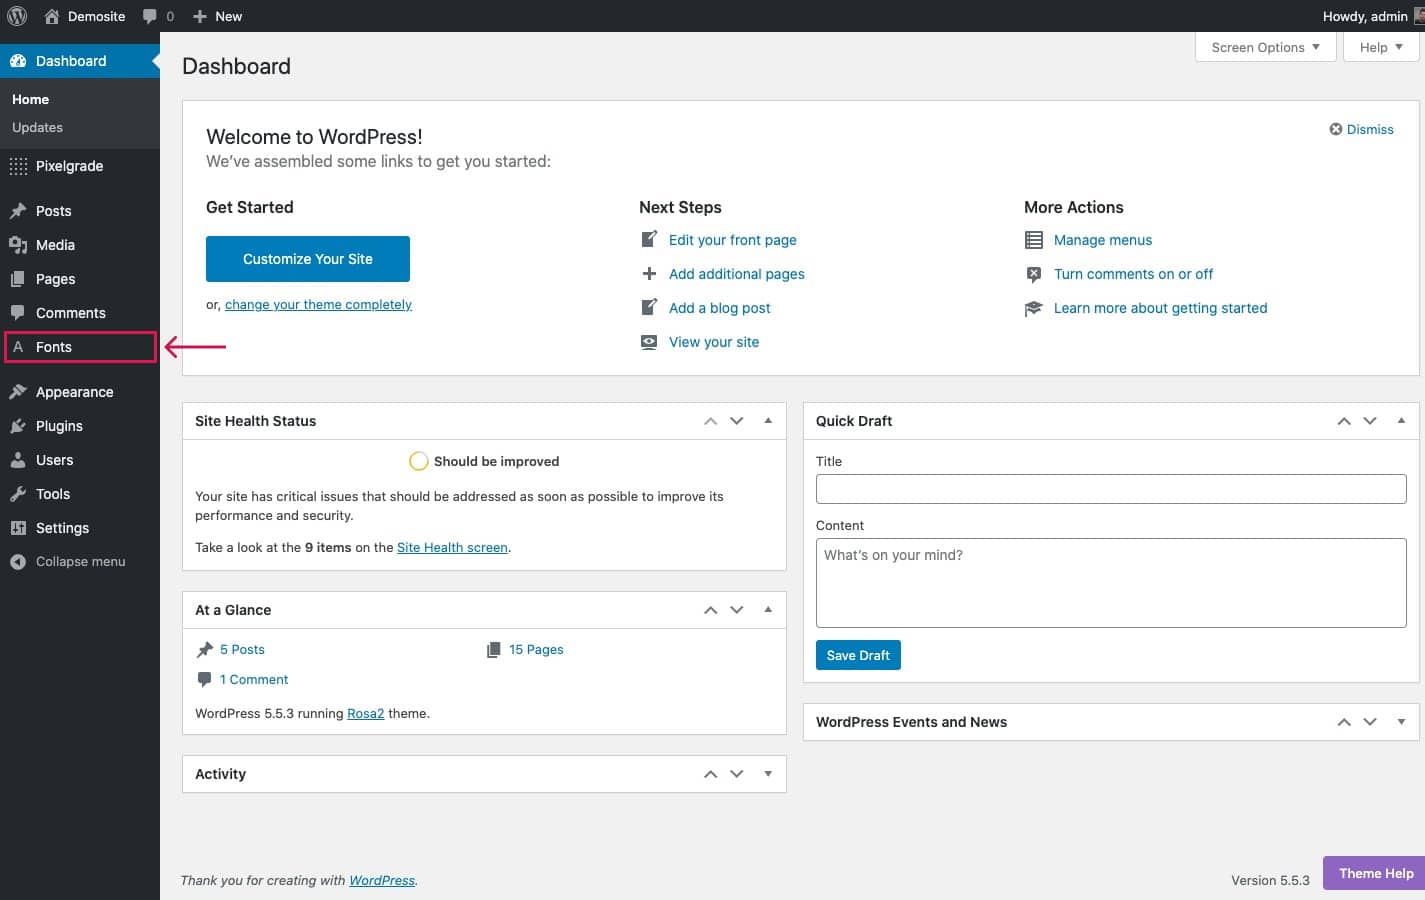
Open the WordPress Customizer. Find the “Fonts” option. Choose the Google Font you added. This tool makes it easy to change fonts. You can see changes live. Make sure to save changes. Now, your site uses the new font everywhere. Easy as pie!
Fonts can slow down your site. Use only the styles you need. Light or Regular is best. Also, load fonts asynchronously. This helps pages load faster. Users will have a smoother experience. Fast sites are happy sites!
Credit: pixelgrade.com
Testing Font Integration
Integrating fonts into a WordPress theme enhances design. Start by selecting fonts from Google Fonts or Adobe Fonts. Add them through the theme’s Customizer or by editing the CSS file.
Cross-browser Compatibility
Checking fonts in different browsers is important. Some fonts may look different in Chrome and Firefox. Always check in major browsers. This ensures your website looks the same everywhere.
Mobile Responsiveness
Phones and tablets are popular. Test your font on these devices. Text should be clear and easy to read. Small screens can change how fonts look. Make sure text is not too big or small.
Load Time Analysis
Fonts can slow down your site. Fast websites are important. Use lightweight fonts to load quickly. Check your site’s speed with tools. This helps improve user experience.
Troubleshooting Common Issues
Fonts sometimes do not show up. This can be because of wrong file paths. Check the path for errors. Make sure the font file is in the right place. Also, ensure the font is properly linked in your CSS file.
Older CSS rules might hide your new font. Check if other styles are overwriting the font. Use the browser inspector tool. Find out which styles are in control. Move your new font rule to the end of the CSS file.
Sometimes, the cache can cause issues. Old data might load instead of new fonts. Clear your browser cache. Also, clear the WordPress cache if you use caching plugins. This will help load the latest data.
Credit: www.hostinger.com
Frequently Asked Questions
How Do I Add Google Fonts To WordPress?
To add Google Fonts, use the Easy Google Fonts plugin. Install and activate it, then navigate to Appearance > Customize. Select Typography and choose your desired font. This method allows easy font customization without coding. Alternatively, you can manually add fonts by editing your theme’s CSS files.
Can I Use Custom Fonts In WordPress?
Yes, you can use custom fonts in WordPress. Upload your font files to your theme’s directory. Edit the theme’s CSS to include the font using @font-face. Plugins like Use Any Font also simplify the process, allowing you to upload and apply custom fonts directly.
Are There Plugins To Add Fonts In WordPress?
Yes, several plugins help add fonts to WordPress. Easy Google Fonts and Use Any Font are popular options. They allow you to easily integrate fonts without coding. These plugins provide user-friendly interfaces for font selection and customization within the WordPress dashboard.
What Is The Best Way To Change Fonts?
The best way to change fonts is using a plugin like Easy Google Fonts. It offers a simple interface for font customization. You can easily select and apply fonts from Google’s library. Manual CSS editing is another option, but requires coding knowledge.
Conclusion
Adding fonts to your WordPress theme is quite straightforward. Start by choosing a font that fits your style. Use the theme editor or a plugin for easy installation. Follow the steps carefully to ensure proper display. Custom fonts can enhance your site’s appeal.
They make your content more readable and engaging. Always preview changes before going live. This ensures everything looks perfect. Don’t forget to test on different devices. This guarantees a consistent experience for all users. With these steps, your WordPress site can stand out.
Happy customizing!


