Are you ready to take your website to the next level? Adding a domain to your Namecheap hosting is a crucial step in establishing your online presence.
Whether you’re launching a blog, an online store, or a personal portfolio, connecting your domain to your hosting account can seem daunting. But don’t worry; you’re not alone in this. Many people feel overwhelmed at first. However, with the right guidance, you’ll find it’s easier than you think.
Imagine the satisfaction of seeing your domain live, ready to welcome visitors from all over the world. In this guide, we’ll walk you through the process step-by-step, ensuring you feel confident and in control. Let’s turn this challenge into a triumph and make your website dreams a reality. Keep reading, and you’ll be equipped with everything you need to add your domain to Namecheap hosting seamlessly.
Credit: www.namecheap.com
Setting Up Your Namecheap Account
Easily add your domain to Namecheap hosting by accessing your account dashboard. Navigate to the “Domain List” section. Follow the simple steps to connect your domain seamlessly.
Setting up your Namecheap account is the first step to getting your domain online and ready for action. Whether you’re launching your first website or expanding your digital empire, having a Namecheap account simplifies the process. Once you have your account up and running, you can easily manage your domains, hosting packages, and more—all from one convenient dashboard. ###Creating Your Namecheap Account
Start by visiting Namecheap’s website. Look for the sign-up button, usually at the top right corner. Click it and fill out the necessary details like your name, email, and password. Don’t forget to use a strong password to keep your account secure. Once you’ve filled in the information, hit the create account button. You’ll receive a confirmation email shortly after. Check your inbox and verify your email to activate your account. It’s a quick process, and you’ll be ready to log in and explore what Namecheap offers. ###Exploring Your Dashboard
After logging in, take a moment to familiarize yourself with the dashboard. This is your command center. Here, you can manage your domains, hosting packages, and even email accounts. Notice the intuitive layout designed for easy navigation. Click around to see where different features are located. Understanding your dashboard will save you time and frustration later. Have you ever wondered how easy it could be to manage multiple domains from one place? Namecheap’s dashboard makes it possible. ###Understanding Your Account Settings
Your account settings allow you to personalize your experience. Click on the account settings tab to update your personal information, change your password, and set preferences. It’s a good idea to review these settings periodically. Keeping your information up-to-date ensures smooth transactions and notifications. What happens if you forget your password? Namecheap has a simple recovery process to get you back in, so there’s no need to worry. ###Securing Your Account
Security is paramount. Namecheap offers two-factor authentication to add an extra layer of protection. Enable this feature under the security settings. Why is this important? Two-factor authentication makes it harder for unauthorized users to access your account. It’s a small step that makes a big difference. Have you ever thought about how vulnerable your account could be without this feature? Consider enabling it today for peace of mind. By following these steps, you’ll have a solid foundation to manage your domains effectively. Once your account is set up, you’re ready to add your domain to Namecheap hosting and take your website live.
Credit: www.youtube.com
Linking Your Domain To Hosting
Linking your domain to hosting is an essential step. It connects your domain name with your web hosting account. This connection allows your website to be accessible online. Namecheap offers a straightforward process for linking domains. This guide will walk you through the steps clearly and simply.
Step 1: Access Your Namecheap Account
Log in to your Namecheap account. Find the “Domain List” section. Click on it to see your domains.
Step 2: Select The Domain To Connect
Locate the domain you want to link. Click the “Manage” button next to it. This will open the settings page.
Step 3: Update Nameservers
Scroll down to the “Nameservers” section. Choose “Custom DNS” from the dropdown. Enter the nameservers provided by your hosting company. Save the changes.
Step 4: Confirm The Dns Settings
Go to your hosting account. Ensure the nameservers match. This step ensures a proper connection.
Step 5: Wait For Propagation
DNS changes can take time. Usually, it takes 24 to 48 hours. Be patient during this period.
Step 6: Test Your Website
After propagation, visit your domain. Check if your website appears. If not, revisit the steps above.
Linking your domain to hosting is complete. Your site is ready for the world.
Verifying Domain Connection
Verifying your domain connection is a crucial step. This ensures that your domain links correctly to your Namecheap hosting account. Without verification, your website might not display as expected. Ensuring this connection avoids potential downtime.
It might seem technical, but the process is straightforward. Follow these steps carefully. Let’s dive into the details.
Understanding Dns Settings
Your domain connects through DNS settings. DNS stands for Domain Name System. It translates your domain name to an IP address. This process allows browsers to find your website.
Access the DNS settings in your Namecheap account. Check if the Namecheap servers are listed. If not, update them to point to Namecheap.
Using Namecheap’s Dashboard
Log in to your Namecheap account. Navigate to the “Domain List” section. Select your domain. Click on “Manage” to access settings.
Ensure the “Domain” tab is open. Look for “Nameservers”. Select “Namecheap BasicDNS” if it’s not already chosen.
Checking Propagation Status
Domain changes take time to update. This process is called propagation. It may take up to 48 hours.
Use online tools to check propagation status. Simply enter your domain name. These tools show if your DNS settings have updated globally.
Troubleshooting Common Issues
Problems might occur with domain connection. Check if the nameservers are correct. Ensure there are no typos in the domain name.
If issues persist, contact Namecheap support. They can assist with troubleshooting. Help is available to resolve any issues.
Credit: documentation.unbounce.com
Frequently Asked Questions
How Do I Add A Domain To Namecheap Hosting?
Log into your Namecheap account. Go to the “Hosting List” tab. Click “Manage” next to your hosting plan. Select “Add Domain. ” Enter your domain name and save changes. Your domain is now added to Namecheap hosting.
How Do I Add A Domain To My Existing Hosting?
Log in to your hosting account and locate the domain management section. Click “Add Domain” and enter your domain name. Choose the relevant settings and save. Ensure DNS is correctly configured. Contact support if you need assistance.
How Do I Add A Domain To Namecheap 365?
To add a domain to Namecheap 365, log in to your Namecheap account. Go to the “Domain List” section. Click on “Manage” next to your chosen domain. Select “Add to Namecheap 365” and follow the prompts to complete the process.
How Do I Add A Sub Domain In Namecheap?
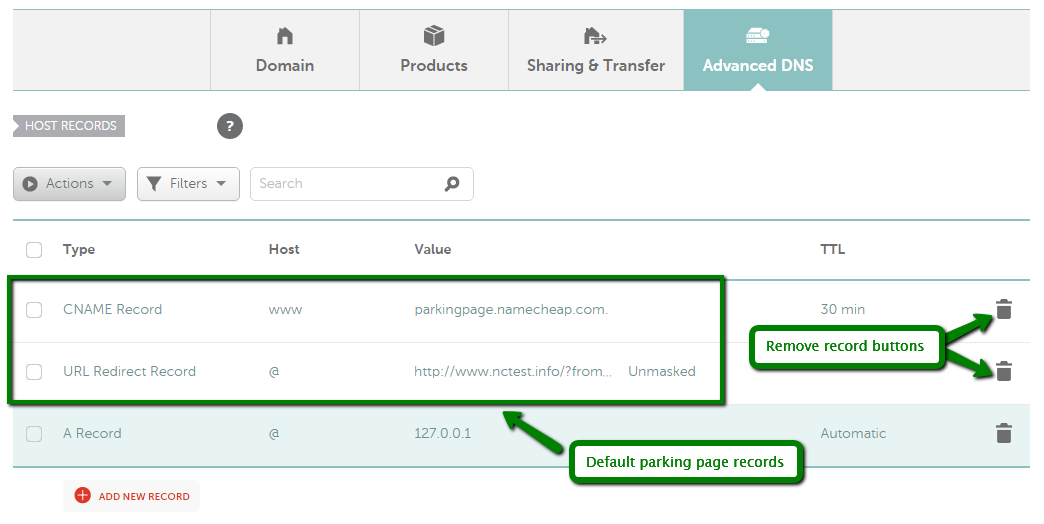
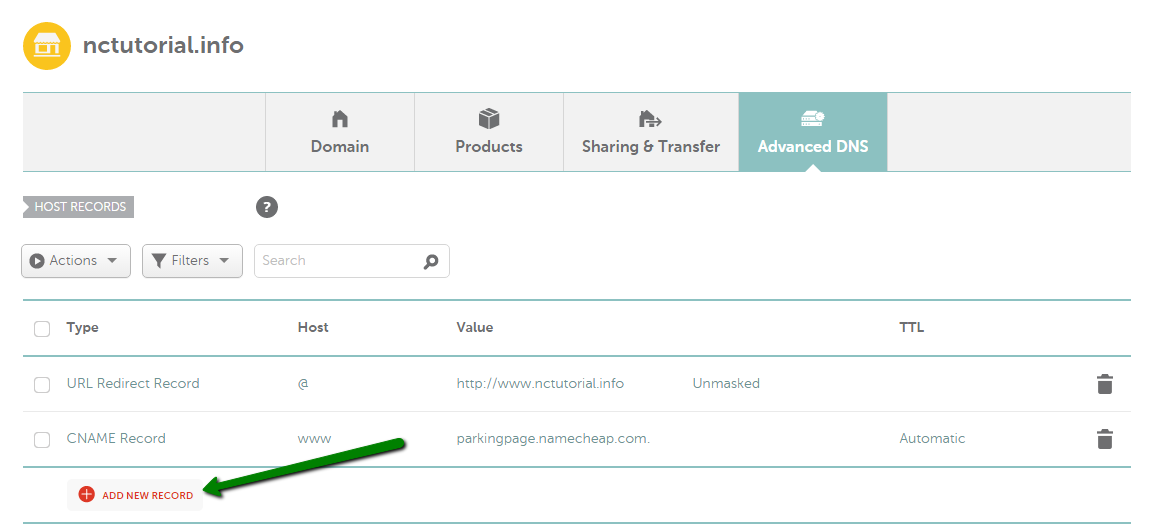
Log into your Namecheap account and go to the “Domain List”. Select your domain and click “Manage”. Navigate to the “Advanced DNS” tab, then click “Add New Record”. Choose “CNAME Record” or “A Record” and enter your subdomain details. Save changes to finalize.
Conclusion
Adding a domain to Namecheap hosting is simple. Just follow these steps. Start by logging into your Namecheap account. Navigate to the “Domain List” section. Select the domain you wish to add. Click on “Manage. ” Choose the “Advanced DNS” tab.
Follow the prompts to add your hosting details. Save your settings. Within a few hours, your domain should be live. This process is efficient and user-friendly. Now, you can focus on building your website. Enjoy your Namecheap hosting experience.