
Want to make your WordPress site look exactly how you imagine it? Adding custom CSS is the key to unlocking full control over your website’s style and design.
Whether you want to tweak colors, adjust fonts, or change layouts, custom CSS lets you do it all without relying on complicated plugins or themes. In this guide, you’ll learn simple, step-by-step methods to add custom CSS to your WordPress site quickly and safely.
Keep reading, and you’ll soon have the power to make your website truly yours.
Why Add Custom Css
Adding custom CSS to your WordPress site lets you change the look and feel easily. It gives you control over styles without changing the theme files. You can make your site unique and match your brand better.
Custom CSS helps you fix small design issues. It also lets you add new styles that the theme does not offer. This way, your site stands out and works well on all devices.
Benefits Of Custom Css
Custom CSS lets you personalize your website’s appearance. You can change colors, fonts, and layouts quickly. It improves user experience by making your site easier to read and navigate.
It saves time compared to changing theme code. Also, it keeps your changes safe during theme updates. You keep your site fresh and consistent without technical risks.
When To Use Custom Css
Use custom CSS when you want small design changes. For example, change button colors or add space between sections. It works well for tweaks that the theme does not allow.
Also, use it to fix responsive design problems. If elements don’t look right on phones or tablets, custom CSS can help. It is a simple way to improve your site’s style without deep coding.

Credit: psdtowp.net
Accessing The WordPress Customizer
Accessing the WordPress Customizer is the first step to adding custom CSS. The Customizer lets you see changes live as you edit your site. It is easy to find and use, even for beginners. This tool helps you adjust your site’s look without touching the code files directly.
Navigating To The Customizer
Log in to your WordPress dashboard. Look for the “Appearance” menu on the left side. Click on “Customize” from the dropdown options. This will open the Customizer panel on the right side of your screen. Here, you can see your website preview and the list of customization options.
Using The Additional Css Section
Scroll down the Customizer menu until you find “Additional CSS.” Click on it to open a text area. You can type or paste your custom CSS code here. Changes appear instantly in the preview. This area keeps your CSS separate and safe from theme updates. When done, click “Publish” to save your styles.
Adding Css Via Theme Editor
Adding custom CSS via the Theme Editor in WordPress is a direct way to change your site’s look. It lets you write CSS code right inside your theme files. This method is quick and does not require extra plugins. You can style your website exactly how you want.
Using the Theme Editor means you must be careful. A small mistake can affect the entire website’s design. Always back up your site before making changes. This keeps your work safe if something goes wrong.
Locating The Style.css File
First, log in to your WordPress dashboard. Go to Appearance, then select Theme Editor. On the right side, find the file list. Look for style.css. This file controls the main styles of your theme.
The style.css file usually appears at the top of the list. Click it to open the code editor. You will see the existing CSS code. Scroll to the bottom to add your new styles.
Editing Safely
Never edit the style.css file directly on a live site. Use a child theme to protect your changes. Child themes keep your custom CSS safe during theme updates.
Before editing, copy all the code and save it somewhere. If you make a mistake, you can restore the original code. Write small CSS changes step-by-step. Check your website after each change.
Credit: wordpress.org
Using A Custom Css Plugin
Using a custom CSS plugin is a simple way to change your website’s style. It helps you add CSS code without touching your theme files. This keeps your changes safe even after theme updates. Custom CSS plugins offer a neat space to write and manage your styles easily.
Top Plugins For Css
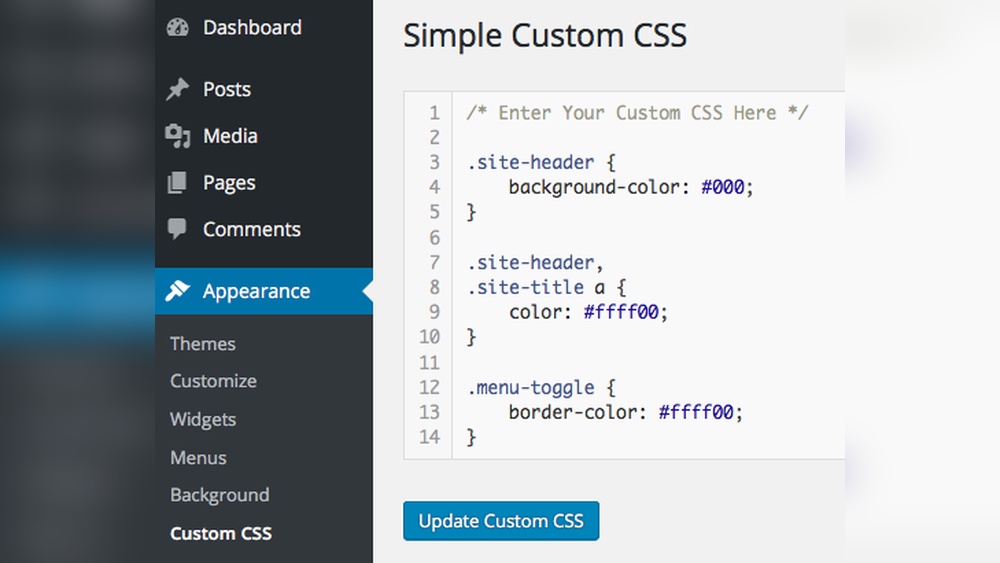
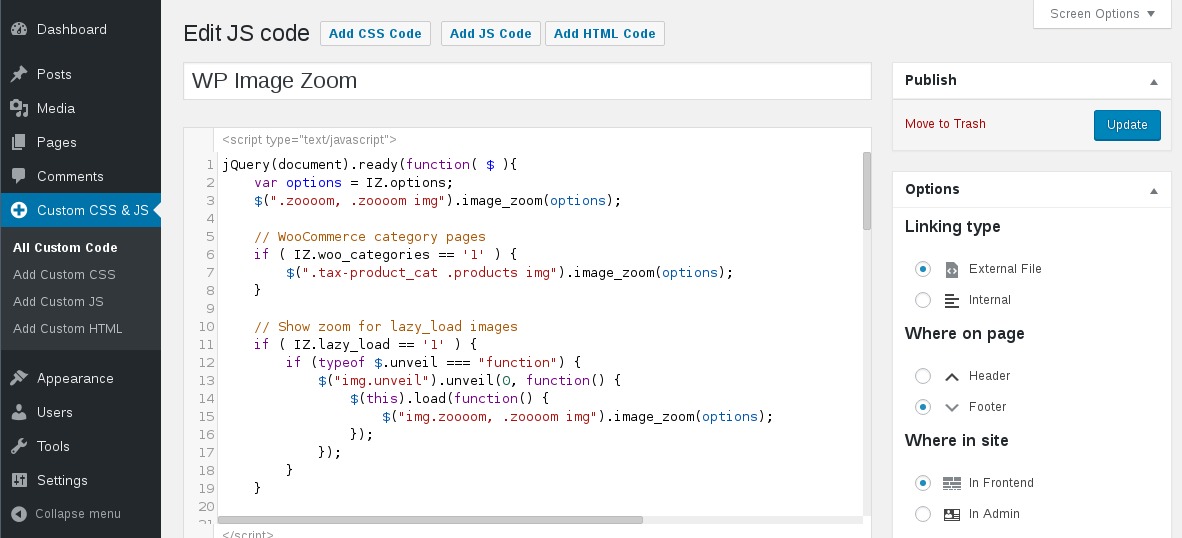
Several plugins work well for adding custom CSS in WordPress. “Simple Custom CSS” is popular for its clean interface. “Custom CSS Pro” offers advanced options for styling. “WP Add Custom CSS” allows CSS changes on specific pages. Choose a plugin that fits your needs and skill level.
Installing And Using Plugins
Go to your WordPress dashboard to install a plugin. Click on “Plugins” and then “Add New.” Type the plugin name in the search box. Click “Install Now” and then “Activate.” After activation, find the plugin’s menu in the dashboard.
Open the plugin settings to add your CSS code. Write your styles in the provided box. Save your changes and refresh your site to see the effect. Using plugins keeps your CSS organized and easy to update anytime.
Writing Effective Css
Writing effective CSS is key to customizing your WordPress site. Good CSS improves your site’s look and user experience. Clear and simple CSS rules help you make precise changes. Avoid complex code that is hard to maintain. Focus on writing CSS that targets exactly what you want to style.
Basic Css Syntax
CSS uses selectors to find elements on the page. Then, it applies styles inside curly braces.
Example:
selector { property: value; }The selector chooses the element. Properties define the style, like color or font size. Each property ends with a semicolon.
Targeting WordPress Elements
WordPress themes have specific classes and IDs. Use browser tools to inspect these elements. Write CSS rules using these classes or IDs.
Example:
.site-title { font-size: 24px; color: 333; }This CSS changes the site title’s font size and color. Targeting the right element avoids unwanted style changes.
Testing And Debugging Css
Testing and debugging CSS is a key step after adding custom styles to your WordPress site. It helps ensure your design looks good and works well on different devices and browsers. Errors in CSS can cause layout problems or broken pages. Finding and fixing these issues quickly improves your site’s appearance and user experience.
Careful testing saves time and prevents frustration. It also helps you learn more about CSS and how your changes affect the site. Use the right tools and methods to check your custom CSS thoroughly.
Using Browser Developer Tools
Browser developer tools allow you to inspect and edit CSS live on your site. Open them by right-clicking on a page element and selecting “Inspect”. You can see the CSS rules applied to that element and try changes instantly.
These tools also show errors in your CSS and highlight overridden styles. You can test different CSS properties and values without changing your files. This makes finding the cause of problems fast and simple.
Developer tools work in all major browsers like Chrome, Firefox, and Edge. Use them to check how your site looks on various screen sizes too.
Common Css Issues
Some CSS problems happen often. One is specificity conflicts, where multiple rules try to style the same element. The browser uses the rule with higher specificity, which may not be yours.
Another issue is missing semicolons or braces. These small mistakes stop CSS from working properly. Check your code carefully for these syntax errors.
Also, remember that different browsers may render styles differently. Test your site in several browsers to ensure consistent appearance.
Tips For Stunning Design
Creating a stunning design in WordPress starts with smart CSS choices. Good design keeps visitors interested and improves user experience. Custom CSS lets you control every detail, making your site unique and professional.
Focus on simple but effective styling tips. These help your site look clean, modern, and easy to navigate.
Consistent Styling
Use the same colors and fonts across your site. Consistency builds trust and makes your site look polished. Avoid using too many font styles or colors. Pick a few and stick to them. This keeps your design simple and clear.
Apply uniform padding and margins for balanced spacing. Consistent spacing helps content flow smoothly. Test your styles on different pages to ensure uniform look.
Responsive Design Practices
Make your custom CSS adapt to all screen sizes. Use flexible widths and relative units like percentages or ems. This ensures your site looks good on phones, tablets, and desktops.
Include media queries in your CSS. They let you change styles based on screen size. Adjust font sizes, image widths, and layout for smaller screens. Test your site on multiple devices to check responsiveness.

Credit: www.greengeeks.com
Frequently Asked Questions
How Do I Add Custom Css In WordPress Easily?
You can add custom CSS via the WordPress Customizer under Appearance > Customize > Additional CSS. This method is simple and safe for beginners. Changes appear instantly, and no theme files are altered, keeping your site update-proof.
Can I Add Css Without A Child Theme In WordPress?
Yes, using the Additional CSS section in the Customizer lets you add CSS without a child theme. It’s perfect for small tweaks. For extensive customization, a child theme is recommended to avoid losing changes after updates.
What Plugins Help Add Custom Css In WordPress?
Popular plugins like Simple Custom CSS, SiteOrigin CSS, and WP Add Custom CSS allow easy CSS addition. These plugins provide user-friendly interfaces and extra features for managing styles without coding knowledge.
Will Custom Css Affect My WordPress Theme Updates?
No, adding CSS via the Customizer or plugins won’t affect theme updates. These methods keep your custom code separate. Avoid editing theme files directly, as updates may overwrite those changes.
Conclusion
Adding custom CSS in WordPress helps you change your site’s look. It gives you control over colors, fonts, and layouts. You do not need advanced skills to start. Just follow simple steps and see the changes live. Custom CSS makes your site unique and personal.
Keep your code clean and organized for best results. Always save a backup before making changes. Experiment and enjoy designing your website your way.


