
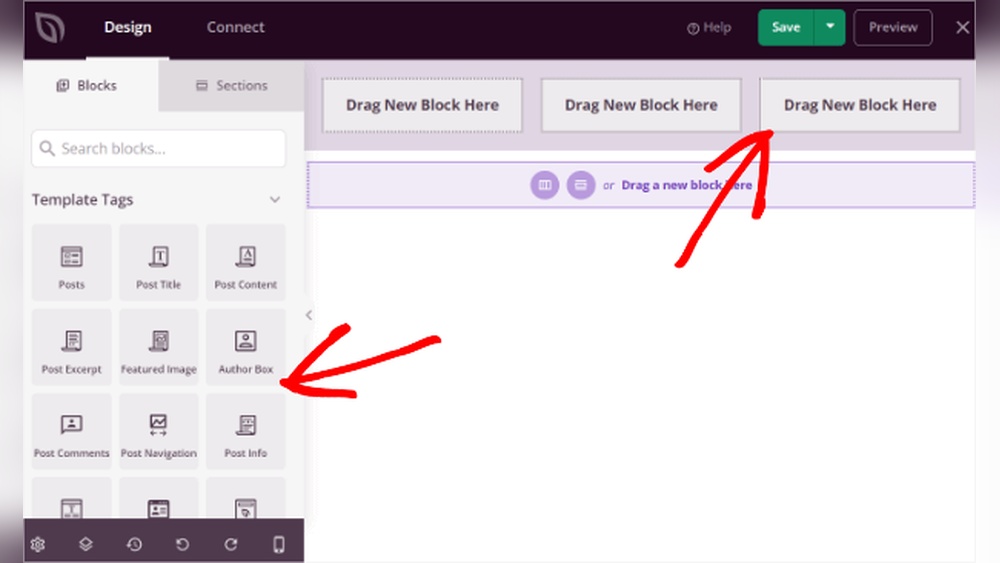
Are you looking to make your WordPress site stand out? Adding a custom header can instantly give your website a fresh, professional look.
But if you’re not sure where to start, don’t worry—you’re in the right place. You’ll learn simple, step-by-step ways to add a header to your WordPress site without any hassle. By the end, your website will look more inviting and unique, helping you grab your visitors’ attention from the moment they arrive.
Ready to transform your site? Let’s dive in!
Choose The Right Theme
Choosing the right theme is key to adding a header in WordPress. Themes control the look and feel of your site. They also affect how easy it is to customize your header. A well-chosen theme offers built-in header options. This saves time and effort. It also ensures your header looks great on all devices. Consider themes that match your website’s purpose and style. This helps keep your site consistent and professional.
Themes With Header Options
Some themes come with built-in header settings. These themes let you change header layouts, colors, and sizes. You can often add logos and menus directly in the header area. Many themes include multiple header styles. This lets you pick one that fits your brand. Themes with header options reduce the need for extra plugins. They make your site faster and easier to manage.
Customizable Header Features
Customizable headers give you control over your site’s top section. You can add images, text, or buttons in the header area. Some themes allow sticky headers, which stay visible when you scroll. Others support video or slideshow backgrounds for headers. Look for themes that let you adjust header padding and margins. These small changes improve your site’s look. A flexible header helps create a unique and user-friendly site.
Credit: kinsta.com
Access The WordPress Customizer
Accessing the WordPress Customizer is the first step to change your site’s header. The Customizer lets you see changes live before saving them. It helps you edit your site with ease. This tool is built into WordPress and is simple to use. You can find many settings here, including header options.
This guide shows how to open the Customizer and find header settings. Following these steps saves time and avoids confusion. Let’s start with navigating to the Customizer.
Navigating To The Customizer
Log into your WordPress dashboard. On the left menu, find the “Appearance” tab. Click on it to open a dropdown. Select “Customize” from this list. This opens the WordPress Customizer panel on the right. You will see your website preview on the left side. This live preview changes as you edit settings.
Locating Header Settings
Inside the Customizer, look for “Header” or “Header Settings.” The exact name depends on your theme. Some themes show header options under “Layout” or “Site Identity.” Click on the appropriate section. You will find options to change the header image, text, and layout. Adjust these settings to fit your style.
Add A Header Image
Adding a header image to your WordPress site makes it more attractive. It helps visitors understand your site’s theme quickly. A good header image sets the tone for the entire website. This section explains how to select or upload images and optimize them for the best look and speed.
Selecting Or Uploading Images
Choose images that match your website’s style and message. Use photos that are clear and simple. Avoid busy or cluttered pictures. You can upload images directly in the WordPress dashboard. Go to Appearance, then Header, and click on “Add new image.” Select a file from your computer or pick one from your media library.
Optimizing Image Size And Quality
Large images can slow your website. Resize images before uploading to keep them fast. Aim for a width of 1200 pixels or less. Save images in JPEG or PNG format for good quality. Compress images using free tools online. This reduces file size without losing clarity. Optimized images improve loading time and user experience.
Credit: www.greengeeks.com
Insert A Site Title And Tagline
Adding a site title and tagline helps visitors know your website’s purpose. These elements appear at the top of your WordPress site. They give your site a clear identity. You can customize the text, font, and color to match your style. This makes your website look professional and inviting.
Editing Text Elements
Start by going to the WordPress dashboard. Click on “Appearance” then “Customize.” Find the “Site Identity” section. Here, you can type your site title and tagline. Keep the title short and clear. The tagline should describe what your site offers. After typing, check how it looks on your site preview. Make changes if needed. Save your work to update the site instantly.
Choosing Fonts And Colors
Fonts and colors affect how visitors feel about your site. Choose a font that is easy to read. Avoid fancy or hard-to-read fonts. Pick colors that match your brand or theme. Use contrasting colors to make text stand out. The title and tagline should be visible on all devices. Test your choices on phones and tablets too. Adjust fonts and colors until the text looks perfect everywhere.
Use Header Widgets
Using header widgets in WordPress offers a simple way to customize your site’s header. Widgets are small blocks that add features or content. They can display menus, search bars, or social icons. This method does not require coding skills. You can drag and drop widgets to the header area easily. It helps make your website more functional and attractive.
Adding Widgets To The Header Area
First, go to your WordPress dashboard. Click on Appearance, then Widgets. Look for the header widget area. Not all themes have this area. If yours does, you will see it listed. Drag any widget you want into the header section. You can add multiple widgets here. Save your changes. Check your site to see the new header widgets live.
Popular Header Widgets
Many widgets work well in headers. The Search widget helps visitors find content fast. The Custom Menu widget shows navigation links clearly. Social Icons widgets link to your social media pages. Text widgets allow you to add announcements or contact info. Image widgets display logos or banners. These widgets improve user experience and site design.
Customize Header Layout
Customizing your WordPress header layout makes your site unique. It helps visitors find important info quickly. A well-organized header improves user experience and site appearance.
WordPress offers tools to change where header elements sit and how they look. Adjusting layout settings fits your brand style and content needs. Small changes create a big impact on your site’s look.
Positioning Header Elements
Move your logo, menu, and other items to suit your design. Place the logo on the left, center, or right. Menus often work best at the top or side. Drag and drop tools in WordPress make this easy.
Keep important elements visible and easy to find. Avoid clutter by spacing items well. Clear positioning helps visitors navigate your site fast.
Adjusting Spacing And Alignment
Space out header items evenly for a clean look. Use padding and margins to create breathing room. Align text and images so they look balanced and neat.
Check how your header looks on different devices. Mobile views may need smaller spacing or stacked elements. Proper alignment ensures your header looks professional everywhere.
Add Custom Header Code
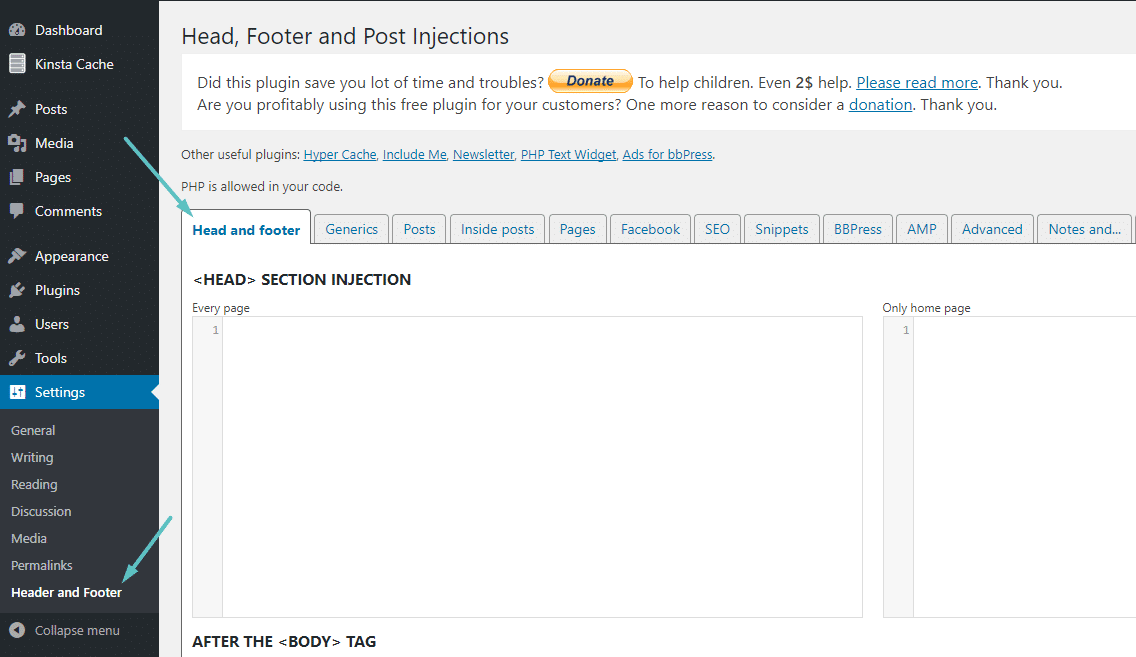
Adding custom header code to WordPress lets you personalize your site’s look and function. This process involves inserting specific code that changes the header’s content or style. It helps you create a unique site that fits your brand or style.
Custom code can add logos, scripts, or special designs to your header. You can do this by editing theme files or adding CSS styles. Both methods are simple and effective for customizing your header.
Using Header.php File
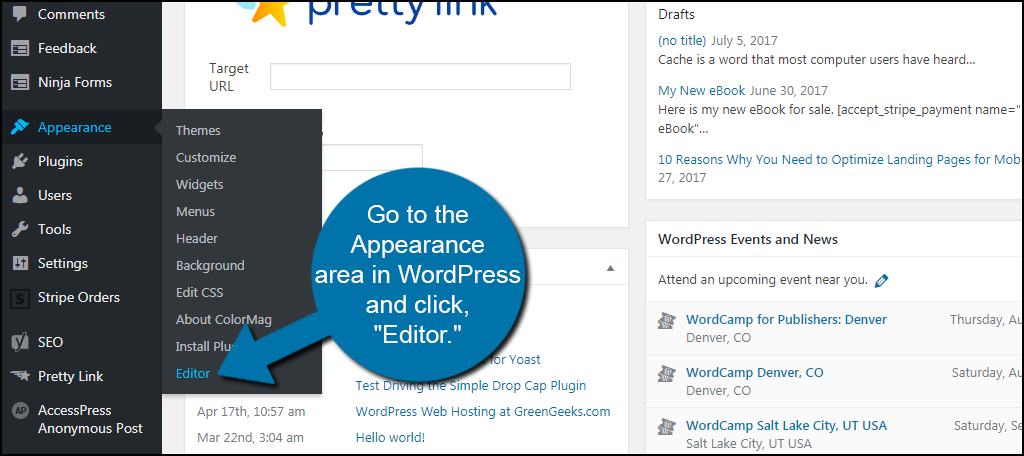
The header.php file controls the header section of your WordPress theme. You can edit this file to add HTML or PHP code directly into your header.
To edit, go to your WordPress dashboard. Navigate to Appearance > Theme Editor. Find the header.php file on the right side. Insert your custom code in the right place, usually before the closing tag.
Be careful when editing this file. A small mistake can break your site. Always back up your theme before making changes.
Adding Css For Header Styling
Custom CSS changes the look of your header without altering the code structure. You can add colors, fonts, spacing, and more.
Go to Appearance > Customize > Additional CSS. Add your CSS rules here. For example, to change the header background color:
header { background-color: 333333; }This method keeps your changes safe during theme updates. It’s a clean way to style your header.
Credit: www.greengeeks.com
Preview And Publish Changes
Troubleshooting common header issues in WordPress helps keep your site professional. A broken or misaligned header can confuse visitors. Fixing these problems improves user experience and site appearance.
Some issues come from image display errors or layout conflicts. These problems often happen after theme updates or plugin installations. Identifying the cause lets you solve the issue quickly.
Fixing Image Display Problems
Images in headers may not show correctly if the file size is too large. Compress images before uploading to reduce loading time. Use common formats like JPG or PNG for better compatibility.
Check the image URL if it does not appear. Broken links cause images to disappear. Re-upload the image or update the link in the header settings.
Clear your browser cache to see recent changes. Sometimes, the old version of your site stays in cache. Reloading with a cleared cache often solves display issues.
Resolving Layout Conflicts
Layout conflicts occur when header elements overlap or shift oddly. These issues often come from CSS or theme style clashes. Inspect the header using browser developer tools to find the problem.
Disable recently added plugins to check for conflicts. Plugins can change styles and cause layout errors. Reactivate plugins one by one to find the culprit.
Use a child theme to safely edit header styles. This method prevents theme updates from erasing your fixes. Adjust padding, margins, or widths for proper alignment.
Frequently Asked Questions
How Do I Add A Header In WordPress?
To add a header in WordPress, go to Appearance > Customize > Header. Use the available options to upload images, add text, or customize layout. Save changes to update your site header instantly.
Can I Customize WordPress Header Without Coding?
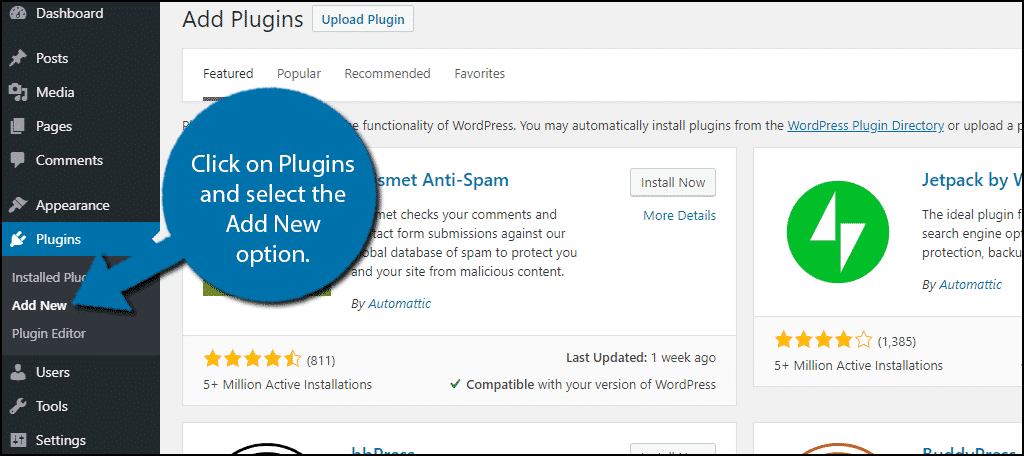
Yes, WordPress allows header customization without coding. Use the Customizer or a page builder plugin. These tools provide drag-and-drop options for easy header design and layout changes.
What Are The Best Plugins For WordPress Headers?
Popular header plugins include Elementor, Header Footer Elementor, and WP Header Images. They offer flexible design, easy customization, and advanced features for unique headers.
How To Make WordPress Header Responsive?
Ensure your header uses a responsive theme or plugin. Test on multiple devices. Customize header elements to adjust size and layout for mobile and tablet screens.
Conclusion
Adding a header to your WordPress site is simple and quick. It helps visitors know your site’s purpose right away. You can choose images, text, or both for your header. Make sure it matches your site’s style and brand. Keep testing different headers to see what works best.
A good header improves site navigation and user experience. Start customizing your header today to make your website look professional and welcoming.



