
Are you ready to give your WordPress site a fresh new look? Adding a downloaded theme can transform your website’s appearance and enhance its functionality.
But, if you’re unsure of where to start, you’re not alone. Navigating the world of WordPress themes can be overwhelming for many. Don’t worry! In this guide, we’ll walk you through each step to seamlessly add a downloaded theme to your WordPress site.
By the end of this article, you’ll feel confident and empowered to make your website stand out. Let’s dive into the simple steps that can lead to a stunning site makeover tailored just for you. Keep reading to unlock the secrets of effortless theme installation!
Credit: www.greengeeks.com
Preparing Your WordPress Environment
Always backup your website. This keeps your data safe. Use a plugin for easy backups. Save the backup file on your computer. This ensures you have a copy if needed. You never know when problems might arise. Being prepared is smart.
Make sure the theme works with your WordPress version. Themes might not be updated. This can cause errors. Visit the theme’s website. Look for updates or notes. If unsure, contact the theme creator. They can help with any questions. Always choose a theme that is compatible. It prevents many issues.
Downloading A WordPress Theme
Search for trusted websites that offer themes. Sites like WordPress.org or ThemeForest are good places. Always check reviews before downloading. Make sure the theme is compatible with your WordPress version. Avoid sites that look suspicious or have poor design. Protect your site from malware and other threats.
Once you find a theme, click on the download button. The theme will usually be in a .zip file. Save it to your computer. Remember the folder where you save it. You need this file later to add to WordPress. Double-check the file name. Make sure it matches the theme you want.
Uploading The Theme Via WordPress Dashboard
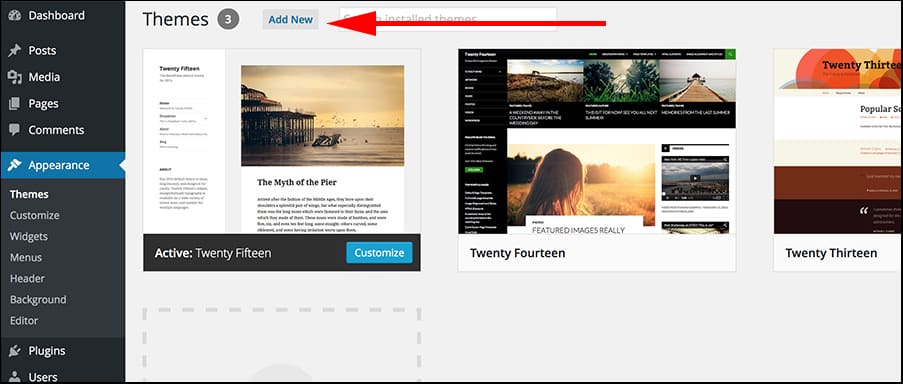
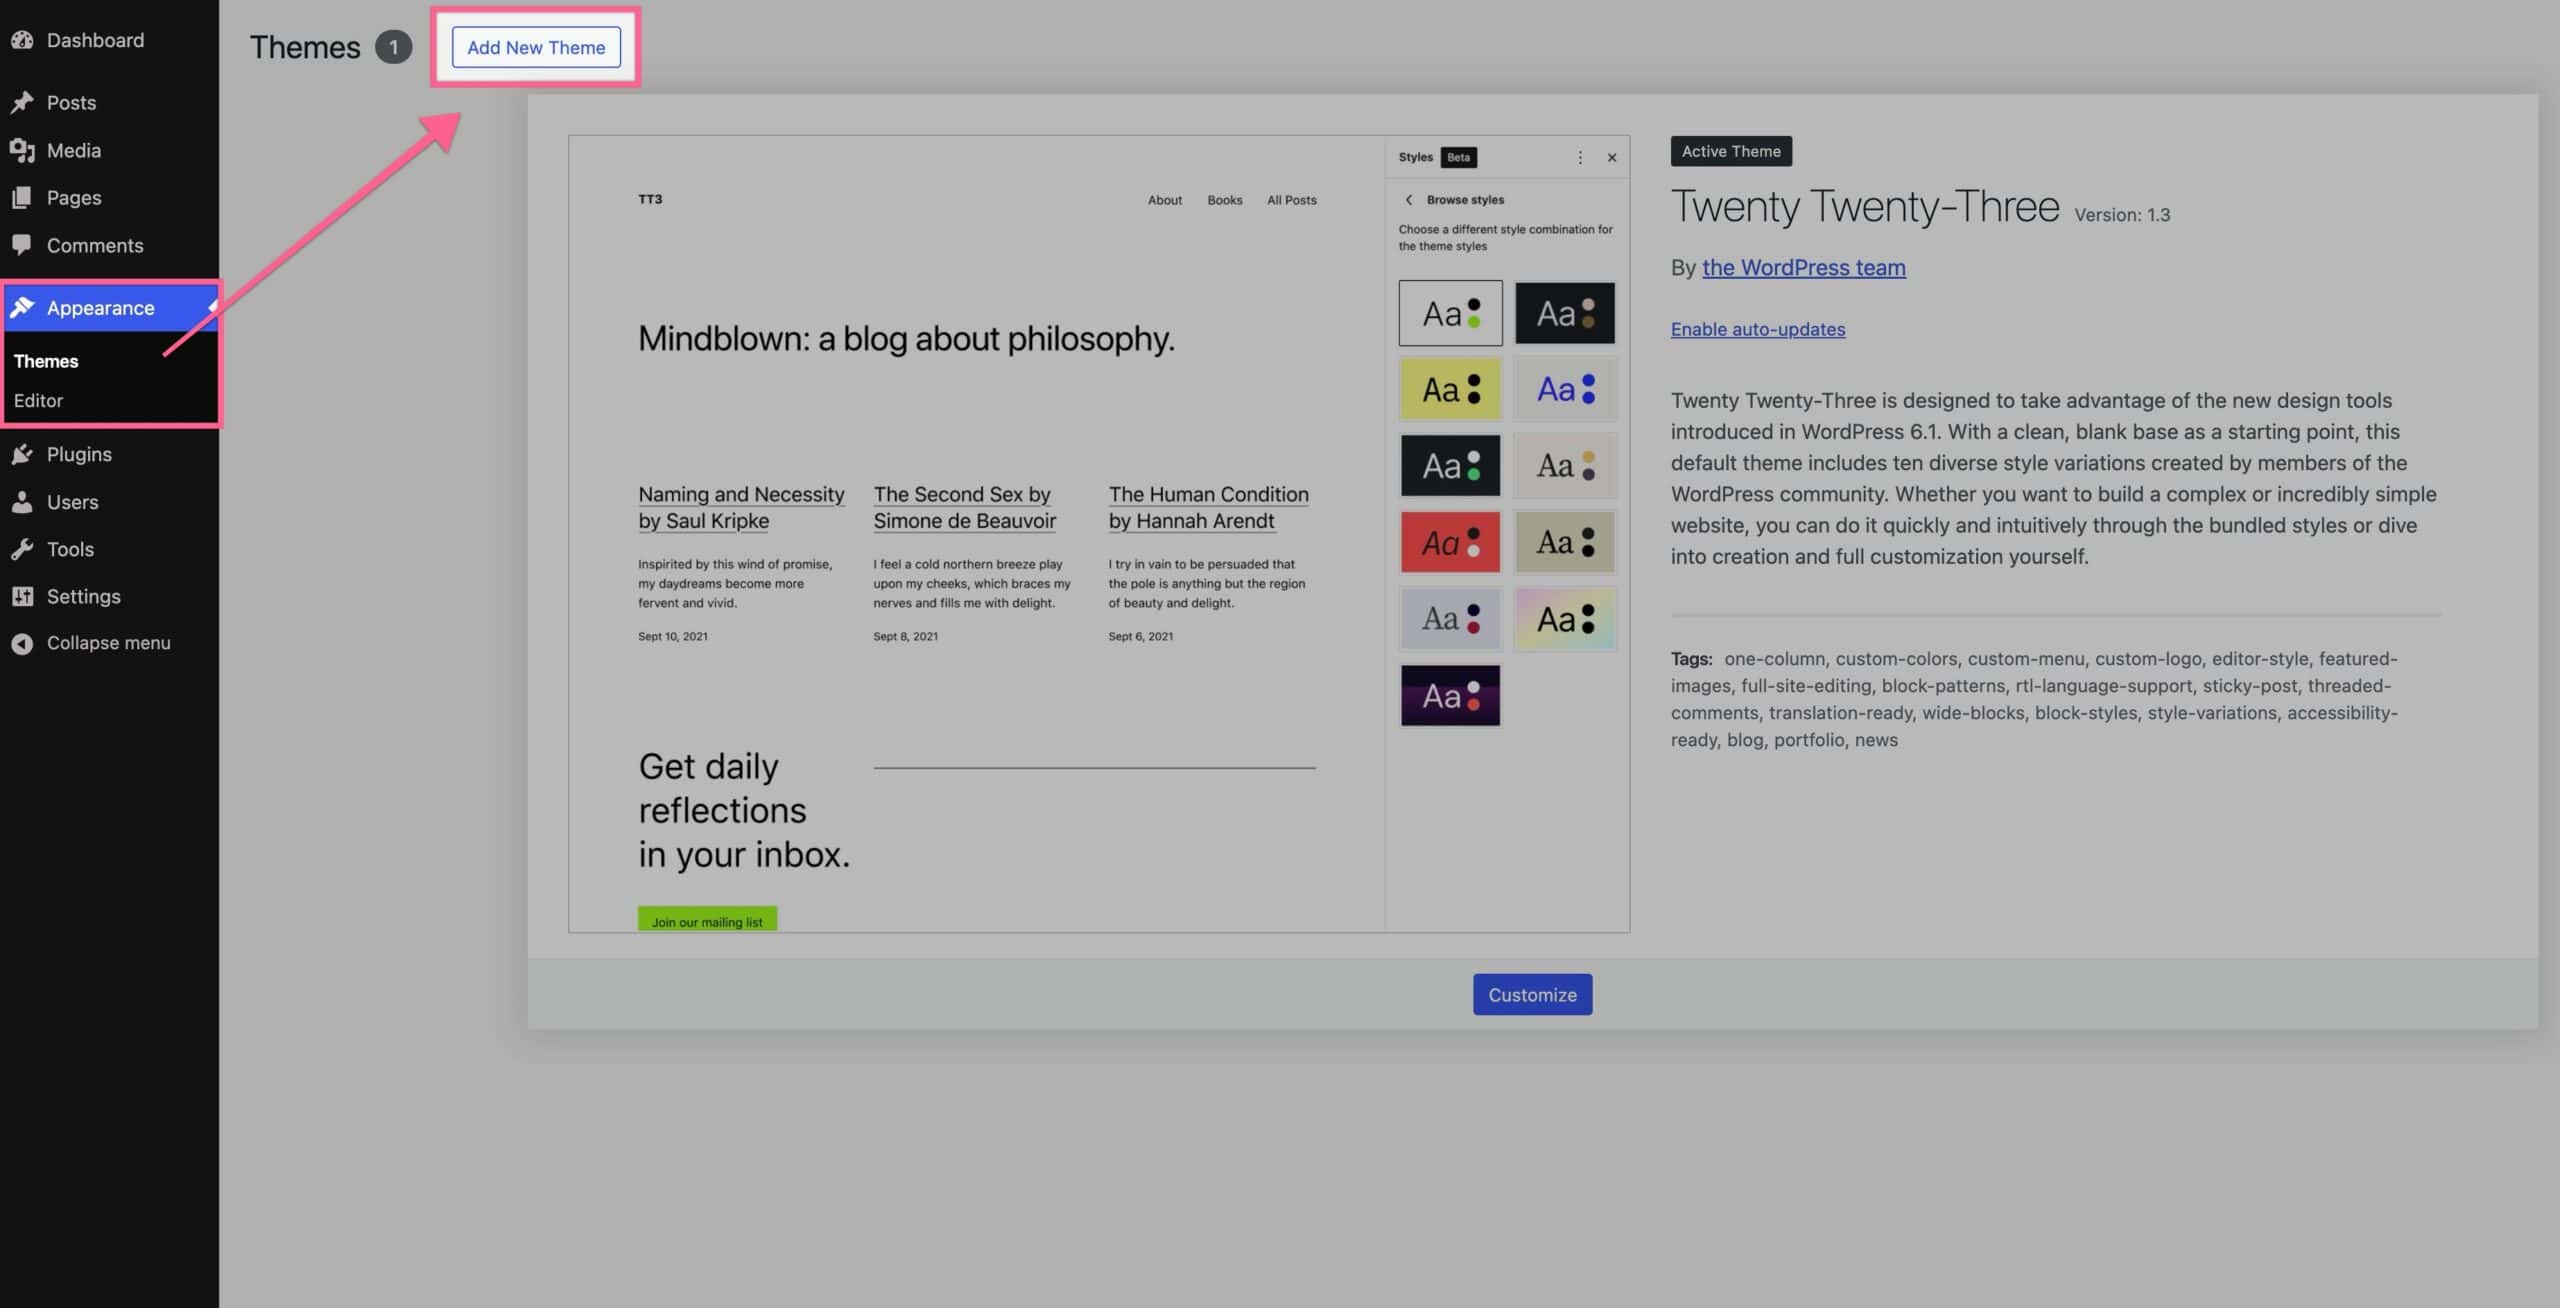
Start by logging into your WordPress dashboard. Look for the Appearance section on the left. Click on Themes to enter the themes area. This is where you can manage all your themes. The process is simple and quick.
Find the Add New button at the top of the page. After clicking it, look for the Upload Theme option. Click this to upload your theme. Now, select the Choose File button. Find your theme’s zip file on your computer. Click Install Now to upload. Finally, activate your theme. Your new theme is now ready.
Installing The Theme Via Ftp
First, you need an FTP client on your computer. Some popular choices are FileZilla and Cyberduck. Download and install one. Then, open the FTP client. You will see spaces to enter your website credentials. This includes the server address, username, and password. You might get these details from your web host. Enter the details and click on connect. Now, you can access your website files.
You need to locate the theme file on your computer. It usually comes in a zipped folder. Unzip it before uploading. In your FTP client, find the wp-content/themes folder. Drag your unzipped theme folder into this directory. Wait for the transfer to complete. Once done, check your WordPress dashboard. Your new theme should appear under the Appearance tab. From there, you can activate it easily.
Activating The New Theme
Discover how to add a downloaded theme to WordPress effortlessly. Upload the theme file via the WordPress dashboard. Activate it to give your site a fresh look instantly.
Navigating To Themes
First, go to your WordPress dashboard. It’s where you manage your site. Find the Appearance option on the left menu. Click on it. You will see a list of options. Choose Themes. Now, you’re in the right place to change your theme.
Activating The Theme
Look for the Add New button at the top. Click on it. You can see a new page now. There, find the Upload Theme button. Click on it to upload your downloaded theme file. Make sure it’s in .zip format. Once uploaded, click Install Now. Wait for the installation to finish. Once done, click the Activate button. Your new theme is live now!

Credit: barn2.com
Customizing Your Theme
First, log in to your WordPress dashboard. Find the “Appearance” menu. Click on “Customize” to open the Theme Customizer. This is where you can make changes to your theme. You can change colors, fonts, and more. Make sure to save your changes. It’s easy and fun.
Go to the “Theme Options” in the customizer. Here, you can adjust various settings. You can set your homepage layout. Choose a header image or adjust the sidebar. Keep your changes simple and neat. This helps your site look great. Remember to click “Publish” to save.
Troubleshooting Common Issues
Adding a downloaded theme to WordPress can sometimes be tricky. Ensure the theme is in a zipped format. Go to your WordPress dashboard, click on ‘Appearance,’ then ‘Themes,’ and select ‘Add New. ‘ Upload the zipped file and activate your new theme.
Resolving Upload Errors
Upload errors are common in WordPress. Sometimes, the theme file is too big. Check the file size before uploading. Use a tool to compress the theme file. Try uploading again. Also, ensure your internet connection is stable. A weak connection may cause problems. Another step is checking your file permissions. Ensure you have the right permissions to upload files. Change these settings in your hosting account.
Fixing Compatibility Problems
Themes may not work with your WordPress version. Update WordPress to the latest version. This might solve the issue. Plugins can also cause problems. Deactivate all plugins and try again. If the theme works, activate plugins one by one. This helps find the problem plugin. Also, check if the theme requires certain plugins. Install any required plugins to make the theme work.
Credit: www.kadencewp.com
Frequently Asked Questions
How Do I Add A Downloaded Theme To WordPress?
To add a downloaded theme to WordPress, go to “Appearance” > “Themes” > “Add New”. Click “Upload Theme”, choose your downloaded theme file, and click “Install Now”. After installation, click “Activate” to apply the theme. Ensure the theme is compatible with your WordPress version.
How Do I Apply A Downloaded Theme?
To apply a downloaded theme, navigate to your platform’s theme settings. Select “Upload” and choose the theme file. Click “Activate” to apply the theme. Adjust settings to fit your preferences and save changes. Ensure your platform supports the theme format before uploading.
Enjoy your new design!
How Do I Add A Download File To WordPress?
To add a download file in WordPress, upload the file via the Media Library. Copy the URL provided. Insert this URL in a post or page using the “Insert Link” option. You can also use download plugins for advanced features like tracking and file management.
How Do I Upload A Downloaded Plugin To WordPress?
Go to your WordPress dashboard. Click on “Plugins” and then “Add New. ” Select “Upload Plugin. ” Click “Choose File,” select your downloaded plugin, and click “Install Now. ” After installation, activate the plugin.
Conclusion
Adding a downloaded theme to WordPress is simple and rewarding. Just follow the steps outlined above. Start by downloading your chosen theme. Then, log into your WordPress dashboard. Navigate to “Appearance” and select “Themes. ” Click “Add New” and “Upload Theme.
” Choose your theme file and click “Install Now. ” Once installed, activate it. Your website now has a fresh look. Customizing it further enhances your site’s appeal. Experiment with different themes to find the perfect fit. Enjoy the creative process.
Your WordPress site is now visually stunning and unique. Keep exploring and learning!


