Navigating the digital landscape can sometimes feel overwhelming, especially when it comes to managing your website. If you’re using Namecheap as your hosting provider, one of the first things you’ll want to master is accessing your cPanel.
This control panel is your gateway to managing files, databases, emails, and much more. But how do you get there without any hiccups? Imagine having the power to effortlessly manage your website’s backend, ensuring everything runs smoothly without the stress.
Understanding how to access Namecheap cPanel is the first step in taking control of your online presence. By the end of this guide, you’ll not only feel more confident but also equipped to handle your website like a pro. Dive in and discover how easy it can be to unlock the full potential of your Namecheap hosting account.

Credit: www.namecheap.com
Login To Namecheap Account
Accessing Namecheap Cpanel starts with logging into your Namecheap account. Navigate to the dashboard and locate the Cpanel button. Click it to manage your website settings effortlessly.
Accessing your Namecheap cPanel is an essential step in managing your web hosting account effectively. But first, you’ll need to log in to your Namecheap account. This process is straightforward, but it’s important to ensure that you do it correctly to avoid any hiccups. Let’s dive into the steps you need to take to make this happen seamlessly.Step 1: Visit The Namecheap Website
Begin by navigating to the Namecheap website. Typing ‘namecheap.com’ in your browser’s address bar will get you there. Once you’re on the homepage, look for the login button at the top right corner.Step 2: Locate The Login Button
On the top right of the Namecheap homepage, you’ll find the login button. Clicking this will direct you to the login page. It’s always interesting to see how familiar the layout becomes after a few visits.Step 3: Enter Your Credentials
Here’s where your memory or your password manager comes into play. Enter your username and password carefully. Ever mistyped your password and had a mini panic? Double-check to make sure you’re not locked out unnecessarily.Step 4: Click ‘sign In’
With your details entered, go ahead and click ‘Sign In’. This is the gateway to accessing the tools you need for managing your domain and hosting services. Do you ever wonder how many clicks it takes to manage your online presence?Step 5: Navigate To Cpanel
Once you’re logged in, you’ll be greeted by your dashboard. From here, find the cPanel link under your hosting package. It’s amazing how much control you have with just a few clicks. Logging in is the first step toward mastering your web presence. What’s your next move in optimizing your website?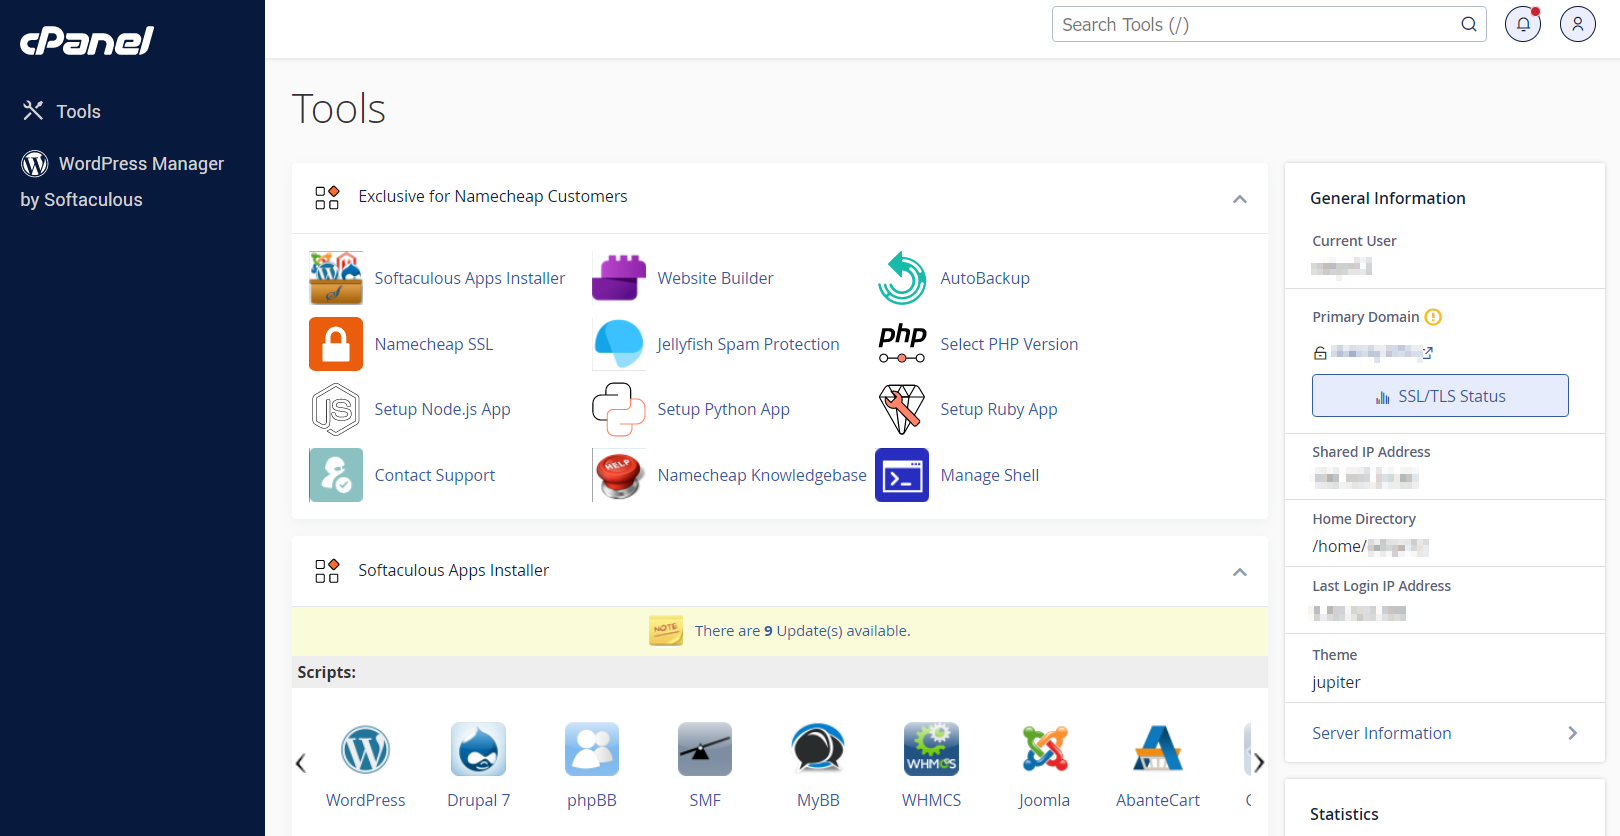
Credit: www.namecheap.com
Locate Cpanel Access
Accessing Cpanel on Namecheap can seem tricky for beginners. But it’s straightforward once you know where to look. This guide will help you locate the Cpanel quickly. Follow these steps to get started.
Log Into Your Namecheap Account
First, visit the Namecheap website. Click on the “Sign In” button at the top. Enter your username and password. Once logged in, you’ll reach your dashboard. This is where you manage your domains and services.
Navigate To The Dashboard
From the dashboard, find the “Domain List” on the left menu. Click on it to see all your registered domains. Here, each domain has options for managing hosting settings.
Select Your Domain
Choose the domain linked to your Cpanel. Click the “Manage” button next to it. This will open a new page with various options.
Locate The Cpanel Button
On the domain management page, look for the “Advanced” section. Here, you will find the “Cpanel” button. Click it to access the Cpanel login page directly.
Access The Cpanel
Once you click the “Cpanel” button, a new tab will open. It will take you to the Cpanel login screen. Enter your Cpanel username and password to log in.
Now you can manage your website settings. Enjoy exploring the various tools and features in Cpanel.
Navigate Cpanel Features
Accessing Namecheap’s Cpanel opens a world of website management tools. Understanding these tools enhances your website experience. Each feature offers unique ways to manage your site efficiently.
File Management
The File Manager helps you organize website files. You can upload, download, and edit files here. It’s like having a desktop interface on the web.
Email Accounts
Create and manage email accounts easily. Set up forwarding, autoresponders, and spam filters. This keeps your communication streamlined and professional.
Domain Management
Manage your domains effortlessly with Cpanel. Add, remove, or redirect domains in a few clicks. This ensures your website’s online presence is flexible and controlled.
Database Management
Cpanel provides tools for database creation and management. Use MySQL or PostgreSQL for your database needs. These tools ensure your website data is organized and accessible.
Software Installation
Install popular applications through Softaculous in Cpanel. From WordPress to Joomla, the options are vast. This simplifies the process of adding functionality to your site.
Security Settings
Enhance your site’s security using Cpanel’s features. Set up SSL certificates and manage firewalls. These tools help protect your site from potential threats.
Performance Optimization
Monitor and improve your site’s performance with analytics tools. Access metrics on site traffic and speed. This helps you make informed decisions to boost efficiency.

Credit: www.youtube.com
Frequently Asked Questions
How To Access Cpanel Through Namecheap?
Log into your Namecheap account. Navigate to “Domain List” and click “Manage” next to your domain. Select “Advanced DNS,” then click “cPanel” under “Hosting Type. ” Access cPanel using the credentials sent by Namecheap.
How Do I Access My Cpanel?
Access your cPanel by entering “yourdomain. com/cpanel” in your web browser. Use your username and password to log in. If you don’t have your credentials, contact your hosting provider. Ensure you’re using a secure connection for safety.
How To Access Terminal In Cpanel Namecheap?
Log in to your Namecheap cPanel account. Navigate to the “Advanced” section. Click on “Terminal” to access it.
Does Namecheap Come With Cpanel?
Yes, Namecheap provides cPanel with its shared hosting plans. It offers an intuitive interface for managing websites. Users can easily access tools for email management, file transfers, and domain settings. CPanel simplifies tasks for beginners and advanced users alike, enhancing the overall web hosting experience.
Conclusion
Accessing Namecheap Cpanel is straightforward with these steps. First, log into your Namecheap account. Click on “Hosting List” to find your domain. Next, select “Go to cPanel” for quick access. Remember your login details for future use. Once inside, explore the tools to manage your website.
From email settings to file management, you have control. Cpanel simplifies website tasks. It’s user-friendly and efficient. With practice, you’ll feel more comfortable navigating. Keep this guide handy for reference. Now, enjoy managing your site with ease.