
Are you ready to give your WordPress site a fresh, unique look? Changing the font is one of the easiest ways to instantly transform your website’s style and make your content stand out.
Whether you want a sleek, professional vibe or a fun, creative flair, picking the right font can make all the difference. But if you’ve ever wondered, “How do I change the font in WordPress? ” you’re in the right place.
You’ll discover simple, step-by-step methods to update your fonts quickly—no tech skills required. Keep reading, and you’ll learn how to customize your site’s typography to match your brand perfectly and keep visitors hooked.

Credit: wordpress.com
Font Changes In Block Themes
Block themes in WordPress offer a modern way to customize your site’s fonts. They use the Site Editor, making font changes simple and direct. You can adjust fonts for headings, paragraphs, and other text elements easily. This approach gives you more control over your site’s look and feel.
Accessing The Site Editor
Start by logging into your WordPress dashboard. Go to Appearance > Editor. This opens the Site Editor for block themes. Here, you can edit your entire site’s design, including fonts. The interface shows a live preview of your site.
Editing Typography Settings
In the Site Editor, find the Styles button in the top right corner. Click it, then select Typography. You will see options to change fonts for headings, body text, and links. Choose the font that fits your brand or style. Adjust font size, weight, and spacing as needed.
Customizing Text Elements
Select specific text elements to customize. For example, choose headings to pick a bold font. Or choose body text for a clean, readable font. You can change fonts for links and buttons too. These settings help create a consistent look across your site.
Saving And Publishing Changes
After making font changes, click the Save button at the top right. This updates your site’s styles immediately. To make the changes live, select Publish. Your visitors will see the new fonts on your site. You can always return to the Editor to tweak fonts again.
Font Changes In Classic Themes
Changing fonts in classic WordPress themes is simple and effective. These themes use the Customizer tool for font updates. The Customizer lets you see changes live before saving them. This section explains how to change fonts step-by-step in classic themes.
Opening The Customizer
First, log in to your WordPress dashboard. Next, go to Appearance and click Customize. This opens the Customizer panel where you manage your site’s look. The panel shows live previews of your site on the right side.
Finding Typography Options
Inside the Customizer, look for sections named Fonts, Typography, or Theme Options. Some themes place font settings under a general Appearance tab. Click the typography section to access font settings. If you do not see these options, your theme may not support font changes here.
Selecting Fonts For Elements
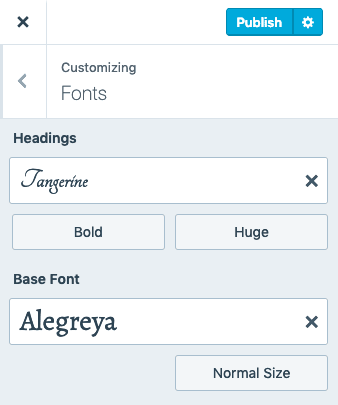
After opening typography settings, choose fonts for various elements. Common elements include headings, paragraphs, and links. Click the dropdown menus to pick your desired fonts. Some themes offer font size, style, and weight options. Choose fonts that match your site’s style and are easy to read.
Applying And Saving Updates
Once you select your fonts, review the preview on the right side. Make sure the fonts look good on all parts of your site. Click Publish or Save & Publish at the top to apply the changes. Your new fonts are now live and visible to visitors.
Using Font Plugins
Using font plugins in WordPress makes changing fonts simple and flexible. Plugins offer many font choices beyond your theme’s defaults. They provide easy controls for font styles, sizes, and weights. This approach suits users who want more font options without coding. Below are the steps to use font plugins effectively.
Installing Font Plugins
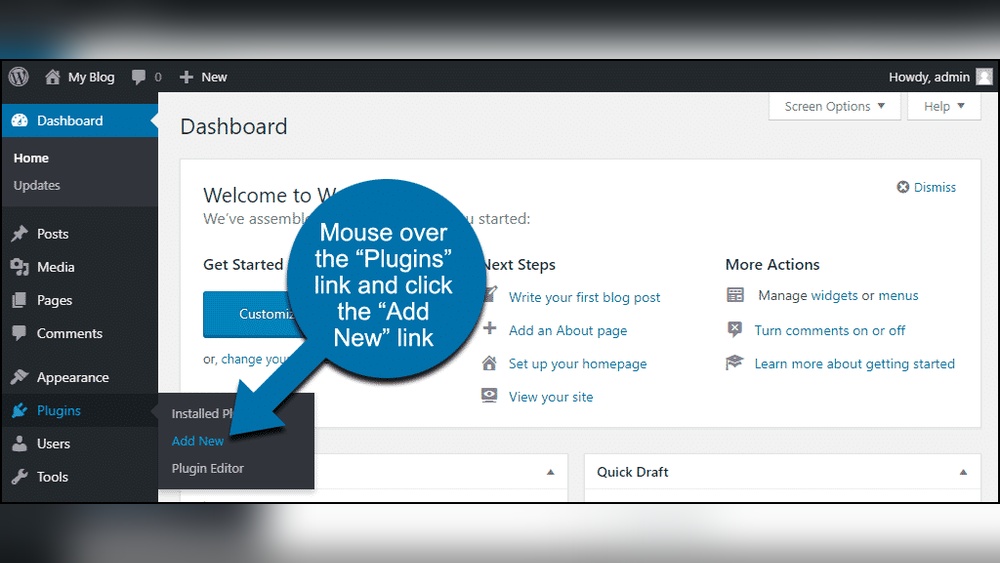
Log in to your WordPress dashboard first. Go to Plugins > Add New. Type “font” or “Google Fonts” in the search box. Find a plugin like Easy Google Fonts or similar. Click Install Now and then Activate. The plugin is ready to use after activation.
Activating And Accessing Plugin Settings
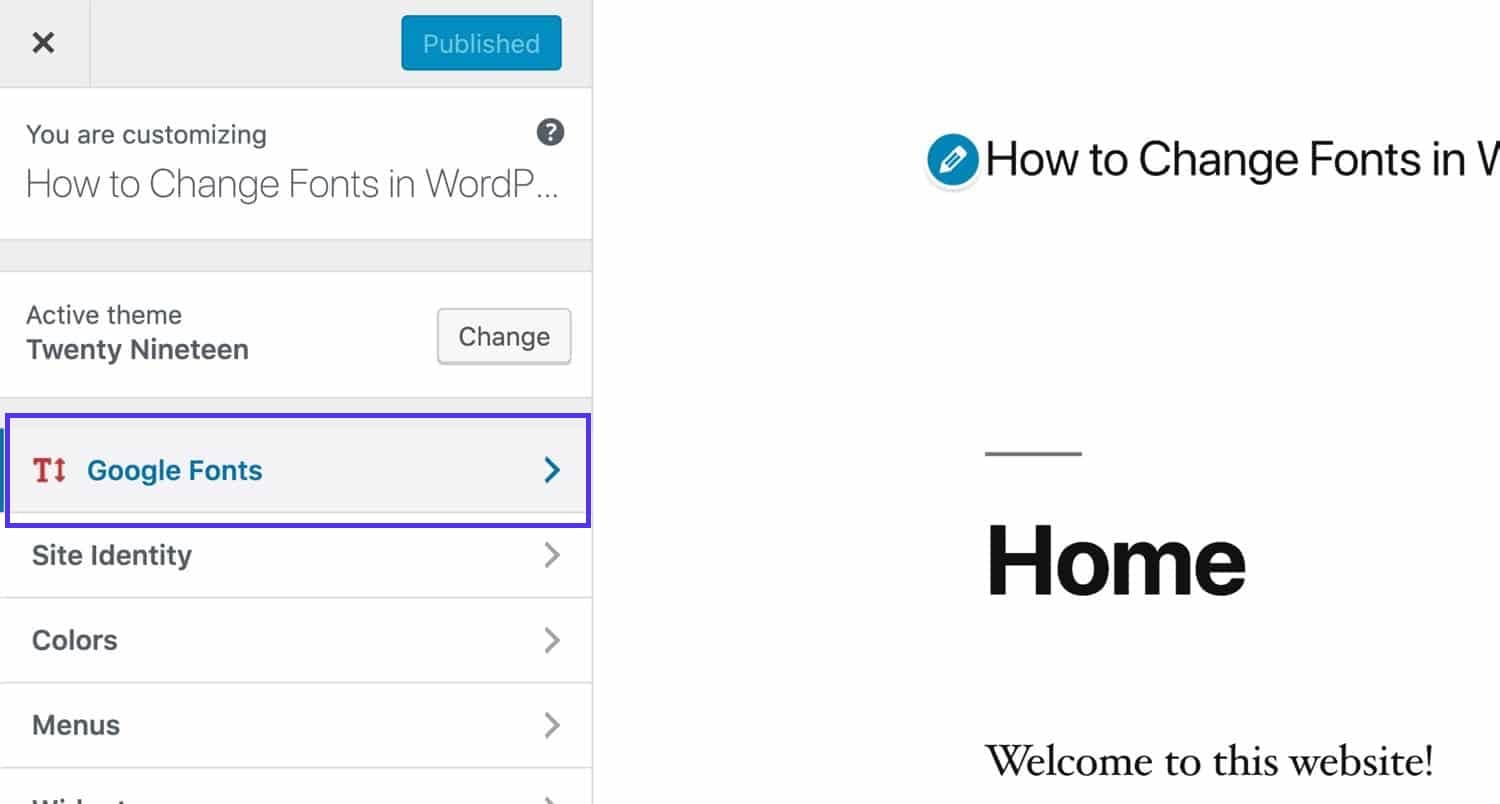
Once activated, the plugin often adds a new menu item. Check under Appearance for options like Fonts or Typography. Click on it to open the font settings panel. Some plugins integrate with the Customizer for live previews. Explore the settings to understand font choices and controls.
Changing Fonts With Plugins
Choose the text element you want to change, such as headings or paragraphs. Select a font from the list provided by the plugin. Adjust font size, weight, and style if available. Many plugins show a preview of your font changes. Make sure your selection fits your site’s style and readability.
Publishing Font Updates
After selecting fonts, save your changes within the plugin’s panel. If using the Customizer, click Publish to apply updates live. Visit your site to confirm the new fonts appear correctly. Clear your browser cache if changes do not show immediately. Your site now displays fresh, customized fonts.
Credit: kinsta.com
Tips For Stunning Typography
Typography plays a key role in making your WordPress site look professional and easy to read. Good font choices help visitors focus on your content. Simple tweaks to font styles can improve the overall feel of your website.
Use these tips for stunning typography to enhance your site’s design and user experience.
Choosing Complementary Fonts
Select fonts that match your site’s style and message. Pair a simple font for body text with a more decorative font for headings. Avoid using too many different fonts to keep a clean look. Stick to two or three fonts that work well together.
Adjusting Font Sizes And Weights
Set font sizes based on the importance of the content. Headings should be larger and bolder than body text. Use font weights to add emphasis without overwhelming the reader. Keep sizes consistent across pages for a balanced design.
Improving Readability And Spacing
Choose fonts that are easy to read on all devices. Adjust line height and letter spacing to avoid cramped text. Use enough space between paragraphs and headings to guide the reader’s eye. Clear spacing makes your content inviting and accessible.
Troubleshooting Font Issues
Font issues can disrupt your website’s look and user experience. Troubleshooting these problems helps keep your site professional and readable. Fixing font issues often requires checking several possible causes. This section covers common font problems and how to solve them quickly.
Fonts Not Showing Correctly
Fonts may not display properly due to missing files or incorrect settings. Check if the font you selected is supported by your theme. Some fonts require extra steps to load, like adding code or using plugins. Ensure the font files are uploaded or linked correctly. Test your site on different browsers to confirm the issue. Sometimes, a simple font replacement fixes the problem.
Plugin Conflicts
Plugins can cause font conflicts by overriding style settings. Disable recently added plugins one by one to find the cause. Some font plugins may clash with your theme or other plugins. Use only one font plugin at a time to avoid conflicts. Update all plugins and themes to their latest versions. A clean, updated setup reduces font display problems.
Clearing Cache After Changes
Changes to fonts may not show immediately due to cached data. Clear your browser cache to see the latest updates. If you use a caching plugin, purge its cache after changing fonts. Clear your CDN cache if your site uses one. This ensures new font files load correctly. Refresh your site to verify the font changes appear as expected.
Credit: wordpress.com
Frequently Asked Questions
How Do I Change The Text Font On WordPress?
To change fonts in WordPress, go to Appearance > Editor for block themes or Appearance > Customize for classic themes. Select Typography or Fonts, pick your desired font, and save changes. You can also use font plugins like Easy Google Fonts to customize fonts easily.
How Do I Change The Style In WordPress?
To change style in WordPress, go to Appearance > Editor (block themes) or Appearance > Customize (classic themes). Select Typography or Fonts. Choose and adjust fonts for headings, text, and links. Save changes. Plugins like Easy Google Fonts can also customize fonts easily.
How Do I Change The Font Style Of A Text?
To change a text font, go to Appearance > Editor or Customize in WordPress. Select Typography, pick your font, and save changes. Alternatively, install a font plugin, activate it, then choose and apply fonts via the plugin settings.
Why Can’t I Change Font Size In WordPress?
You can’t change font size in WordPress if your theme or block editor lacks typography controls. Use a compatible theme, customizer, or font plugin to adjust sizes.
Conclusion
Changing fonts in WordPress is simple and quick. Use the Site Editor for block themes or the Customizer for classic ones. Plugins offer extra font options if needed. Choose fonts that fit your style and improve readability. Save your changes and check your site.
Small font tweaks can make a big difference. Keep experimenting until your site looks just right. Your WordPress site will feel fresh and unique with new fonts.


