
Are you ready to unlock the potential of your very own website? Installing WordPress on your web hosting is your first step towards creating an online presence that stands out.
Whether you’re setting up a personal blog, an online store, or a professional portfolio, WordPress offers you the flexibility and power to bring your vision to life. But if you’re feeling overwhelmed by the technical jargon or worried about making a mistake, don’t fret.
This guide is designed just for you, to walk you through the process step-by-step. We’ll simplify the technical steps, so you can focus on what truly matters – your content and creativity. Ready to dive in and get your WordPress site up and running smoothly? Let’s get started!
Choosing A Web Host
Picking the right web host is key. Look for reliable service providers. Check their customer support and uptime guarantees. Reviews from other users can be helpful. Also, see if they offer easy WordPress installation.
Shared hosting is cheaper. But you share space with others. This can slow your site. Dedicated hosting gives you more control. It’s faster but costs more. Choose based on your needs and budget.
Make sure the host supports WordPress. Check if they have PHP and MySQL. These are needed for WordPress. Some hosts offer special features for WordPress. This can make your life easier.
Setting Up Domain Name
First, choose a unique name for your website. This is your domain name. Popular sites like GoDaddy can help you register. Registering a domain is easy. Just type your chosen name. Check its availability. If it’s available, you can buy it. Some names cost more than others. Price depends on how popular the name is.
After buying, set up your domain. Go to your domain’s control panel. Find the DNS settings. DNS means Domain Name System. Change the nameservers to your hosting provider’s details. Your hosting provider gives you these details. This links your domain to your hosting. It may take some hours to update. Be patient.
Accessing Control Panel
First, find the login page for your web hosting account. Enter your username and password. If you forget, check your email for login details. This email comes when you buy hosting.
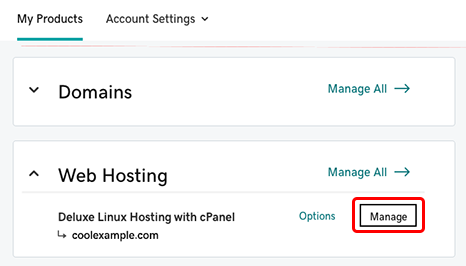
Once logged in, you see the control panel dashboard. It looks like a big menu. It has many buttons and links.
On the dashboard, look for a button called “WordPress” or “Apps.” Click on it to open. Now, you see more options. Some dashboards have a search bar. You can type “WordPress” there.
Click the WordPress icon. Follow the steps to install. Each step has instructions. Read them carefully. In a few clicks, WordPress is ready.
Credit: www.youtube.com
Using One-click Installers
Web hosting providers often offer one-click installers for WordPress. These tools save time. Usually found in the control panel. Look for sections labeled Software or Apps. Some call it Softaculous or QuickInstall. Finding these tools is the first step.
After locating, start the installation process. Click on the WordPress icon. Follow the prompts. Choose your domain. Set up username and password. Keep them safe. Installation takes a few minutes. Once done, access your site. Start building your blog or website. Easy and quick setup.
Manual WordPress Installation
Start by visiting the WordPress website. Find the download button and click it. Save the file on your computer. The file will be a zip. Unzip the file when the download is complete. This gives you the WordPress folder.
Open an FTP client like FileZilla. Connect to your web server using your FTP details. Find the WordPress folder on your computer. Drag the folder to your server’s root directory. Wait for the files to upload. Check if all files are uploaded.
Access your web hosting control panel. Look for MySQL databases. Click to create a new database. Name your database and save it. Create a username and password for the database. Keep these details safe. They are needed later.
Locate the wp-config-sample.php file in your WordPress folder. Rename it to wp-config.php. Open the file in a text editor. Enter your database name, username, and password. Save the file. Upload the modified wp-config.php to your server.
Credit: mythemeshop.com
Finalizing Installation
Complete your WordPress setup by clicking the ‘Install’ button. Follow on-screen prompts to finalize installation. Access your new WordPress site by logging into the admin dashboard.
Completing Setup Wizard
The setup wizard is easy to follow. Click “Next” to move forward. Each step is simple. Follow the instructions on the screen. Make sure all details are correct. This ensures a smooth installation. If something is wrong, go back and fix it.
Setting Up Admin Account
Create a strong password for your account. Choose a username that is easy to remember. Avoid using “admin” for security reasons. Write down your login details. Keep them in a safe place. This will help you log in easily next time.
Customizing Site Settings
Begin by adjusting your site title. This is the name of your website. Set your tagline too. It’s a short description of your site. Choose a theme that you like. A theme changes how your site looks. Explore different options to find the best fit. Finally, save all changes to keep your settings.
Troubleshooting Common Issues
Installing WordPress on web hosting can bring common issues. Slow loading times often result from large images or plugins. Incorrect folder permissions might cause upload errors, while outdated PHP versions can lead to compatibility problems.
Dealing With Installation Errors
WordPress installation errors can be confusing. Often, these errors happen due to incorrect file permissions. Ensure your files have the right permissions set. Another common issue is missing files. Always check if all files uploaded correctly. Sometimes, the PHP version might not be compatible. Check if your hosting supports the required version. Lastly, some plugins or themes can cause conflicts. Try disabling them temporarily and see if the error resolves.
Resolving Database Connection Problems
Database connection issues are common in WordPress. First, ensure your database credentials are correct. These include the database name, username, and password. Check the wp-config.php file for any mistakes. Sometimes, the database server might be down. You can contact your hosting provider for assistance. Also, verify if the database host is set correctly. It is usually ‘localhost’, but this can vary.
Credit: www.godaddy.com
Post-installation Tips
Ensure your WordPress site is secure by changing default login credentials. Regularly update plugins for optimal performance. Backup your website frequently to prevent data loss.
Selecting Themes And Plugins
Choose a theme that matches your site’s purpose. Themes affect how your site looks. Check reviews before picking a theme. Plugins add features to your site. Too many plugins can slow your site. Pick only what you need.
Ensuring Site Security
Security is important for your site. Use strong passwords for all accounts. Update WordPress and plugins regularly. Install a security plugin for extra protection. Back up your site often. This helps if something goes wrong.
Optimizing Site Performance
Performance is key to keep visitors happy. Optimize images so they load fast. Use a caching plugin. This helps your site run smoother. Check your site speed often. A faster site is better for everyone.
Frequently Asked Questions
How To Install WordPress On A Web Host?
Start by downloading WordPress from its official site. Upload the files to your web host. Create a MySQL database and user. Run the WordPress installation script by accessing your site’s URL. Follow the prompts to complete the setup.
How Do I Install WordPress On My Local Host?
Download and install XAMPP. Start Apache and MySQL. Download WordPress and extract it in the XAMPP “htdocs” folder. Create a MySQL database in phpMyAdmin. Run WordPress installation by accessing “localhost/your-folder-name” in your browser. Complete setup by following prompts.
Can I Install WordPress On Shared Hosting?
Yes, you can install WordPress on shared hosting. Many providers offer one-click installation options. Ensure the hosting meets WordPress requirements, like PHP and MySQL support. Shared hosting is cost-effective and suitable for small to medium websites. Regularly update WordPress for security and performance improvements.
How Do I Upload WordPress To Hosting?
Upload WordPress by downloading it from WordPress. org. Use FTP to transfer files to your hosting server. Create a MySQL database, then run the WordPress installation script. Follow prompts to complete setup. Ensure you have database information ready for the installation process.
Conclusion
Installing WordPress on web hosting is simple. Follow steps carefully. Start by choosing a reliable host. Download WordPress from its official site. Use FTP to upload files. Create a database using your hosting control panel. Run the WordPress installation script.
Fill in required details like site name and admin credentials. Check your site after setup. Everything should work smoothly. Regularly update WordPress for security and features. Now, enjoy your new website. Share your thoughts and experiences. Encourage others to build their own sites.
Your journey into WordPress is just beginning!


