
Are you tired of relying on third-party web hosting services that limit your control and customization? Imagine having the power to manage your own server, tailor it to your needs, and save money in the long run.
Setting up your own server for web hosting isn’t just for tech experts; with the right guidance, anyone can do it. This guide will walk you through the process step-by-step, ensuring you have all the tools and knowledge you need.
Dive in to discover how you can take control of your online presence and make your website truly your own. Ready to unlock the potential of web hosting on your terms? Let’s get started!

Credit: www.siteuptime.com
Choosing The Right Hardware
Processors are the heart of your server. Choose strong CPUs. More cores mean better performance. Memory is key for speed. At least 16GB RAM is good. Network ports should be fast. Gigabit is ideal.
Choose SSD for fast data access. They are quicker than HDDs. Storage size depends on your needs. 500GB is a good start. Backups are important. Consider external storage for safety.
Servers use power all the time. Look for energy-efficient options. They save money and help the environment. Check for power ratings. Lower is better. Cooling systems matter. Efficient cooling saves energy.
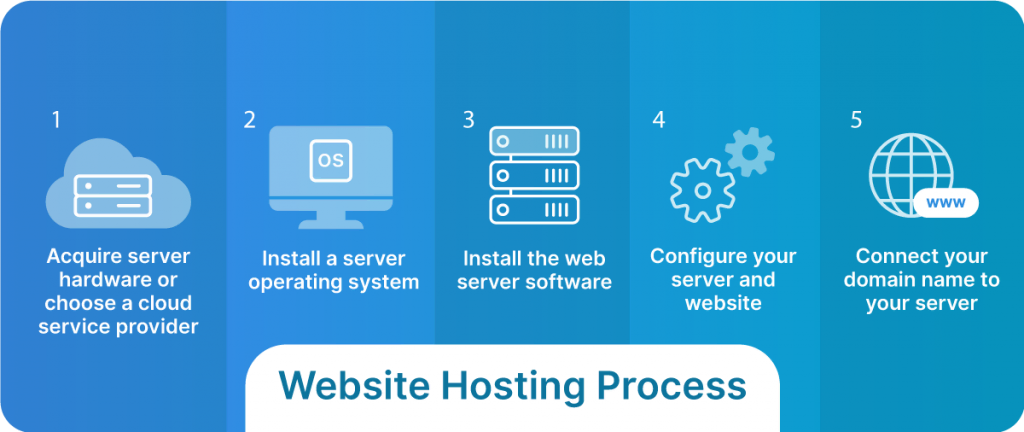
Credit: www.liquidweb.com
Selecting The Operating System
Choosing the right operating system is vital for setting up your web hosting server. Consider factors like compatibility and support. Linux is popular for its stability and open-source nature, while Windows offers ease of use with many applications. Your choice impacts performance and security.
Linux Vs. Windows
Linux is popular for web servers. It’s open-source and free. Many web developers choose Linux. Windows is also an option. It is user-friendly and supports many applications. Linux offers flexibility and stability. Windows has great support and updates. Both have unique features. Choose based on your needs and skills.
Popular Distributions
Popular Linux distributions include Ubuntu, CentOS, and Debian. Ubuntu is beginner-friendly. CentOS is stable for enterprises. Debian is known for its reliability. Windows Server editions like Windows Server 2019 are widely used. Each distribution offers different features. Pick the one that fits your project.
Installation Tips
- Check system requirements before installing.
- Backup your data.
- Create a bootable USB drive.
- Follow installation guides step-by-step.
- Choose correct partition settings.
- Enable firewall and security settings.
Network Configuration
Setting up an IP address is the first step. It helps computers talk to each other. First, find your server’s IP. Next, ensure it is unique. Avoid using the same IP for different devices. This can cause confusion. Use a static IP for a stable connection. Dynamic IPs change often. Static IPs stay the same. They are more reliable for servers.
DNS helps translate website names into IP addresses. It’s like a phonebook for the internet. Set up your DNS records carefully. Use A records for mapping domain names to IPs. CNAME records are for aliases. Double-check for errors. They can cause connection issues. Always keep your DNS settings updated.
Firewalls protect your server from threats. They act like guards. Only let trusted data through. Set up rules for your firewall. Allow only necessary services. Block everything else. This keeps your server safe. Regularly update your firewall. New threats appear often. Staying updated is crucial for security.

Credit: www.youtube.com
Web Server Software
Apache and Nginx are popular web servers. Apache is known for its flexibility. Nginx is fast and uses less memory. Each has its own strengths. Apache supports many modules. Nginx handles static files quickly. Choosing depends on your needs.
Installing Apache is simple. First, open the terminal. Then type sudo apt-get install apache2. Nginx is also easy. Use the command sudo apt-get install nginx. Wait for it to finish. Follow on-screen prompts. Check if the server is running. Open your browser. Type localhost in the address bar.
Optimizing performance is important. Use caching to speed up your server. Enable gzip compression. This reduces file sizes. Limit the number of connections. Monitor server load regularly. Adjust settings as needed. Keep your software updated. This ensures better security. Happy hosting!
Database Setup
Picking the right database system is crucial. Popular choices include MySQL and PostgreSQL. Each has its own strengths. MySQL is easy to use. PostgreSQL offers more features. Check what your project needs. This helps in making the best choice.
Installing a database is simple. First, download the software. Then follow the steps to install it. Each system has guides. These guides are easy to follow. After installing, configure your database. Set up users and permissions. This keeps your data organized.
Security is very important. Always use strong passwords. Update your database regularly. This keeps it safe from threats. Limit user access. Only give access to those who need it. Backup your data often. This protects your information. A secure database runs smoothly.
Domain Name Registration
Pick a name that is easy to remember. It should be short and simple. Avoid complex words or numbers. Names like “mywebsite.com” are good. They are clear and precise. Check if the name is available. Use tools online for this task.
Visit a domain registrar website. Popular ones are GoDaddy and Namecheap. Create an account. Enter your chosen domain name. Follow the steps. You need to pay a fee. This fee is yearly. Complete the payment to own the domain.
Find your server’s IP address. Log into your domain registrar account. Go to DNS settings. Enter the IP address there. Save changes. This connects your domain to the server. It might take a few hours. Soon, your website will be online.
Ssl Certificate Installation
Installing an SSL certificate ensures a secure connection for your website. Enhance your server setup by adding this layer of protection. A secure site builds trust with visitors and improves search engine rankings.
Importance Of Ssl
SSL certificates keep your data safe. They protect it from hackers. Secure sites get more trust. Users feel safe on them. Google likes secure sites too. It helps with SEO ranking. An SSL certificate is a must. Your site needs one.
Obtaining A Certificate
Get an SSL from a trusted provider. Choose the right type. Domain validation is basic. Organization validation is better. Extended validation is best. Check the costs. Compare providers. Some offer free SSL. Let’s Encrypt is popular. Decide based on needs.
Installation Steps
- Buy your SSL certificate.
- Get the certificate files.
- Access your server panel.
- Locate the SSL settings.
- Upload the certificate files.
- Activate the SSL on your server.
- Test your site for errors.
Website Deployment
Use an FTP client to upload your website files. Popular options include FileZilla and Cyberduck. Connect to your server with your username and password. Drag and drop your files into the public_html folder. This is where your site lives. Double-check that all files are in the right place. Incorrect file paths can cause errors.
Open a browser and type your site’s URL. Your website should load quickly and correctly. Check each page to ensure everything is working. Look for broken links and missing images. Test on different devices like phones and tablets. Make sure it looks good everywhere. This step ensures a smooth user experience.
Sometimes errors happen. A 404 error means a page isn’t found. Check your file paths again. A 500 error is a server issue. Restart your server and try again. If images won’t load, check the file names. They should match exactly. Use simple tools like Pingdom to check performance. Ask for help if needed.
Regular Maintenance
Updating Software is very important. It keeps your server safe. Old software might have bugs. Bugs can cause problems. Always use the latest version. Check for updates often. Many updates fix security holes. Your server will work better with updates.
Monitoring Performance helps you know how your server is doing. Look at speed and uptime. Slow servers make websites bad. Use tools to watch the server. These tools show if there are issues. Fix problems quickly. Good performance makes users happy.
Backup and Recovery is a safety net. Things might go wrong. Backups save your data. You can recover lost files. Make backups often. Store them safely. Test recovery steps regularly. This ensures everything works. You will not lose important stuff.
Frequently Asked Questions
Can I Create My Own Web Hosting Server?
Yes, you can create your own web hosting server. You’ll need a computer, reliable internet connection, and server software. Consider security measures, regular backups, and hardware maintenance for smooth operation. Ensure legal compliance and understand technical aspects to manage it effectively.
Can I Host My Website On My Home Server?
Yes, you can host your website on a home server. Ensure stable internet, adequate hardware, and security measures. A dedicated IP address is recommended. Home servers may lack professional support and uptime guarantees. Consider potential legal and ISP restrictions.
How Much Does It Cost To Run A Server For A Website?
Running a server for a website costs $5 to $500 monthly. Costs depend on hosting type, server specifications, and traffic. Shared hosting is cheaper, while dedicated servers are more expensive. Choose based on your website’s needs and budget. Always compare providers for the best deal.
Do You Need A Server For Web Hosting?
Yes, web hosting requires a server. Servers store website files and make them accessible online. Options include shared, VPS, or dedicated servers. Choose based on your site’s needs and traffic. Reliable hosting enhances site performance and user experience.
Conclusion
Setting up your own server is a rewarding task. You gain control and flexibility. It requires patience and learning. Start small, then expand as needed. Choose the right hardware. Install reliable software. Keep security in mind always. Regular maintenance ensures smooth operation.
Troubleshoot issues promptly. Hosting your website brings satisfaction. You see your efforts come to life. With dedication, you manage your server efficiently. It’s a journey worth taking. Explore more resources to deepen your knowledge. Enjoy the process of building and hosting.


