
Are you struggling to make your WordPress posts stand out? Adding a featured image can instantly grab your reader’s attention and give your content a professional look.
But if you’re not sure how to add one, don’t worry—you’re in the right place. In this guide, you’ll learn exactly how to add a featured image to your WordPress post, step by step. By the end, you’ll be able to enhance your posts and attract more readers with eye-catching visuals.
Keep reading, and let’s make your blog posts shine!
Choosing The Right Featured Image
Choosing the right featured image is important for your WordPress post. The image grabs attention and shows what the post is about. A good image makes readers want to click and read more. Picking the right image also helps your post look professional and clear.
Image Size And Dimensions
Select an image size that fits well on your website. Large images take longer to load and can slow down your site. Small images may look blurry or pixelated. A common size for featured images is 1200 by 628 pixels. This size works well on most screens and social media platforms.
Best Image Formats
Choose the right file format for your image. JPEG is great for photos with many colors. It keeps the file size smaller. PNG works well for images with text or logos. It keeps sharp edges and transparency. WebP is a newer format. It offers good quality and smaller file sizes but may not work on all browsers.
Optimizing For Speed And Seo
Compress your images before uploading. Smaller files help your page load faster. Fast sites improve user experience and search rankings. Use descriptive file names with keywords. This helps search engines understand your image. Add alt text that describes the image clearly. Alt text improves accessibility and boosts SEO.
Credit: www.hostinger.com
Accessing The WordPress Post Editor
To add a featured image to a WordPress post, start by opening the post editor. This editor is where you write and format your content. WordPress offers two main types of editors. Each one has a slightly different way to access the featured image section. Knowing which editor you use helps you find the right tools quickly.
Classic Editor Vs Block Editor
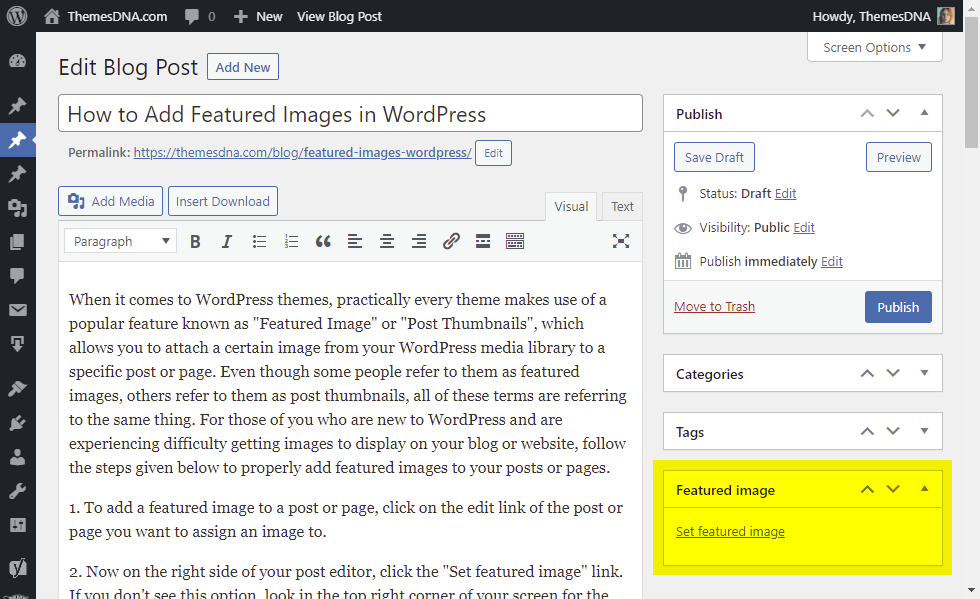
The Classic Editor looks like a simple text box with some buttons above it. It feels like a word processor. You write your post in this box. The featured image option appears in a box on the right side of the screen.
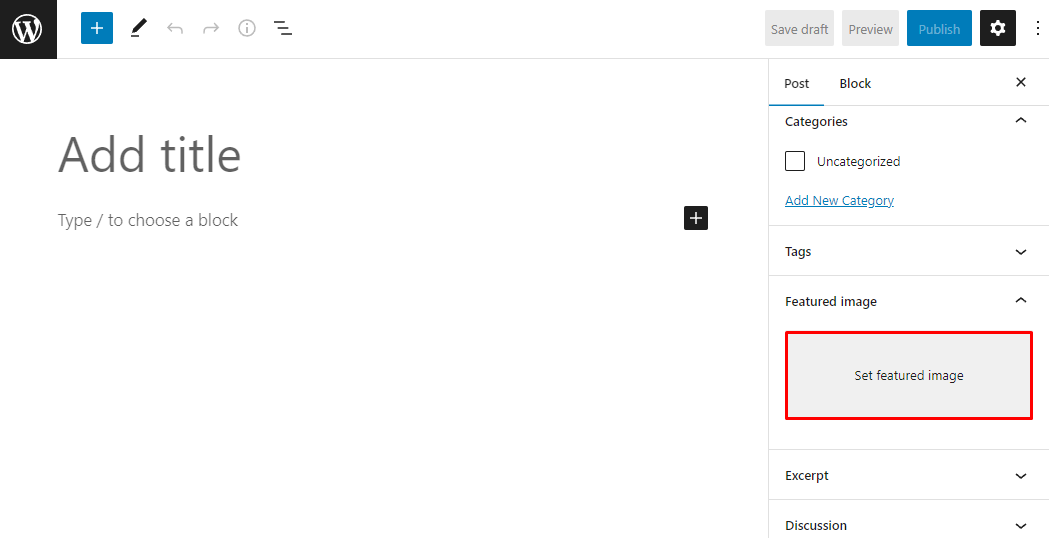
The Block Editor, also called Gutenberg, breaks your content into blocks. Each block holds a different type of content, like text, images, or videos. The featured image option is found in the settings sidebar on the right side of the screen.
Navigating To The Featured Image Section
In the Classic Editor, find the “Featured Image” box on the right side. Click “Set featured image” to open your media library. Choose an image or upload a new one. Then click “Set featured image” to confirm.
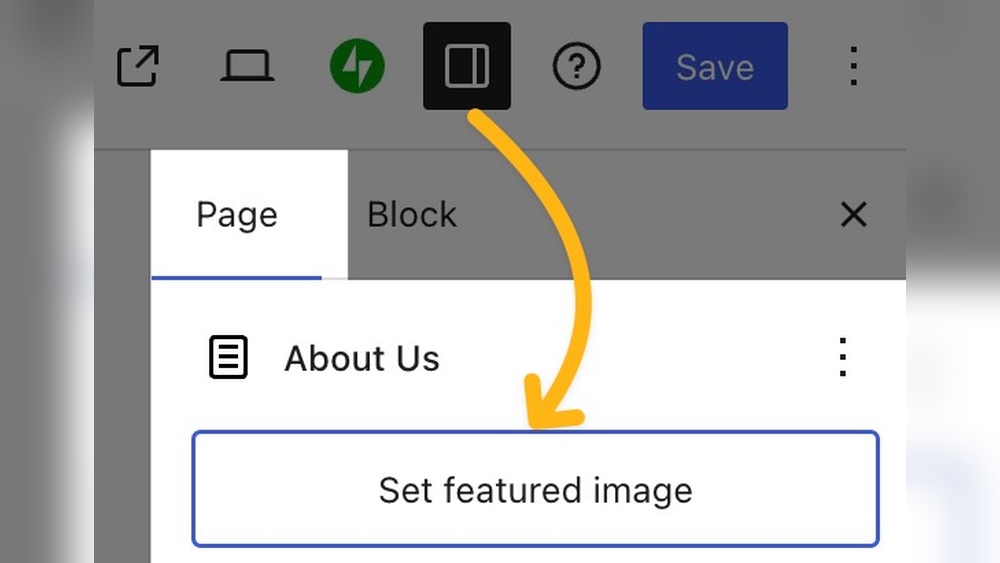
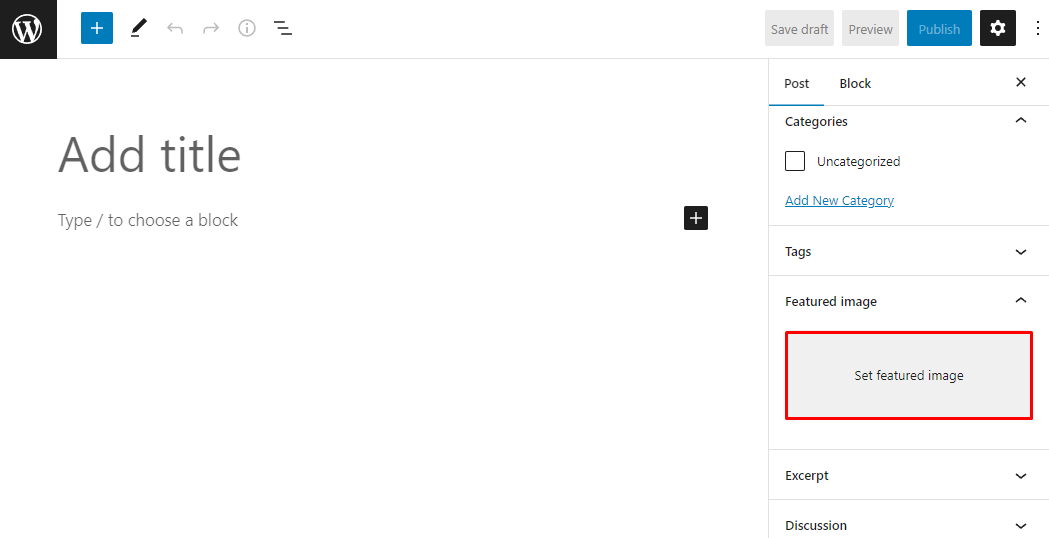
In the Block Editor, click the gear icon to open the settings. Look for the “Featured Image” panel. Click it to expand. Select or upload the image you want. Click “Set featured image” to apply it to your post.
Uploading And Selecting An Image
Adding a featured image to your WordPress post makes it more attractive and draws readers’ attention. You can upload a new image or select one from your existing media library. Both options are simple and quick. This section explains how to upload and choose images step by step.
Uploading From Computer
To upload an image from your computer, open the post editor. Find the “Featured Image” box on the right side. Click on “Set featured image” to open the media window. Then, click the “Upload Files” tab. Drag your image file or click “Select Files” to browse your computer. After uploading, the image preview appears. Click “Set featured image” to confirm. The image now shows in the featured image box.
Choosing From Media Library
Choose an image already saved in your WordPress media library. Open the “Featured Image” box in the post editor. Click “Set featured image” to open the media window. Select the “Media Library” tab. Scroll or search for the image you want. Click on the image to highlight it. Then click “Set featured image.” The chosen image now appears in the featured image box ready to use.
Setting The Featured Image
Setting the featured image in a WordPress post helps your content stand out. This image appears on the post page and in previews. It gives readers a quick idea about the post’s topic. The process is simple and fast.
Follow clear steps to set the image correctly. This ensures your post looks professional and inviting.
Assigning The Image To The Post
Go to the post editor in WordPress. Find the “Featured Image” option on the right side. Click “Set Featured Image.” Choose an image from your media library or upload a new one. After selecting, click the “Set Featured Image” button. The image now links to your post as the featured image.
Previewing The Image Placement
Click the “Preview” button to see how the image looks. Check the image position and size on your post page. Make sure it fits well with the content. If the image looks off, go back and choose a different one. Adjust until it matches your post style and theme.
Editing Or Changing The Featured Image
Editing or changing the featured image in a WordPress post is simple and fast. It helps keep your content fresh and visually appealing. You can remove an old image or replace it with a new one anytime. This flexibility improves your post’s look and reader engagement.
Removing An Existing Featured Image
To remove a featured image, open the post in WordPress editor. Find the “Featured Image” box on the right side. Click on the “Remove featured image” link below the current image. The image will disappear, leaving the post without a featured image. Save or update your post to keep the change.
Replacing With A New Image
Replacing the featured image is easy. First, remove the old image as described above. Then, click “Set featured image” in the same box. Choose a new picture from your media library or upload a fresh file. Select the image and click “Set featured image.” Update the post to apply your new picture.
Credit: www.hostinger.com
Troubleshooting Common Issues
Troubleshooting common issues helps keep your WordPress posts looking great. Problems with featured images can hurt your post’s appeal. Fixing these issues quickly improves user experience. Let’s explore common problems and easy solutions.
Featured Image Not Showing
First, check if the featured image is set correctly. Sometimes, the image is not assigned to the post. Open the post editor and look for the “Featured Image” box. Make sure an image is selected there.
Next, clear your site cache. Cached pages may show old versions without the new image. Also, deactivate plugins one by one. Some plugins block featured images from appearing.
Switch to a default theme like Twenty Twenty-One. This helps check if the theme causes the issue. If the image shows up, your theme may have a bug or conflict.
Image Size Not Displaying Correctly
WordPress uses different image sizes for thumbnails and full images. Sometimes, the featured image looks blurry or stretched. Check the theme’s image size settings. Your theme may crop images to fixed dimensions.
Upload images that match the recommended size. Large or small images can distort display. Use image editing tools to resize before uploading.
Regenerate thumbnails using a plugin. This fixes size problems by creating new image versions. Lastly, review CSS styles. Custom styles might affect image size or alignment.
Enhancing Featured Images With Plugins
Plugins help improve the look and function of featured images in WordPress. They offer extra options that the default editor does not have. Using plugins can make your posts more attractive and easier to manage.
Many plugins help with resizing, cropping, and optimizing images. Others make it simple to add captions and alt text. These features improve user experience and boost SEO.
Popular Plugins For Image Management
Some plugins help you control your featured images better. “Regenerate Thumbnails” lets you resize images quickly. “Smush” compresses images without losing quality. “Envira Gallery” creates beautiful image galleries. These tools save time and keep images looking good.
Adding Captions And Alt Text
Captions explain images to your readers. They add context and make your posts clearer. Alt text helps search engines understand images. It also improves accessibility for users with disabilities. Many plugins let you add captions and alt text easily. This improves SEO and user experience.
Credit: themesdna.com
Frequently Asked Questions
What Is A Featured Image In WordPress Posts?
A featured image represents your post visually. It appears on your blog homepage, archives, and social shares. It helps attract readers and improves post presentation.
How Do I Add A Featured Image In WordPress?
Open the post editor, find the “Featured Image” box, click “Set featured image,” choose or upload an image, then click “Set featured image. ” Finally, update or publish your post.
Can I Change The Featured Image After Publishing?
Yes, you can. Simply edit the post, open the “Featured Image” box, select a new image, and save your changes. The new image will replace the old one.
Why Is Adding A Featured Image Important For Seo?
Featured images enhance user engagement and improve click-through rates. They make your posts visually appealing and can increase traffic from social media and search results.
Conclusion
Adding a featured image helps your WordPress posts stand out. It draws readers’ attention and makes posts look professional. The process is simple and quick to learn. Use images that match your content for best results. Always check image size and quality before uploading.
This small step improves your website’s appearance and user experience. Keep practicing to get comfortable with adding featured images. It boosts your blog’s visual appeal and keeps readers engaged. Try adding a featured image in your next post today.


