
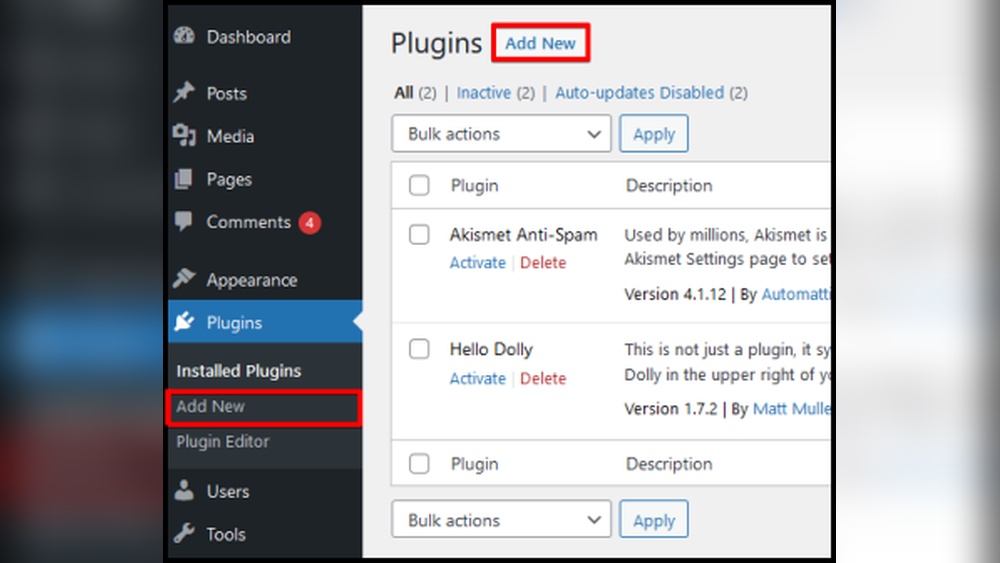
Are you ready to get your WordPress site up and running but don’t know where to start? Activating WordPress might sound tricky, but it’s actually a simple step that opens the door to endless possibilities for your website.
Whether you want to blog, sell products, or showcase your work, activating WordPress is your first move toward making it all happen. Keep reading, and you’ll learn exactly how to activate WordPress quickly and easily—no confusion, no hassle. Let’s get your website live and working for you!
Choosing The Right WordPress Plan
Choosing the right WordPress plan is the first step to build a strong website. Picking the best plan saves money and fits your needs. It affects your site’s speed, security, and design options. Understanding the differences helps you avoid future problems.
Free Vs Paid Plans
Free plans offer basic tools and limited storage. They include ads that you cannot remove. Custom domains are not allowed. Perfect for small blogs or testing ideas. Paid plans provide more space and no ads. You get a custom domain and better support. They allow plugin and theme installations. Paid plans suit businesses and growing websites.
Hosting Options
WordPress.com provides hosting with their plans. It is easy but less flexible. Self-hosted WordPress.org requires separate hosting. You choose your hosting provider and plan. This option gives full control over your site. Hosting affects speed and uptime. Reliable hosting keeps your site online and fast. Shared, VPS, and dedicated hosting vary in cost and power. Choose based on your budget and traffic needs.
Credit: psdtowp.net
Setting Up A Domain Name
Setting up a domain name is a key step to activate WordPress. It gives your website a unique address on the internet. This makes it easy for visitors to find your site. You need a domain name before you build your WordPress site. The process is simple and quick. Follow these steps to get your domain ready.
Registering A Domain
Choose a domain name that matches your website’s purpose. Keep it short and easy to remember. Use domain registrars like GoDaddy, Namecheap, or Google Domains. Search your chosen name to check if it is available. If free, you can buy it for one year or more. Provide your contact details to complete registration. After payment, the domain is yours to use.
Connecting Domain To Hosting
Next, connect your domain to your web hosting. Hosting stores your website files online. Log into your hosting account’s control panel. Find the DNS settings or domain manager section. Update the nameservers with those from your hosting provider. This links your domain to your hosting server. Changes can take a few hours to apply. Once done, your domain points to your WordPress site.
Installing WordPress
Installing WordPress is the first step to building your website. It sets up the platform where you create pages, posts, and manage your site. There are two common ways to install WordPress. One is quick and easy. The other takes a few more steps but gives you full control.
One-click Installation
One-click installation makes setting up WordPress simple. Many web hosts offer this feature in their control panel. You just select WordPress, enter a few details like your site name, and click install. The system handles the rest. This method saves time and avoids technical steps. It is perfect for beginners and those who want fast results.
Manual Installation Steps
Manual installation gives more control over your WordPress setup. Start by downloading the WordPress files from the official website. Next, upload these files to your web server using an FTP client. Create a database in your hosting control panel for WordPress to use. Then, run the WordPress installation script by visiting your site URL. Follow the on-screen instructions to connect WordPress to the database and set up your admin account. This process takes longer but helps understand how WordPress works behind the scenes.
Activating Your WordPress Site
Activating your WordPress site is an important step to start using its full features. Activation connects your site to the WordPress system. This process ensures your site is ready for publishing and managing content. Follow the steps below to activate your WordPress site quickly and easily.
Logging Into WordPress Dashboard
First, open your web browser and go to your WordPress login page. Enter your username and password carefully. Click the “Log In” button. The WordPress dashboard will appear. This is the main control panel for your website. Here, you can manage all settings and content.
Entering License Key
Next, find the section for license activation. Usually, it is under the “Settings” or “Updates” menu. Enter the license key you received after purchase. Make sure there are no spaces before or after the key. Click the “Activate” button to submit your license key. This step verifies your site’s authenticity.
Verifying Activation
After entering your license key, check for confirmation messages. A success message means your site is activated. You can also check the license status in the dashboard. Activation allows you to receive updates and support. If the activation fails, recheck your license key and try again.
Configuring Basic Settings
Configuring basic settings is the first step after activating WordPress. These settings help shape your website’s identity and improve user experience. Setting up the essentials correctly makes your site easier to find and use.
Focus on site title, permalink structure, timezone, and language. Each part plays a key role in how your website runs and appears to visitors.
Setting Site Title And Tagline
The site title shows the name of your website. It appears on browser tabs and search results. Choose a clear, simple title that describes your site well.
The tagline is a short phrase below the title. It explains what your site is about. Use a brief, catchy sentence to attract visitors.
Go to Settings > General to enter your site title and tagline. Keep them relevant and easy to remember.
Choosing Permalinks
Permalinks control how URLs look on your site. A clean URL helps visitors and search engines understand your pages.
Choose “Post name” for simple and readable links. For example, yoursite.com/about-us instead of complex numbers.
Set this under Settings > Permalinks. Save changes to apply the new URL structure.
Adjusting Timezone And Language
Set your site’s timezone to match your location. This keeps post times accurate for visitors.
Choose the language your audience understands best. WordPress supports many languages for easy use.
Find these options in Settings > General. Select your timezone and language from the dropdown menus.

Credit: www.youtube.com
Installing Essential Plugins And Themes
Installing essential plugins and themes is a key step to activate WordPress effectively. It helps build a strong foundation for your website. Plugins add new features. Themes change the look and feel.
Choosing the right themes and plugins improves user experience. It also boosts site performance and security. Start with basic tools. Then customize as needed.
Selecting Themes
Pick a theme that fits your website’s purpose. Look for clean design and fast loading speed. Check if the theme is mobile-friendly. Responsive themes adapt well to phones and tablets.
Choose themes with good reviews and regular updates. Avoid outdated or overly complex options. Simplicity often works best for beginners. Themes from the official WordPress directory are safe choices.
Adding Key Plugins
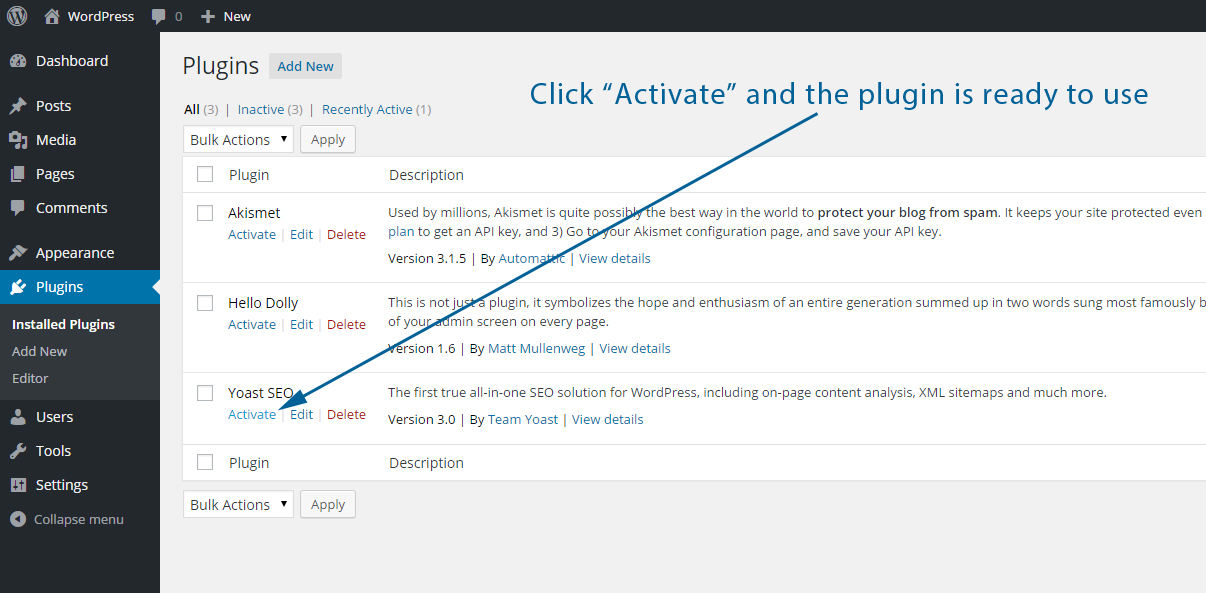
Install plugins that enhance security and SEO. Use caching plugins to speed up your site. Backup plugins protect your data from loss. Contact form plugins help visitors reach you easily.
Limit plugins to only those you need. Too many plugins can slow down your website. Check plugin compatibility with your WordPress version. Keep all plugins updated for smooth operation.
Troubleshooting Activation Issues
Activation problems can stop your WordPress site from working right. These issues often cause stress and delay your project. Knowing how to fix these problems fast saves time and effort. This section helps you solve common activation errors. It also shows when to reach out for help.
Common Errors
Activation errors often come from wrong license keys. Make sure you entered the code exactly as given. Another frequent issue is an unstable internet connection. A slow or lost connection can block activation. Server problems on your host can also cause errors. Check your hosting status if activation fails. Plugin conflicts may stop activation too. Disable other plugins and try again. Clear your browser cache and cookies to avoid outdated info.
Contacting Support
Contact support if problems persist after basic checks. Prepare details like error messages and steps taken. This helps the support team find solutions faster. Use official support channels to avoid scams. Be clear and polite in your communication. Keep track of your support tickets for follow-up. Support teams often provide tailored help for your issue.
Credit: www.webtoffee.com
Frequently Asked Questions
How Do I Activate WordPress After Installation?
To activate WordPress, access your site’s admin panel via /wp-admin. Log in using your credentials. Complete the setup by configuring basic settings and choosing a theme to start building your site.
What Is The Role Of A WordPress License Key?
WordPress itself is free and doesn’t require a license key. However, premium themes or plugins may need activation keys to unlock full features and support.
Can I Activate WordPress Without Hosting?
No, WordPress needs web hosting to be activated and run. Hosting provides the server space required for your website files and database.
How To Troubleshoot WordPress Activation Issues?
Check internet connection, login credentials, and hosting status. Clear cache and disable conflicting plugins. If problems persist, contact your hosting provider for assistance.
Conclusion
Activating WordPress is a simple process anyone can follow. Just complete a few steps to get your site ready. Once activated, you can start building and customizing your website. Remember to keep your login details safe. Regular updates keep your site secure and fast.
Enjoy creating content and sharing your ideas online. WordPress opens many doors for your online presence. Start your journey today and watch your website grow.


