
Are you ready to take full control of your website’s domain without the hassle? Using an external hosting service with your Google Domain can give you more flexibility, better performance, and often lower costs.
But if you’re unsure how to connect these two smoothly, you’re not alone. In this guide, you’ll discover simple, step-by-step instructions to link your Google Domain to any hosting provider you choose. By the end, you’ll have the confidence to manage your site like a pro and avoid common mistakes that slow you down.
Let’s dive in and make your domain work exactly how you want it.
Credit: www.hostgator.com
Choosing An External Host
Choosing the right external host is a key step in using Google Domains. It affects your website speed, security, and uptime. A good host keeps your site online and running smoothly. This guide helps you pick the best option for your needs.
Factors To Consider
Start by checking server reliability. Look for hosts with high uptime rates above 99.9%. Next, consider site speed. Fast loading times improve user experience and SEO. Also, review security features like SSL certificates and backups. These protect your site and data. Pricing is important too. Choose plans that fit your budget without cutting essential features. Lastly, check customer support. Good support helps solve problems quickly.
Popular Hosting Providers
Many hosts work well with Google Domains. Bluehost offers easy WordPress setup and good support. SiteGround is known for speed and strong security. HostGator provides affordable plans for small sites. DreamHost features unlimited bandwidth and storage. Each has pros and cons, so compare features carefully. Choose one that matches your site’s needs and budget.
Preparing Your Google Domain
Preparing your Google Domain is an important first step before using external hosting. It ensures your domain settings are ready and avoids problems later. Taking time here saves effort during the hosting setup process.
Accessing Domain Settings
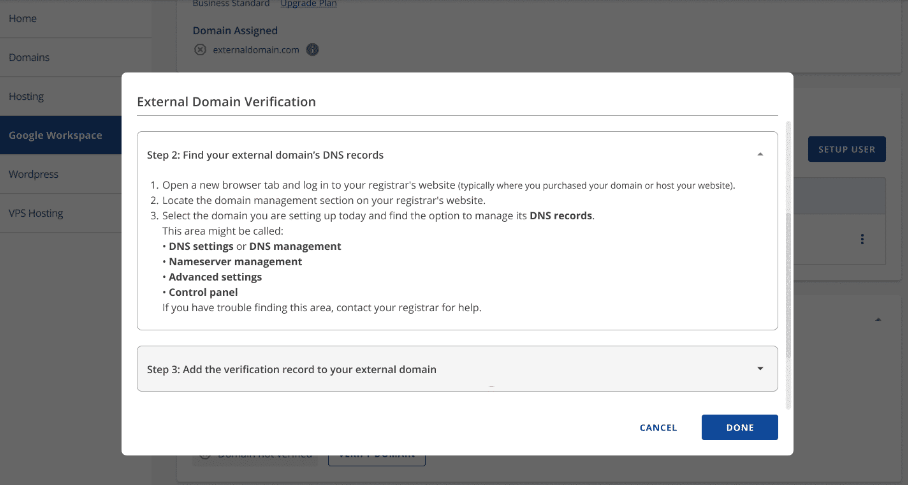
Start by signing in to your Google Domains account. Find the domain you want to use with external hosting. Click on the domain name to open its settings. Look for the “DNS” or “Domain Settings” section. This area lets you manage where your domain points and how it works.
Backing Up Existing Records
Before making changes, save your current DNS records. These include A records, CNAMEs, MX records, and others. Copy each record into a document or spreadsheet. This backup helps restore settings if needed. It prevents website downtime and email issues during the switch.
Configuring Dns Settings
Configuring DNS settings is key to using external hosting with Google Domains. These settings tell the internet where to find your website and services. Correct DNS setup ensures visitors reach your site without issues. You need to update name servers and add specific DNS records. Each step guides traffic properly to your hosting provider.
Updating Name Servers
Name servers control where your domain points. To use external hosting, replace Google’s default name servers. Log in to your Google Domains account. Find the domain you want to change. Go to the “DNS” section. Choose “Use custom name servers.” Enter the name servers given by your hosting provider. Save changes. This switch directs all domain traffic to your host.
Adding A And Cname Records
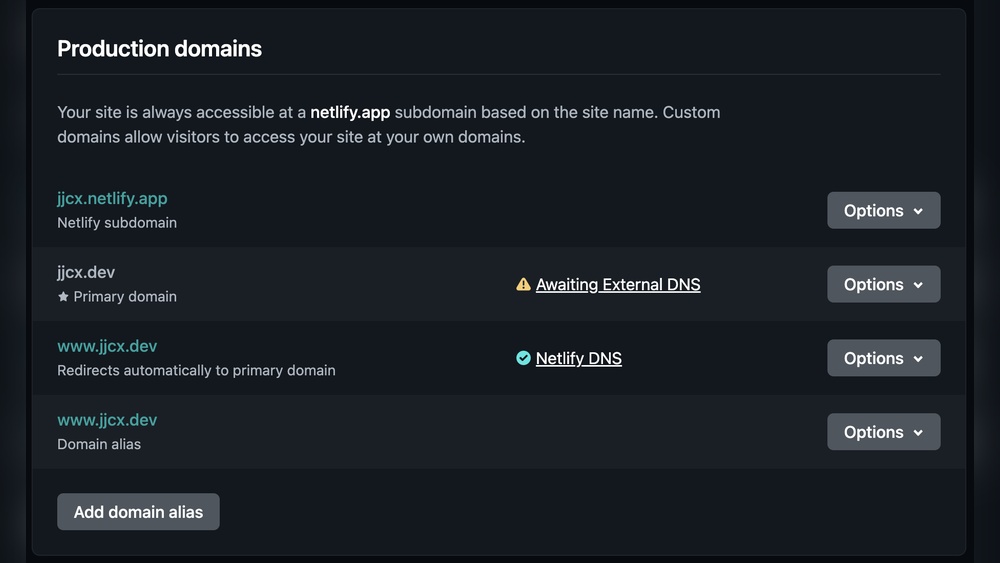
A and CNAME records connect your domain to your hosting IP and services. An A record links your domain to an IP address. A CNAME record points subdomains to another domain name. In Google Domains, open the “DNS” page for your domain. Scroll to “Custom resource records.” Add an A record using your hosting IP. Then add CNAME records for subdomains like “www.” Save each record. These steps ensure your domain and subdomains work correctly with external hosting.

Credit: answers.netlify.com
Verifying Domain Ownership
Verifying domain ownership is a crucial step in using external hosting with your Google Domain. This process proves you control the domain name. It lets hosting providers connect your website securely. Verification also ensures that you can manage your domain settings safely. The method depends on how you want to verify and what your host requires.
Using Txt Records
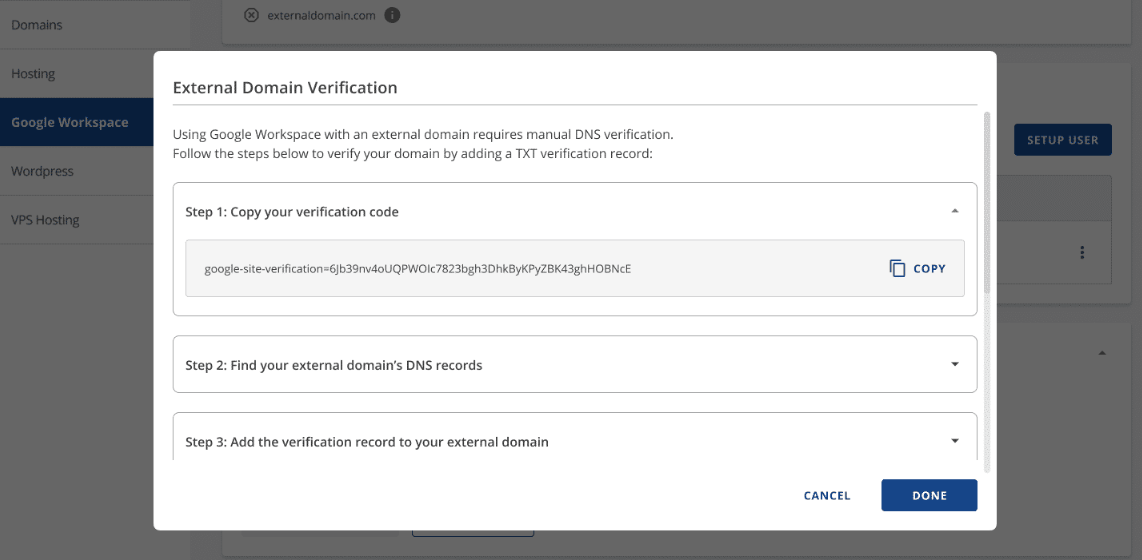
TXT records are the most common way to verify domain ownership. Your hosting provider gives a special code. You add this code to your domain’s DNS settings as a TXT record. This record tells Google Domain that you own the domain. After adding the TXT record, wait a few minutes to hours. Then, go back to your hosting site and click verify.
This method is simple and does not affect your website’s performance. You only need to access the DNS settings in your Google Domain account. Look for the option to add a new TXT record. Paste the code exactly as given. Save the changes and wait for verification.
Alternative Verification Methods
Other ways to verify domain ownership include HTML file upload and meta tags. HTML file upload means placing a file on your website’s root directory. Your host gives you the file to upload. After uploading, you confirm verification on their site.
Meta tag verification requires adding a specific tag to your website’s HTML code. This tag goes into the head section of your homepage. Your hosting provider gives the tag details. After adding the tag, you click verify on their platform.
These methods work well if you have website access and prefer not to change DNS records. Choose the method that fits your skill level and setup best.
Linking Domain To Hosting
Linking your Google Domain to external hosting allows your website to appear online using your custom domain name. This step connects the domain purchased from Google Domains with your web hosting provider. Without this link, visitors cannot reach your website through your domain.
The process requires updating domain settings to point to your hosting server. It might seem technical, but following clear steps makes it easy. You will manage DNS records and verify the connection to ensure everything works correctly.
Connecting Via Control Panel
Start by logging into your Google Domains account. Select the domain you want to link. Find the “DNS” or “Name Servers” section in the dashboard.
Replace default Google name servers with those provided by your hosting company. You will usually get these from your hosting welcome email. Enter the new name servers carefully and save changes.
This step directs your domain traffic to your hosting server. It may take some time for changes to update worldwide. This delay is called DNS propagation and can last up to 48 hours.
Testing The Connection
After updating DNS settings, check if the domain points to your hosting. Open a browser and type your domain name. The website hosted on your external server should load.
Clear your browser cache or use a different device if the site does not show. You can also use online tools like “DNS Checker” to see if changes have spread globally.
Confirming this connection ensures your website is live and accessible. This simple test avoids future access problems for visitors.
Troubleshooting Common Issues
Troubleshooting common issues with external hosting and Google Domains helps keep your website running smoothly. Problems often arise from simple mistakes or waiting times. Understanding these issues saves you time and frustration. Let’s explore two frequent problems and how to fix them.
Propagation Delays
DNS changes take time to spread across the internet. This process is called propagation. It can take from a few minutes to 48 hours. During this time, your website might not load correctly.
Clearing your browser cache can help see the latest changes. Use online tools to check if DNS updates have reached your location. Patience is key. Avoid making more changes until propagation finishes.
Incorrect Dns Entries
DNS records must be exact. A small typo can stop your website from working. Double-check all DNS entries in your Google Domain settings. Confirm that nameservers, A records, and CNAMEs match your hosting provider’s instructions.
Look for extra spaces or wrong characters. Use simple text editors to edit DNS records. Save changes carefully. After updating, wait for propagation to complete before testing your site again.
Optimizing Domain Settings
Optimizing your domain settings is key to a smooth online presence. Proper settings improve security and communication. They also help your site work better with external hosting.
Adjusting these options takes just a few steps. Each setting adds value to your domain management. Focus on SSL certificates and email forwarding for best results.
Enabling Ssl Certificates
SSL certificates protect your website data. They create a secure connection between server and visitor. Google Domains supports free SSL for linked sites.
To enable SSL, access your domain control panel. Find the security or SSL section. Turn on the certificate option for your domain.
Once active, your website address changes to HTTPS. This shows visitors your site is safe. It also improves your search engine ranking.
Setting Up Email Forwarding
Email forwarding lets you use your domain’s email address. Messages sent to this address go to your regular inbox. It keeps professional contact easy and simple.
In Google Domains, find the email forwarding settings. Enter the email address you want to forward messages to. Save your changes to activate forwarding.
This feature avoids extra email hosting costs. It also helps keep your personal email organized. Manage all communication from one place.
Credit: www.hostgator.com
Frequently Asked Questions
How Do I Connect Google Domain To External Hosting?
To connect, update your domain’s DNS settings in Google Domains. Replace default records with your hosting provider’s nameservers or A records. This directs your domain to the external host’s servers, enabling your website to load properly.
Can I Keep Email With Google Domains Using External Hosting?
Yes, you can keep using Google Domains email services. Just ensure your MX records point to Google’s mail servers in the DNS settings. This keeps your email functional while hosting your website externally.
How Long Does Dns Propagation Take After Setup?
DNS changes typically take 24 to 48 hours to fully propagate worldwide. During this time, your site may be intermittently accessible. Be patient, as propagation speed depends on various ISPs and global DNS cache updates.
Is External Hosting Cheaper Than Google Domains Hosting?
External hosting prices vary widely based on provider and plan. Google Domains charges only for domain registration, not hosting. Sometimes, external hosting can be more cost-effective for advanced features or higher traffic websites.
Conclusion
Using Google Domains with external hosting is simple and clear. Just update your DNS settings carefully. This lets your website run smoothly on the hosting you choose. You keep control of your domain and hosting separately. This method offers flexibility and easy management.
Follow the steps, and your site will be online fast. Keep your information safe and double-check settings. This way, your online presence grows without hassle. The process fits beginners and experts alike. Start today and enjoy your website’s full potential.


