

Thinking about moving your domain from GoDaddy to another hosting provider? You’re not alone.
Whether you want better features, lower prices, or more control, transferring your domain can feel tricky. But don’t worry — this guide breaks down every step clearly and simply. By the end, you’ll know exactly what to do to make the switch smoothly and without stress.
Ready to take control of your domain and hosting? Let’s dive in!
Preparing Your Domain For Transfer
Preparing your domain for transfer is a key step before moving it from GoDaddy to another host. This process ensures a smooth and successful transfer without delays. Follow these steps carefully to get your domain ready.
Check Domain Eligibility
Start by confirming your domain is eligible for transfer. Domains must be older than 60 days. Newly registered or recently transferred domains cannot move yet. Also, check if the domain is not locked or on hold by GoDaddy. Verify the domain status in your account dashboard before proceeding.
Unlock Your Domain
Domains are usually locked to prevent unauthorized transfers. You must unlock the domain in your GoDaddy account. This allows the new host to request the transfer. Log into your GoDaddy dashboard, find your domain settings, and turn off the domain lock feature. Keep the domain unlocked until the transfer completes.
Disable Privacy Protection
Privacy protection hides your contact details from public view. It can block transfer requests because the new host needs to verify your information. Disable privacy or WHOIS protection in your GoDaddy settings. This step makes your contact info visible for the transfer process. You can enable privacy again after the transfer finishes.
Obtaining The Authorization Code
Obtaining the authorization code is a key step to transfer your domain from GoDaddy. This code is also called the EPP code or transfer key. It acts like a password to allow your new hosting provider to take control of your domain.
Without this code, the transfer process cannot start. GoDaddy keeps this code private to protect your domain from unauthorized transfers. You need to request it from your GoDaddy account. After you get it, you can provide it to your new hosting provider to complete the transfer.
Requesting The Epp Code From Godaddy
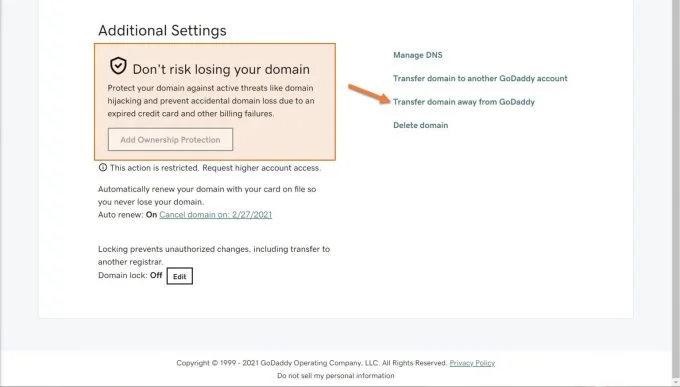
Log in to your GoDaddy account first. Go to the “Domains” section to see your list of domains. Select the domain you want to transfer.
Scroll down to the “Additional Settings” area. Find the option labeled “Get authorization code” or “Request transfer code.” Click it. GoDaddy will send the code to your registered email address. Check your email and save the code safely.
Where To Find The Code
The authorization code arrives in your email inbox. It usually comes from GoDaddy or their domain service team. The email subject often includes “Authorization Code” or “EPP Code.”
Keep the code private. Do not share it with anyone except your new hosting provider. Entering this code correctly speeds up the transfer. Losing or delaying the code slows the entire process.
Initiating The Transfer With New Host
Starting a domain transfer from GoDaddy to a new host requires clear steps. You must begin the process with your new hosting provider. This part is crucial for a smooth transition.
The new host will guide you through their system. They check if the domain is ready to move. This step ensures no issues during transfer.
Starting The Transfer Process
First, log into your new hosting account. Find the domain transfer section. Enter the domain name you want to move.
The host will verify the domain’s eligibility. It must be unlocked and over 60 days old. This is a standard rule for domain transfers.
After verification, the host sends a request to GoDaddy. This begins the actual transfer. You will get updates on the status.
Entering The Authorization Code
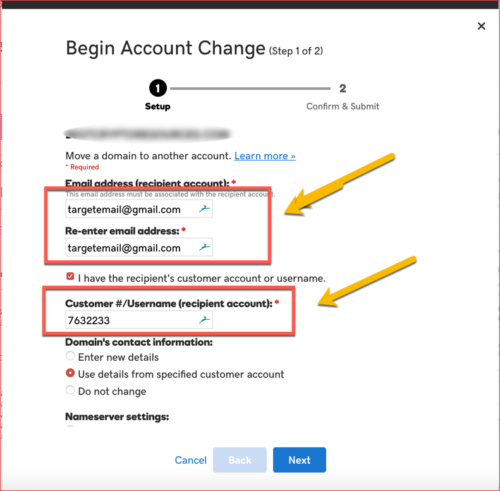
The authorization code is a key for transfer approval. You get this code from your GoDaddy account.
Log in to GoDaddy, open your domain settings, and find the code. Copy it exactly to avoid errors.
Enter the code into your new host’s transfer form. This confirms you own the domain. It also protects your domain from unauthorized moves.
Once the code is accepted, the transfer moves forward. Keep an eye on your email for confirmation messages. Respond quickly to approve the transfer if needed.
Credit: wphostingdiscount.com
Approving The Transfer
Approving the transfer is a key step when moving your domain from GoDaddy to another host. Without approval, the transfer cannot continue. This step ensures you want to move your domain and that the process is secure.
You need to act quickly after starting the transfer to avoid delays. The transfer approval mainly happens through email. Watching the transfer status helps you stay informed about progress.
Confirming Transfer Via Email
Check your email inbox soon after initiating the transfer. GoDaddy and the new host will send confirmation messages. These emails contain instructions or links to approve the transfer.
Open the email carefully. Click the approval link or follow the steps exactly. This confirms your permission to move the domain. Without this, the transfer will stop.
Sometimes the email might go to the spam or junk folder. Always check those folders too. Approving the transfer fast helps avoid expiration of the request.
Monitoring Transfer Status
After approval, keep an eye on the transfer status. You can check this on the new host’s dashboard or GoDaddy’s site. It shows if the transfer is pending, in progress, or complete.
The transfer usually takes a few days to finish. If you see any issues or delays, contact the new host or GoDaddy support. They can help resolve problems quickly.
Monitoring the status lets you know when the domain is fully moved. Then, you can update your settings and start using your new hosting.
Post-transfer Steps
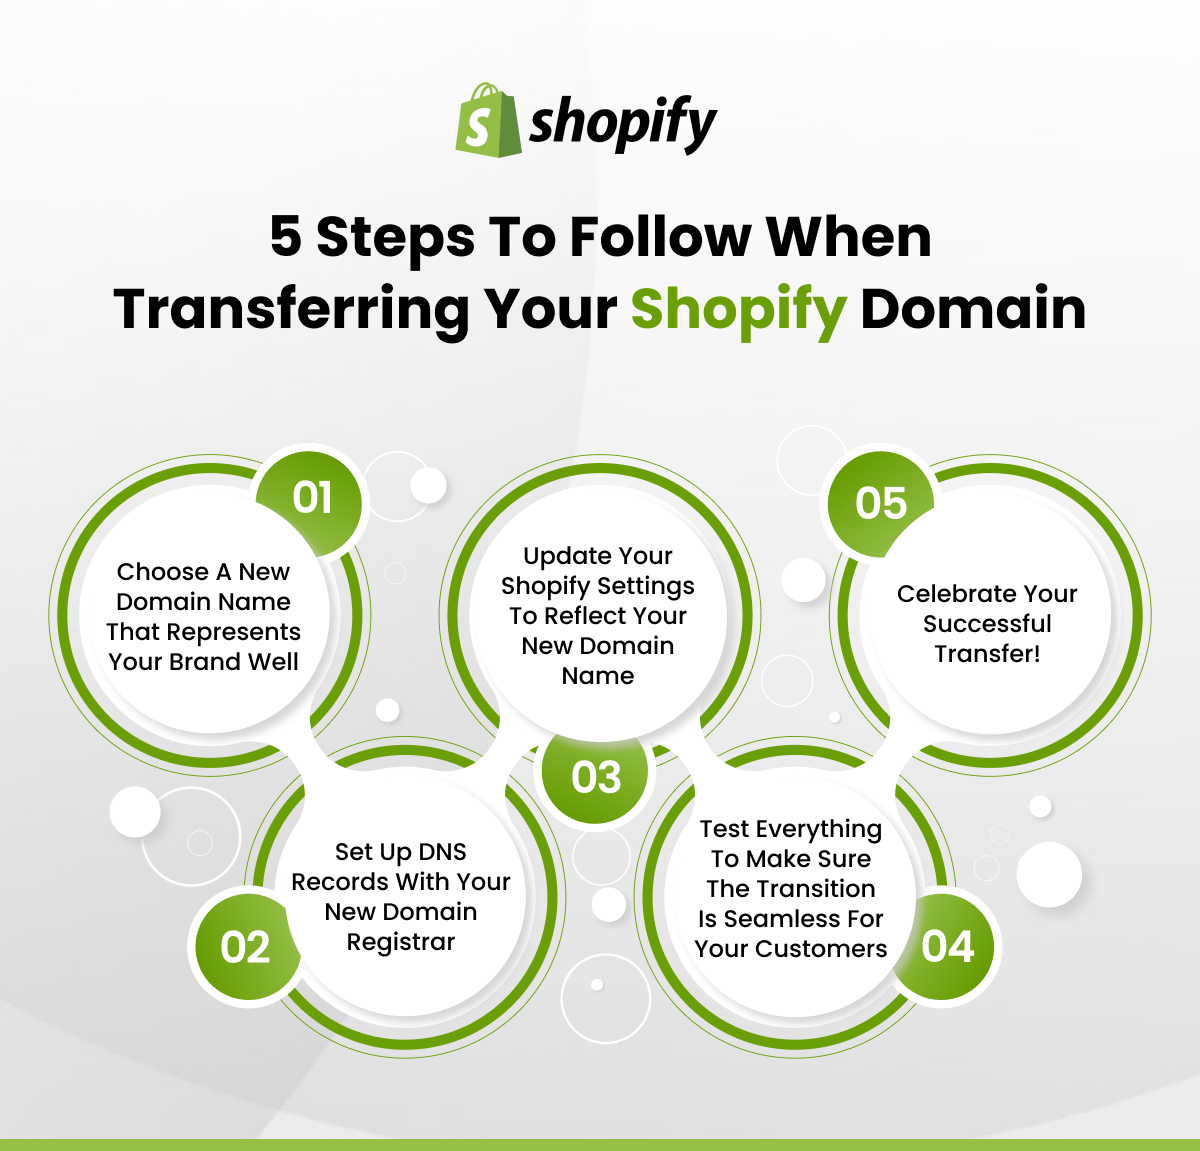
After transferring your domain from GoDaddy to another host, some key steps follow. These steps help ensure your website works well. Taking action quickly avoids downtime and confusion.
Focus on updating your DNS settings and checking domain functionality. These tasks keep your site live and accessible to visitors.
Updating Dns Settings
Change your DNS settings to point to the new hosting server. This directs internet traffic to the right place. Log in to your domain registrar’s control panel. Locate the DNS or nameserver settings.
Replace GoDaddy’s nameservers with those from your new host. Save the changes. DNS updates may take a few hours to fully apply. Avoid making other changes during this time to prevent errors.
Verifying Domain Functionality
Check if your domain works correctly after DNS updates. Open a browser and enter your website address. The site should load from the new host without issues.
Test all pages and features for proper function. Use tools to confirm DNS propagation worldwide. If problems occur, review DNS settings or contact your new host’s support.
Confirming your domain’s smooth operation ensures a positive visitor experience. This step completes your domain transfer process.
Credit: ecommerce.folio3.com
Common Transfer Issues
Transferring a domain from GoDaddy to another hosting provider can sometimes face common issues. These problems may slow down the process or cause errors. Knowing how to handle these issues helps complete the transfer smoothly.
Handling Transfer Delays
Transfer delays happen often due to domain lock or expired registration. Make sure your domain is unlocked before starting the transfer. Check that your domain registration is current and not expired. Waiting for GoDaddy’s approval can also cause delays. Patience is key during this step. Keep an eye on your email for any messages from GoDaddy or the new host. Respond quickly to avoid extra delays.
Resolving Authorization Code Errors
The authorization code is essential for a domain transfer. Errors occur if the code is wrong or missing. Request the code directly from GoDaddy’s control panel. Copy it carefully to avoid typos. Some transfers need a new code if the old one expires. Enter the code exactly as provided to prevent rejection. Contact GoDaddy support if you cannot find the code or it does not work.
Credit: chemicloud.com
Frequently Asked Questions
How Do I Unlock My Domain On Godaddy?
To transfer your domain, first unlock it in your GoDaddy account. Go to Domain Settings and disable the domain lock option. This allows the transfer process to proceed smoothly with the new hosting provider.
What Is An Authorization Code For Domain Transfer?
An authorization code, or EPP code, is a security key from GoDaddy. You need it to verify your identity when transferring your domain to another host. This code ensures only authorized transfers occur, protecting your domain from unauthorized moves.
How Long Does Godaddy Domain Transfer Take?
A domain transfer from GoDaddy usually takes 5 to 7 days. The exact time depends on the new host and domain extension. You can speed up the process by approving the transfer promptly through email.
Can I Keep My Email During Domain Transfer?
Yes, you can keep your email by setting up DNS records carefully. Make sure MX records are updated with the new host before transferring the domain. This prevents email downtime during the transfer process.
Conclusion
Transferring a domain from GoDaddy to another host takes a few clear steps. First, unlock your domain and get the authorization code. Next, start the transfer with your new hosting provider. Keep an eye on your email for confirmation messages.
The process may take a few days. Stay patient and follow instructions carefully. After the transfer, check your website to ensure it works well. This helps avoid downtime or issues. Moving your domain can seem tricky, but following these steps makes it simple.
You can manage your website hosting with ease.


