
You’ve just secured your perfect domain name—congratulations! But what comes next?
Owning a domain is just the first step to getting your website online. If you’re wondering how to turn that name into a live site people can visit, you’re in the right place. You’ll learn exactly how to host your domain quickly and easily, without confusing tech jargon or hidden costs.
By the end, you’ll have the confidence to launch your website and start sharing your ideas with the world. Ready to make your domain shine? Let’s dive in!
Credit: www.geeksforgeeks.org
Choosing A Hosting Provider
Choosing a hosting provider is the next step after buying your domain name. This choice affects your website’s speed, security, and reliability. Hosting means storing your website files on a server so people can visit your site anytime. Picking the right host makes sure your website runs smoothly and stays online.
Shared Vs Dedicated Hosting
Shared hosting means sharing one server with many websites. It is cheaper but can be slower if many sites use resources. Dedicated hosting gives you a whole server for your site. It is faster and more secure but costs more. Choose based on your budget and website needs.
Popular Hosting Services
Some well-known hosting providers include Bluehost, SiteGround, and HostGator. They offer easy setup and good support. Each has different plans for beginners and advanced users. Research their features and reviews before deciding. Reliable hosts keep your site safe and accessible.
Evaluating Hosting Plans
Look at disk space and bandwidth limits in each plan. More space and bandwidth mean your site can handle more visitors. Check if the host offers backups and security features. Good customer support is also important. Compare prices and what you get for each plan.
Linking Domain To Hosting
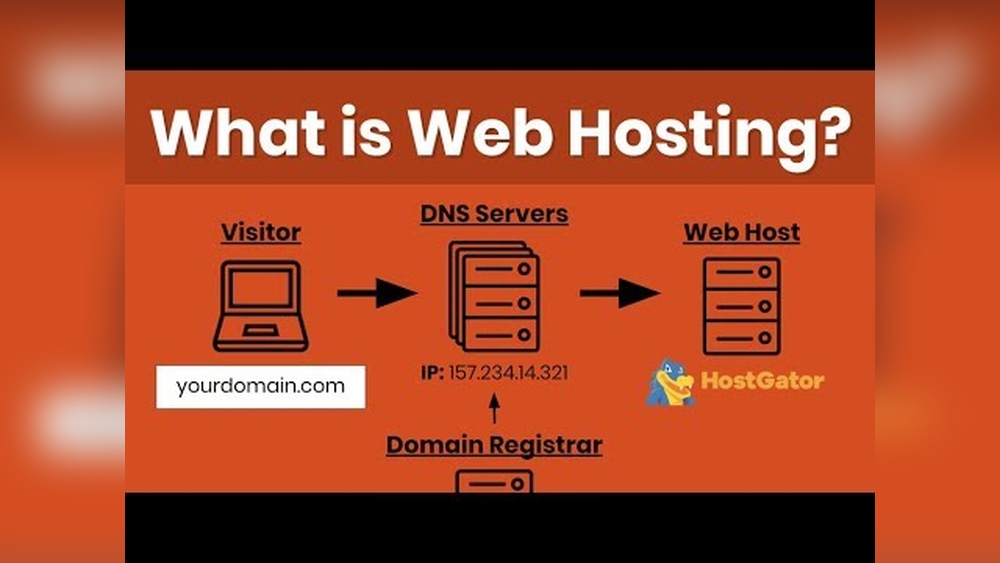
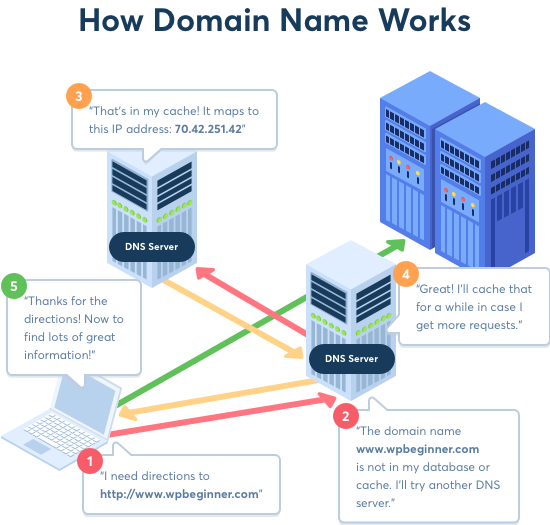
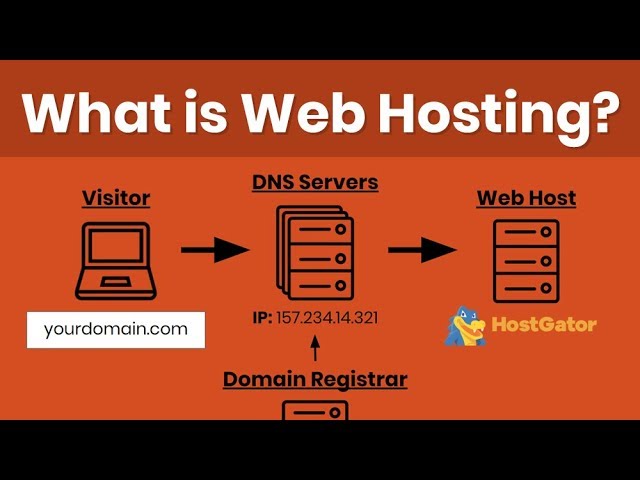
Linking your domain to your hosting is the next step after buying a domain name. This process connects your website address to the server where your files live. Without this, visitors cannot see your website by typing your domain name. The link happens through DNS settings, which tell the internet where to find your site.
Updating Dns Settings
Start by logging into your domain registrar account. Find the DNS management section or name server settings. Replace the default name servers with those from your hosting provider. These are usually given in your hosting welcome email. Save the changes carefully to avoid mistakes.
Propagation Time Explained
After updating DNS, changes don’t happen instantly. The internet takes time to spread the new information worldwide. This process is called propagation. It can take from a few minutes to 48 hours. During this time, some visitors might see the old site or an error.
Checking Domain Connection
Check if your domain points to your hosting by using online tools like DNS checkers. You can also enter your domain in a browser. If the website loads correctly, the link is active. If not, review your DNS settings and wait more for propagation.
Setting Up Your Website
After buying a domain name, the next step is setting up your website. This means putting your site online so visitors can see it. You need to prepare your site’s files and settings carefully. This process helps your website work well and look good.
Installing A Content Management System
A Content Management System (CMS) helps you build and manage your website easily. Popular CMS options include WordPress, Joomla, and Drupal. Most web hosts offer one-click installation for these systems. Choose a CMS based on your needs and skills. After installation, you can add pages, posts, and images without coding.
Uploading Website Files
Website files include images, text, and code that make your site work. Use an FTP client or your hosting control panel to upload these files. Make sure to place files in the correct folder, usually called “public_html” or “www.” Check that all files upload correctly to avoid broken links or errors. Organize files well to keep your site easy to manage.
Configuring Site Settings
Configuring your site settings helps improve its performance and security. Set your site title, description, and timezone. Adjust permalinks to make URLs clean and user-friendly. Enable SSL to secure your website with HTTPS. Check your CMS and hosting settings regularly to keep your site updated and safe.
Credit: www.wpbeginner.com
Ensuring Website Security
Website security is vital after getting a domain name. It protects your site from hackers and keeps visitor data safe. A secure website builds trust and helps your search rankings. Take simple steps to secure your site right away.
Activating Ssl Certificates
SSL certificates encrypt data between your site and visitors. This protects passwords, payment details, and personal info. Most hosting providers offer free SSL certificates. Activate SSL to change your site URL from http to https. Browsers show a padlock icon for secure sites. This signals safety to users and search engines.
Regular Backups
Backups save copies of your website files and databases. They help restore your site after attacks or errors. Set up automatic backups through your hosting control panel. Keep backups in a separate location for extra safety. Test backups regularly to ensure they work properly.
Setting Up Firewalls
Firewalls block harmful traffic from reaching your website. They filter out hackers, bots, and suspicious activity. Many hosts include firewalls with their plans. You can also add a web application firewall (WAF) for extra protection. Firewalls reduce the risk of hacks and downtime.
Testing And Launching
After buying your domain name and setting up hosting, testing your website is key. Testing ensures your site works well for all visitors. It helps find problems before people see your site. Launching means making your website live for everyone. Doing this the right way sets a strong start for your site.
Cross-browser Testing
People use different browsers like Chrome, Firefox, or Safari. Your website must look good and work well on all. Check your site on popular browsers to spot issues. Fix any design or function problems you find. This keeps visitors happy and avoids lost traffic.
Mobile Optimization
Many users browse on phones or tablets. Your site should load fast and fit small screens. Test your pages on various mobile devices. Make buttons easy to tap and text easy to read. Mobile-friendly sites rank better on search engines.
Final Launch Checklist
Before you go live, review everything carefully. Check all links to avoid broken pages. Confirm images load correctly and fast. Test contact forms and other interactive parts. Set up website backups and security measures. Once all is ready, publish your site confidently.
Credit: www.youtube.com
Frequently Asked Questions
What Is The First Step After Buying A Domain Name?
The first step is choosing a reliable web hosting provider. This ensures your website is accessible online and loads quickly for visitors.
How Do I Link My Domain To Hosting?
Update the domain’s DNS settings with your hosting provider’s nameservers. This connects your domain to your hosting server correctly.
Can I Host My Website For Free After Buying A Domain?
Some providers offer free hosting, but they often have limits. Paid hosting offers better speed, security, and support for your site.
How Long Does It Take To Connect Domain And Hosting?
DNS changes usually take 24 to 48 hours to fully propagate. During this time, your website might not be accessible everywhere.
Conclusion
Hosting your website after buying a domain name is simple. Choose a good hosting provider that fits your needs. Upload your website files carefully and check if everything works well. Keep your site updated and secure to avoid problems. With these easy steps, your website can be online and ready for visitors.
Take your time and follow the process step-by-step. Soon, you will have your own space on the internet.


