
Are you looking to make your WordPress site more interactive and gather feedback easily? Adding a Google Form is one of the simplest and most effective ways to do just that.
Imagine collecting responses, surveys, or contact information without any hassle. You’ll learn exactly how to add a Google Form to your WordPress site step by step. By the end, you’ll have a seamless, professional-looking form ready to engage your visitors and grow your audience.
Let’s get started!
Choose The Right Google Form
Choosing the right Google Form is key to collecting useful information. The form must fit your website’s purpose and audience. A well-chosen form improves user experience and response rates.
Focus on creating or selecting a form that matches your needs. Adjust its settings to make it easy and clear for visitors. These steps ensure the form works smoothly on your WordPress site.
Create Or Select A Form
Start by logging into your Google account. Open Google Forms and browse existing forms or create a new one. Pick a form that fits your goal, like surveys, feedback, or registrations. Keep questions simple and direct. Avoid too many questions to keep users interested. Choose a form design that looks clean and professional.
Customize Form Settings
Click the settings gear icon in Google Forms. Decide if users can submit multiple responses or just one. Enable or disable email collection based on your needs. Turn on confirmation messages to thank users after submission. Adjust question types for better data collection, such as multiple choice or dropdown. Check privacy settings to protect user data. Customize the theme to match your website’s style.
Get The Google Form Embed Code
Getting the embed code for your Google Form is the first step to placing it on your WordPress site. This code allows the form to show directly on your page without visitors leaving your site. You can customize the size and appearance of the form using this code.
Follow simple steps to access and copy the embed HTML. This makes adding the form quick and easy.
Access Form Sharing Options
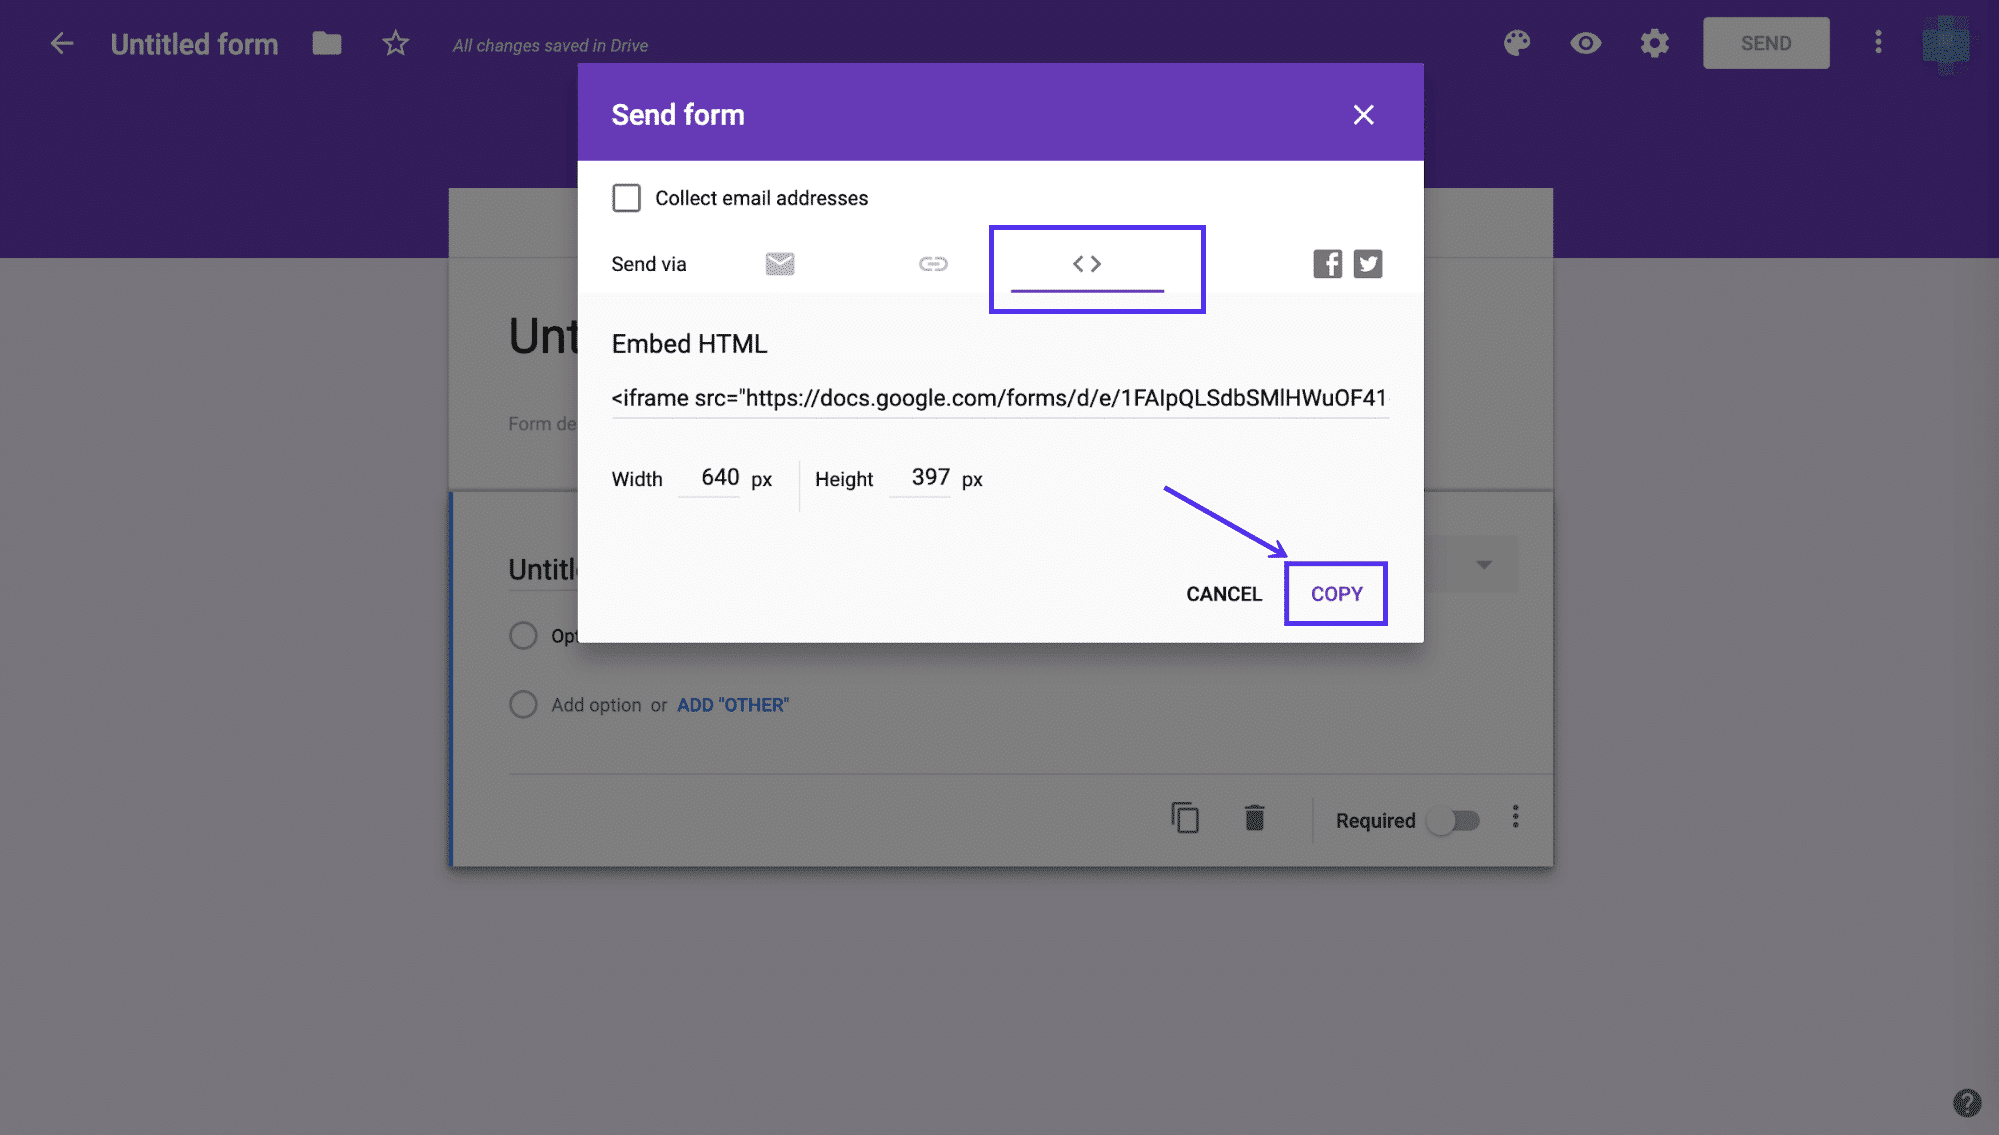
Open your Google Form in edit mode. Click the “Send” button at the top right corner. A pop-up window appears with several sharing options. Choose the “Embed HTML” option, which looks like two angle brackets <>. This option reveals the embed code you need.
Copy The Embed Html
Adjust the width and height values if needed to fit your site. Highlight the entire embed code inside the box. Right-click and select “Copy” or press Ctrl+C (Cmd+C on Mac). Keep this code ready for pasting into your WordPress editor.
Embed Form Using WordPress Editor
Embedding a Google Form into your WordPress site is simple using the WordPress editor. This method lets you place the form directly on any page or post. Visitors can fill out the form without leaving your website. It keeps the process smooth and user-friendly.
The WordPress editor, especially Gutenberg, makes embedding straightforward. You just need the embed code from Google Forms. Then, add it to your site with a few clicks. Let’s break down the steps.
Add Html Block In Gutenberg
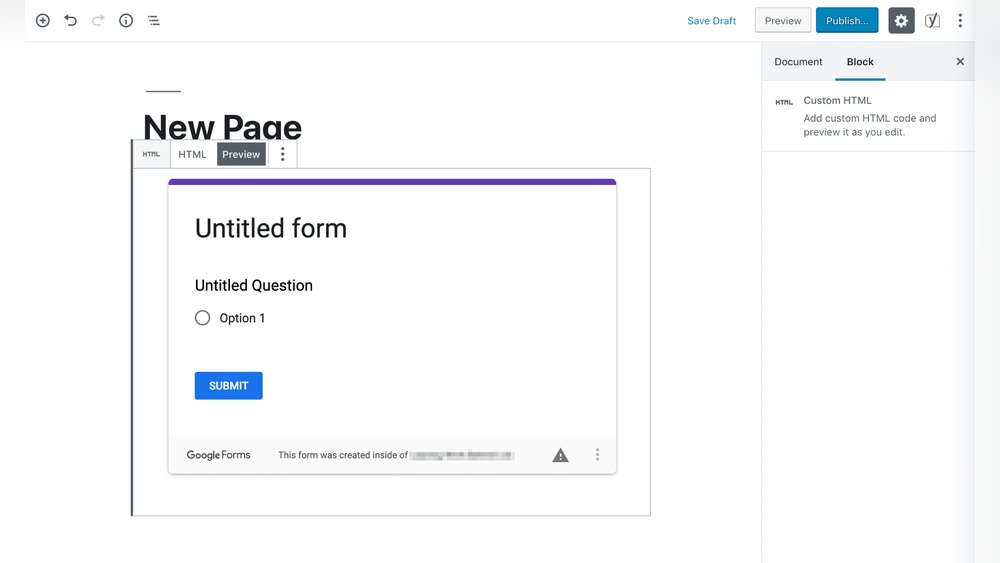
Open the WordPress editor for the page or post where you want the form. Click the plus (+) icon to add a new block. Search for the “Custom HTML” block and select it. This block lets you insert HTML code directly. It is perfect for embedding the Google Form code.
Paste The Embed Code
Go to your Google Form and click the “Send” button. Choose the embed icon (<>) to get the HTML code. Copy this code to your clipboard. Return to WordPress and paste the code into the Custom HTML block. Preview the page to check the form’s appearance. Publish or update your page to make the form live.
Credit: kinsta.com
Use Plugins For Easier Integration
Using plugins makes adding Google Forms to WordPress simple and fast. Plugins handle the technical parts for you. No need to touch any code. This saves time and avoids errors. Plus, plugins often offer extra features. You can customize the form’s look and behavior easily.
Popular Google Form Plugins
Several plugins help embed Google Forms on WordPress sites. “Google Forms” plugin is popular and easy. It allows direct embedding with shortcode. “WPForms” supports Google Forms integration through add-ons. “Formidable Forms” also works well with Google Forms. These plugins offer user-friendly interfaces. They suit beginners and experienced users alike.
Installing And Configuring Plugins
Start by going to your WordPress dashboard. Click “Plugins” then “Add New.” Search for the desired Google Form plugin. Click “Install Now” and then “Activate.” After activation, navigate to the plugin settings. Connect the plugin to your Google account if needed. Paste your Google Form URL or ID in the provided field. Customize settings like form size or style. Save changes and preview the form on your site. Adjust settings as needed to fit your page design.
Adjust Form Appearance And Settings
Adjusting the appearance and settings of your Google Form on WordPress helps it look good and work well. This step makes sure the form fits your website style and is easy for visitors to use. You can change its size, layout, and how it behaves on different devices.
Responsive Design Tips
Make the form easy to use on phones and tablets. Use code or plugins that allow the form to resize automatically. Avoid fixed widths that cause scrolling or cut off parts of the form. Test the form on different screen sizes to check how it looks. Clear and simple forms get better responses.
Form Size And Layout
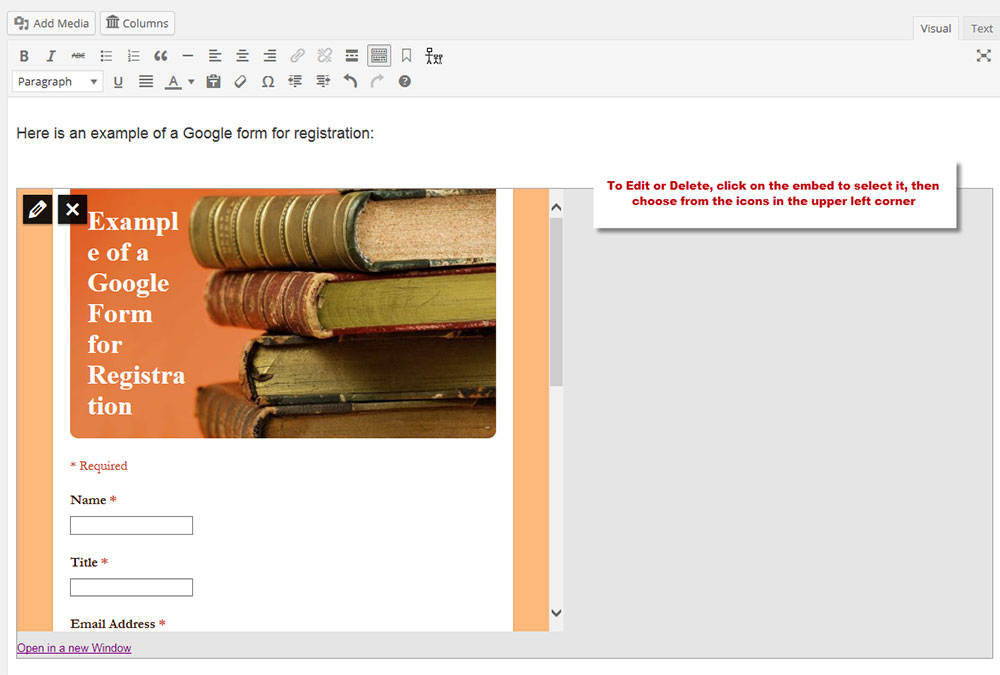
Set the form width to match your website’s content area. Use the embed code’s width and height settings to adjust size. Keep the form narrow enough to fit smaller screens but wide enough for easy reading. Organize questions in a logical order. Group related questions to make the form cleaner and faster to complete.
Credit: muffingroup.com
Test The Embedded Google Form
Testing the embedded Google Form is a key step after adding it to your WordPress site. It ensures the form works well and collects data correctly. This step helps you catch problems before visitors see the form. Testing improves user experience and keeps your site professional.
Check Functionality On Different Devices
Open your WordPress page with the embedded form on a phone, tablet, and desktop. Make sure the form looks good and fits the screen. Test each form field by entering sample data. Check if dropdown menus, checkboxes, and buttons respond properly. Submit the form to confirm it sends responses without errors. This step ensures visitors have a smooth experience on any device.
Troubleshooting Common Issues
If the form does not appear, check the embed code for errors. Clear your browser cache and reload the page. Make sure the Google Form is set to “Anyone with the link can respond.” Slow loading might mean your internet or server is weak. For form submission errors, verify your Google Form settings and email notifications. Fix these issues early to keep your form working well.
Keep Google Form Updated
Keeping your Google Form updated on WordPress is important. It ensures your visitors always see the latest questions. It also helps you collect accurate data without any confusion.
Changes you make in Google Forms can show up on your WordPress site quickly. This keeps your site fresh and useful for your audience. Regular updates avoid broken links or outdated forms on your pages.
Sync Changes Automatically
Google Forms sync automatically with WordPress if embedded correctly. You do not need to re-embed the form after every change. Just update your form in Google Forms, and it shows on your site.
This saves time and avoids mistakes. Your visitors always get the newest version. Check that your embed code uses the latest iframe link from Google Forms.
Manage Form Responses
Manage responses easily using Google Forms. Responses are collected in one place and update in real time. You can view answers in a spreadsheet or directly in Google Forms.
This helps you track data without extra tools. Export responses to Excel or Google Sheets for more analysis. Keep your data organized to improve your form’s effectiveness.

Credit: www.wpbeginner.com
Frequently Asked Questions
How Do I Embed A Google Form In WordPress?
To embed a Google Form, copy its embed code from Google Forms. Paste this HTML code into your WordPress post or page using the Text editor or a Custom HTML block.
Can I Customize Google Forms On WordPress?
Google Forms customization happens within Google Forms itself. You can change themes, colors, and questions. The form on WordPress will display these customizations automatically.
Is A Plugin Needed To Add Google Form To WordPress?
No plugin is necessary to add Google Forms. Embedding via HTML code is simple and effective. However, some plugins offer extra styling and integration options.
Will Google Forms Work On All WordPress Themes?
Yes, Google Forms embed code works with almost all WordPress themes. It is responsive and adjusts to different screen sizes by default.
Conclusion
Adding a Google Form to your WordPress site is simple and quick. You just need to copy the form’s embed code and paste it into your page or post. This lets visitors fill out the form without leaving your site.
It helps you collect feedback, sign-ups, or any information easily. Try these steps today and see how it improves your site’s interaction. Keep your forms clear and easy to use for the best results.


