
Are you struggling to organize your WordPress site the way you want? Adding a page under a tab might seem tricky, but it’s easier than you think.
When your visitors can find what they’re looking for quickly, they stay longer and come back more often. In this guide, you’ll learn simple, step-by-step instructions to add a page under a tab in WordPress. By the end, your website will look cleaner, more professional, and easier to navigate.
Ready to make your site more user-friendly? Let’s get started!
Creating Pages In WordPress
Creating pages in WordPress is simple and quick. Pages are essential for your website. They hold important content like About Us, Contact, and Services. You can create as many pages as you need. Each page has its own unique content and layout. Understanding how to create pages helps you build a clear site structure.
Accessing The Pages Section
Log in to your WordPress dashboard first. On the left menu, find and click “Pages.” This opens the Pages section. Here, you see all existing pages. You can edit or delete pages from this list. To create a new page, you need this section.
Adding A New Page
In the Pages section, click the “Add New” button. A blank page editor will open. Enter your page title at the top. This title appears on your website and menu. Below the title, you add the page content. You can add text, images, and videos here.
Customizing Page Content
Use the block editor to customize your page content. Each block can be text, image, or video. Click the “+” icon to add new blocks. Rearrange blocks by dragging them up or down. You can also change fonts, colors, and alignment. Preview your page to see how it looks. Make changes until you are happy with the design.
Credit: www.wpbeginner.com
Setting Up Menus
Setting up menus in WordPress helps organize your website’s pages. Menus guide visitors to important content. They appear as tabs or lists on your site. Creating clear menus improves user experience. Follow simple steps to set up menus quickly.
Navigating To Menu Settings
Log in to your WordPress dashboard first. Find the “Appearance” option on the left side. Click on “Menus” under Appearance. This opens the menu settings page. Here, you control how menus look and function.
Creating A New Menu
On the Menus page, click “Create a new menu.” Give your menu a name. Choose a name that matches its use. For example, “Main Menu” or “Footer Menu.” Click “Create Menu” to save it. Your new menu is now ready to edit.
Adding Pages To Menus
Look for the “Pages” box on the left side. Select the pages you want to add. Check the boxes next to the page names. Click the “Add to Menu” button. The pages appear in the menu structure. Drag and drop to reorder pages. Click “Save Menu” to finish.
Adding Pages Under Tabs
Adding pages under tabs in WordPress helps organize your website better. It creates a clean menu with main topics and related subtopics. Visitors find information quickly and navigate easily.
This structure also improves your site’s user experience and SEO. Clear menus help search engines understand your content. Below are simple steps to add pages under tabs.
Understanding Menu Structure
Menus in WordPress use a hierarchy system. Main tabs are top-level menu items. Pages placed under these become submenus or dropdown items. This setup keeps your site tidy and easy to explore.
Dragging Pages To Create Submenus
Go to Appearance > Menus in your dashboard. Find the page you want to add as a submenu. Drag it slightly to the right under the main tab. This action nests the page below the tab, creating a dropdown effect.
Saving And Previewing Changes
After arranging your menu, click the Save Menu button. Visit your site to see the menu in action. Check if the submenu appears correctly under the main tab. Adjust as needed for the best look and function.
Using Plugins For Advanced Menus
Using plugins for advanced menus in WordPress makes managing your site easier. These tools offer more options than the basic menu editor. You can create multi-level menus, add icons, or style menus differently. Plugins help organize pages better under tabs. This gives visitors a clear path to find content.
Recommended Menu Plugins
Several plugins work well for advanced menus. Max Mega Menu allows you to build large, drop-down menus. WP Mega Menu offers drag-and-drop features and icons. Responsive Menu focuses on mobile-friendly menus. These plugins suit different needs and skill levels.
Installing And Activating Plugins
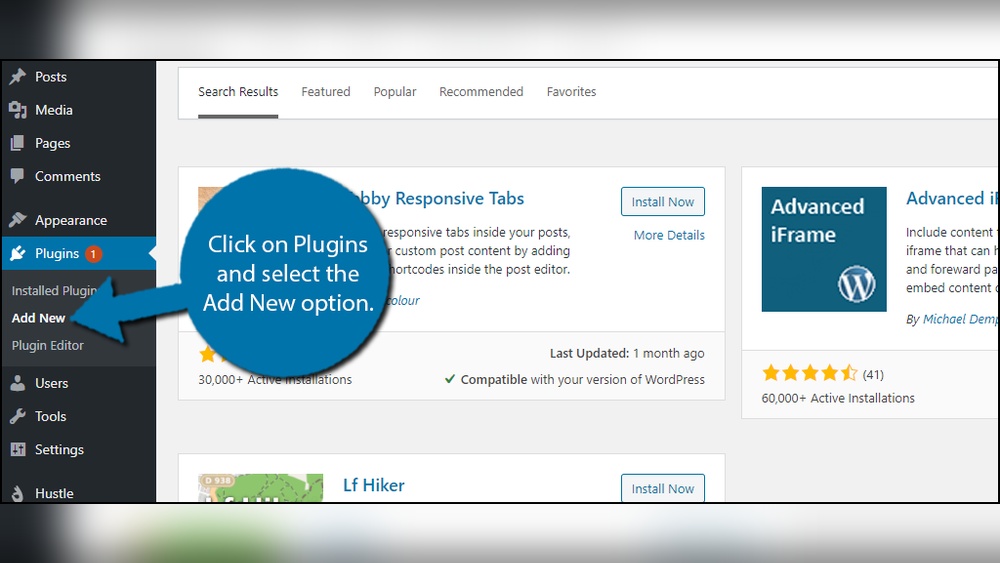
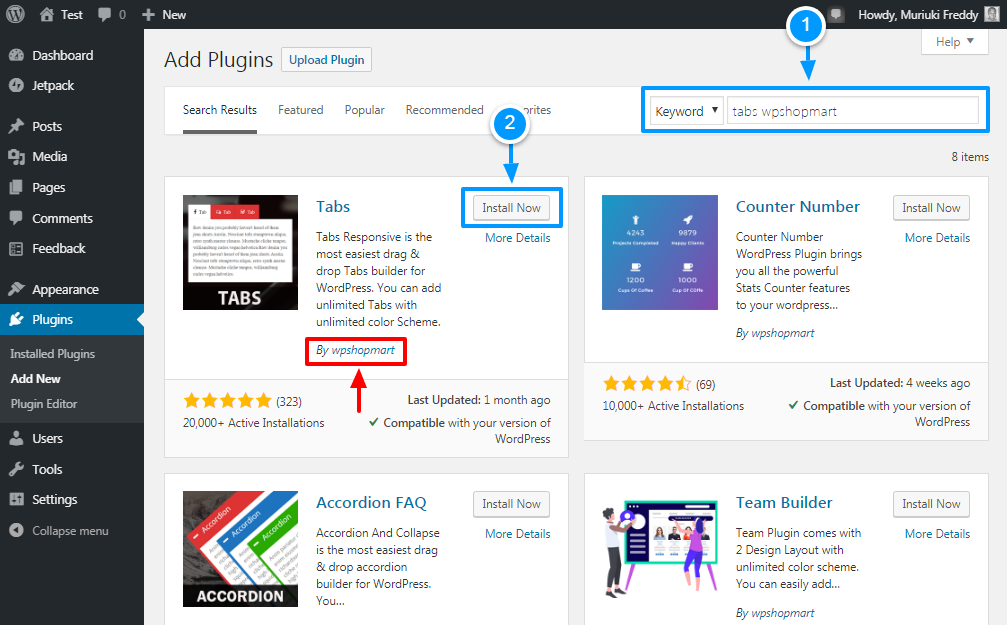
Go to your WordPress dashboard. Select Plugins and click Add New. Type the plugin name in the search box. Click Install Now next to the plugin you want. Once installed, click Activate to enable it. The plugin will appear in your dashboard menu.
Configuring Plugin Settings
Open the plugin settings from the dashboard menu. Adjust layout options to fit your site style. Choose how menus display on desktops and phones. Add pages or custom links under tabs. Save your changes and check the menu on your site. Fine-tune settings until the menu looks right.
Troubleshooting Common Issues
Troubleshooting common issues can save time and frustration. Sometimes, menus or pages do not show as expected. This section covers simple fixes to common problems.
Menu Not Displaying Correctly
The menu might not appear due to theme settings or conflicts. Check if the menu is assigned to the correct location in Appearance > Menus. Some themes have multiple menu spots; assign your menu to the primary one. Also, ensure no plugins block menu display. Disable plugins one by one to find conflicts.
Pages Not Showing Under Tabs
Pages may not appear under tabs if not properly linked in the menu. Confirm the pages are added as sub-items in the menu structure. Drag pages slightly to the right under a parent tab for nesting. Save the menu after changes. Sometimes, page visibility settings hide pages; check if pages are set to public.
Clearing Cache And Refreshing
Cache can cause outdated menu views. Clear your browser cache first. Then clear any caching plugins active on your site. This forces WordPress to load the latest menu setup. After clearing cache, refresh the page with Ctrl + F5 to see changes immediately. This step often fixes display problems fast.
Credit: www.wpexplorer.com
Credit: www.wonderplugin.com
Frequently Asked Questions
How Do I Add A Page Under A Tab In WordPress?
To add a page under a tab, use WordPress menus. Go to Appearance > Menus, create or edit a menu, then drag your page below the tab item to nest it. Save the menu to display the page as a submenu.
Can I Create Multiple Subpages Under One Tab?
Yes, you can add multiple subpages under a single tab in WordPress menus. Simply drag additional pages below the main tab item. Each page will appear as a dropdown submenu for easy navigation.
Will Adding A Page Under A Tab Affect Seo?
No, adding pages under tabs organizes your site structure. It improves user experience and helps search engines understand your site hierarchy, which can positively impact SEO.
Is Coding Required To Add A Page Under A Tab?
No coding is needed. WordPress provides an easy menu editor in the dashboard. You can add and arrange pages under tabs using drag-and-drop, making it beginner-friendly.
Conclusion
Adding a page under a tab in WordPress is simple and fast. You just need to follow a few clear steps. This helps organize your site and makes it easy for visitors to find information. Keep your menus neat and logical for a better user experience.
Try these tips on your WordPress site today. Your visitors will thank you for it.


