
Are you struggling to make your WordPress site truly yours? Editing templates might sound tricky, but it doesn’t have to be.
Imagine having full control over your website’s look and feel without needing to be a tech expert. In this guide, you’ll discover simple, step-by-step ways to edit WordPress templates so your site stands out and works exactly how you want.
Keep reading, and you’ll unlock the secrets to customizing your site quickly and confidently. Your perfect website is just a few clicks away.
Credit: www.smashingmagazine.com
Choosing The Right Template
Choosing the right template is a key step in building a WordPress site. It shapes how your site looks and feels. The right template makes your site easy to use and attractive. It also helps your site work well on all devices.
Focus on templates that match your site’s purpose. Think about your content and style. A good template supports your goals and helps visitors find what they need quickly.
Free Vs Premium Templates
Free templates are a good start. They cost nothing and often have basic features. Many free templates suit blogs and small sites. They get updates and support but can be limited in style and options.
Premium templates cost money but offer more choices. They often include better design and more tools. Premium templates get regular updates and faster support. These are great for business sites or when you want a unique look.
Checking Template Compatibility
Not all templates work with every WordPress version. Check if the template supports the latest WordPress updates. Compatibility with popular plugins is also important. Make sure the template works with your key plugins like SEO or contact forms.
Test the template on different browsers and devices. It should look good and work well everywhere. This saves you trouble after launching your site.
Previewing Templates
Preview templates before you install them. WordPress lets you see how a template looks with your content. Use this to check colors, fonts, and layout. See if the template fits your style and needs.
Try different templates to compare them. A live preview helps you choose the best one. This step avoids surprises after setting up your site.
Installing A Template
Installing a template in WordPress is the first step to change your website’s look. Templates control your site’s design and layout. Choosing the right template helps your site stand out. This section explains how to install a template easily.
Using The WordPress Dashboard
Open your WordPress dashboard. Go to the “Appearance” menu. Click on “Themes” to see available templates. Click the “Add New” button at the top. Browse or search for a template you like. Click “Install” on the template you want. Wait for the installation to finish.
Uploading Templates Manually
Download your template file as a .zip from a trusted source. Go to the WordPress dashboard. Navigate to “Appearance” > “Themes.” Click “Add New” and then “Upload Theme.” Choose the .zip file from your computer. Click “Install Now” to upload the template. Wait until the upload completes.
Activating Your Template
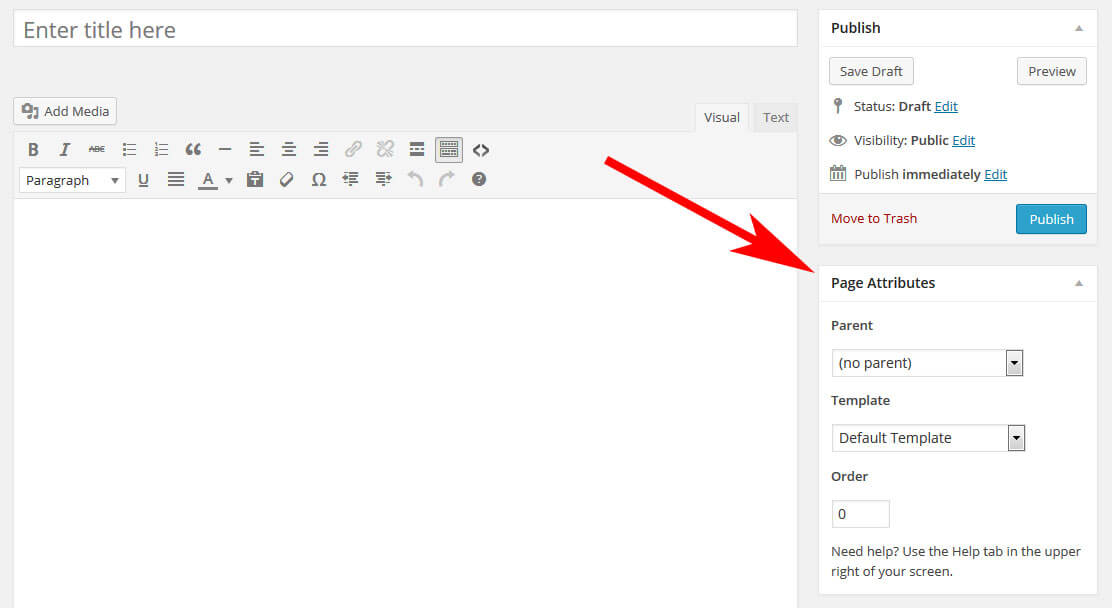
After installing, you must activate the template. Go to “Appearance” > “Themes.” Find the template you installed. Hover over it and click “Activate.” Your website now uses the new template. Check your site to see the changes live.
Customizing Template Settings
Customizing template settings in WordPress lets you change your site’s look quickly. You can adjust colors, fonts, and layouts to match your style. These settings help your website feel unique and professional. Even beginners can make simple changes without coding.
Accessing The Customizer
Start by going to your WordPress dashboard. Find the “Appearance” menu and click “Customize.” This opens the Customizer panel on the left side. You will see live previews of your site on the right. This tool lets you change settings and see results immediately.
Changing Colors And Fonts
Inside the Customizer, look for options called “Colors” or “Typography.” Click on these to pick new colors for backgrounds, text, and links. Choose fonts that match your brand or style. Use simple, easy-to-read fonts for better visitor experience.
Adjusting Layout Options
The layout section controls how your content appears on the page. You can change sidebar positions or the number of columns. Some templates let you enable or disable elements like headers and footers. Adjust these settings to create a clean, organized look.

Credit: wordpress.org
Editing Template Files
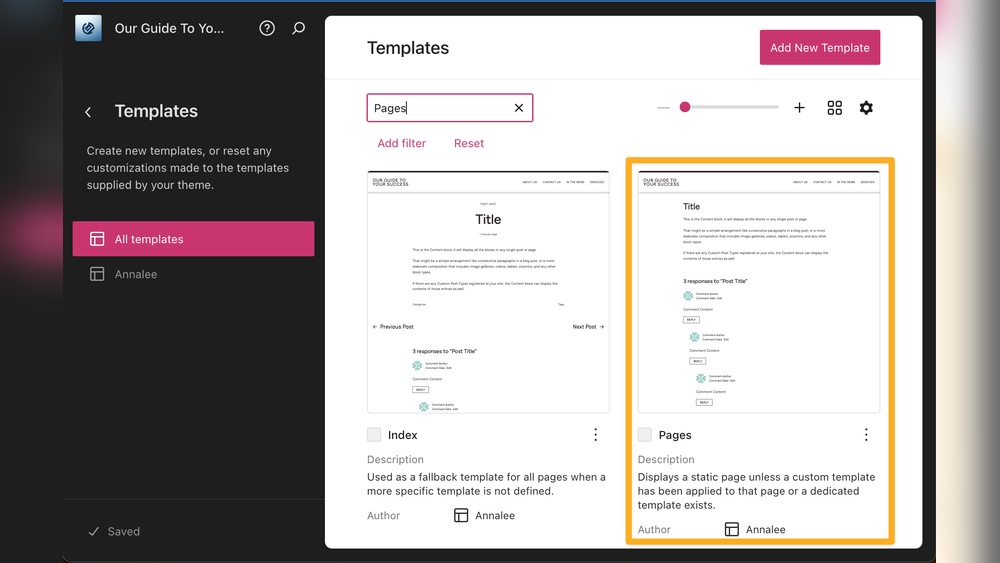
Editing template files in WordPress lets you change how your site looks and works. Templates control the layout and design of your pages. By editing these files, you can customize your site beyond the basic options.
Before starting, understand the risks. Template files are written in code. Small mistakes can break your website. Take your time and follow best practices to keep your site safe.
Using The Theme Editor
The Theme Editor is built into WordPress. It lets you change template files directly from the dashboard. Access it under Appearance > Theme Editor. You can edit files like header.php or footer.php here.
Be careful. Changes apply immediately. Saving errors can cause site problems. Use this tool only for small edits or quick fixes.
Working With Child Themes
Child themes are safer for editing templates. They let you change your site without altering the original theme files. Your changes stay safe during theme updates.
Create a child theme and copy the template files you want to edit. Make your changes in the child theme files. WordPress will use these instead of the originals.
Backing Up Before Editing
Always back up your site before editing templates. A backup saves your current files and database. This helps restore your site if something goes wrong.
Use plugins or your web host’s backup tools. Save a copy to your computer. Editing without backups risks losing your work and site data.
Adding Widgets And Plugins
Adding widgets and plugins is a simple way to improve your WordPress template. Widgets let you place content blocks in specific areas. Plugins add new features and tools that your site needs. Both work together to make your website more useful and user-friendly.
Placing Widgets In Template Areas
Widgets fit into sidebars, footers, and other spots. To place a widget, go to the WordPress dashboard. Click on Appearance, then Widgets. Drag the widget to the area you want. Customize it by filling in the options shown. Save your changes to see the widget on your site.
Choosing Compatible Plugins
Select plugins that match your WordPress version. Check user reviews and ratings for reliability. Avoid plugins that are outdated or rarely updated. Pick plugins that do not slow down your site. Test new plugins on a staging site first. This keeps your live site safe from issues.
Enhancing Functionality
Plugins add many useful features. You can add contact forms, SEO tools, or galleries. Some plugins improve security and speed. Use only the plugins you need to keep your site fast. Too many plugins can cause conflicts and errors. Keep your plugins updated to ensure smooth performance.

Credit: docs.themeisle.com
Saving And Previewing Changes
Saving and previewing changes in WordPress templates is an important step. It helps you see your edits before making them live. This process reduces mistakes and ensures the design looks good. By saving and previewing, you control how your website appears to visitors.
WordPress offers tools to save your work safely. You can also view changes in real time. These tools make editing easier and faster. Understanding how to save and preview helps keep your website professional.
Using The Preview Mode
Preview mode shows your edits without publishing them. It lets you check layout, colors, and text. You can open preview in a new tab or window. This way, the live site stays unchanged while you review. Use preview mode often to catch errors early.
Publishing Your Edits
Publishing makes your changes visible to everyone. After previewing, click the publish button. WordPress updates the live site with your new design. Always double-check your work before publishing. Saving drafts helps you avoid accidental updates.
Troubleshooting Common Issues
Sometimes, changes don’t appear as expected. Clear your browser cache to see updates. Disable caching plugins if problems persist. Check for plugin conflicts by deactivating them one by one. Always backup your site before making big edits.
Frequently Asked Questions
How Can I Edit WordPress Templates Easily?
You can edit WordPress templates via the Theme Editor or a child theme. Use the built-in editor for simple tweaks or a child theme for safer, extensive modifications. Always back up your site before editing templates to prevent data loss.
What Tools Are Best For Editing WordPress Templates?
The WordPress Theme Editor, FTP clients, and code editors like Visual Studio Code are ideal. These tools let you access and modify template files safely. Choose an editor that supports PHP, HTML, and CSS for best results.
Can I Customize Templates Without Coding In WordPress?
Yes, use the WordPress Customizer or page builder plugins like Elementor. These tools allow template changes without coding knowledge. They offer drag-and-drop interfaces for easy design and layout customization.
How Do I Create A Child Theme For Template Editing?
Create a child theme folder, add a style. css and functions. php file, then enqueue the parent theme styles. This method preserves your customizations during theme updates, keeping your edits safe and intact.
Conclusion
Editing templates in WordPress is simple and flexible. You can change colors, fonts, and layouts with ease. Using the built-in editor saves time and effort. Always save your changes to avoid losing work. Experiment with different styles to find what fits best.
Keep backups before making big changes. This helps keep your site safe and running well. With practice, editing becomes quicker and more natural. Enjoy creating a website that looks just how you want.


