
Are you ready to get your website online but not sure how to start with hosting? Hosting your domain with Namecheap is simpler than you think.
Whether you want a personal blog, a business site, or an online store, this guide will walk you through every step. By the end, you’ll have the confidence to set up your domain and get your site live quickly. Keep reading, and you’ll discover the easy way to make your website accessible to the world.
Credit: help.pixpa.com
Choosing The Right Domain
Choosing the right domain is the first step to building your online presence. It shapes your brand and helps visitors find you. A good domain name is simple, memorable, and matches your business or idea. Think carefully before you register it. The right choice can make a big difference in how people see your site.
Tips For Selecting A Domain Name
Pick a name that is short and easy to spell. Avoid complicated words or long phrases. Use keywords related to your business to help with search engines. Stay away from numbers and hyphens, as they can confuse users. Think about your target audience and what they might remember. Make it unique but clear.
Checking Domain Availability
Use Namecheap’s search tool to see if your domain is free. Enter your desired name and check results quickly. If it’s taken, try slight changes or different spellings. Keep a list of backup names to save time. Verify that your domain does not infringe on trademarks to avoid legal issues.
Comparing Domain Extensions
.com is the most popular and trusted extension. It suits most businesses and personal sites. Other options like .net, .org, or country-specific extensions can work well too. Consider your audience’s location and purpose before choosing. Some extensions are cheaper but less known. Pick one that fits your brand and goals.
Credit: sendlayer.com
Setting Up A Namecheap Account
Setting up a Namecheap account is the first step to hosting your domain. It is simple and fast. This section guides you through creating your account and using the dashboard.
Creating Your Account
Visit the Namecheap homepage. Click the “Sign Up” button at the top right. Enter your email address and create a strong password. Confirm your password by typing it again. Agree to the terms and conditions. Click “Create Account” to finish. You will receive a confirmation email. Open it and verify your email address. Your account is now ready for use.
Navigating The Dashboard
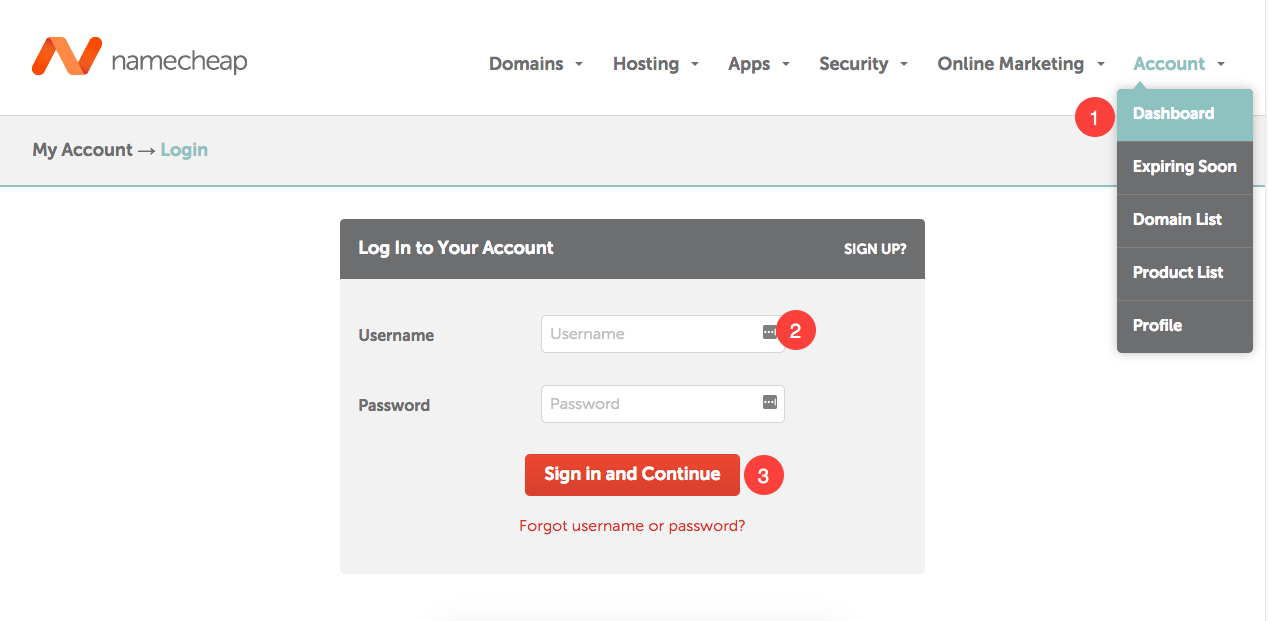
Log in to your Namecheap account. The dashboard shows your domains and services. Use the menu on the left to explore options. Find domain management, hosting plans, and support. Check notifications at the top for updates. The dashboard is your control center. It helps you manage your domain easily.
Registering Your Domain
Registering your domain is the first step in hosting with Namecheap. It gives your website a unique address on the internet. Choosing the right domain helps visitors find your site easily. The process is simple and quick. Follow these steps to register your domain successfully.
Searching For Your Domain
Start by entering your desired domain name into Namecheap’s search bar. The tool checks if the name is available or already taken. Try different variations if your first choice is not free. Use simple and clear words that relate to your website. Short names are easier to remember.
Adding Domain To Cart
Once you find an available domain, click the option to add it to your cart. Namecheap may suggest similar domains or add-on services like privacy protection. Review these options carefully and decide what you need. Keep your selection focused to avoid extra costs.
Completing The Purchase
Proceed to checkout to finalize your domain registration. Enter your contact and payment details as required. Namecheap offers secure payment methods for safety. After payment, you receive confirmation and control over your new domain. Now you are ready to link it to your hosting.
Configuring Domain Settings
Configuring your domain settings is a key step after purchasing a domain on Namecheap. These settings control how your domain works and who can see your information. Proper setup ensures your website runs smoothly and your details stay private.
Each domain has a management panel where you can change these settings easily. The options include updating your contact details and turning on privacy protection. Both help keep your domain secure and up to date.
Accessing Domain Management
Start by logging into your Namecheap account. Go to the “Domain List” section. Find the domain you want to manage. Click the “Manage” button next to it. This opens the domain management dashboard.
Here, you can see all settings related to your domain. It is the control center for DNS, contacts, and privacy options.
Updating Contact Information
Check that your contact information is correct and current. This includes your name, email, phone, and address. Click “Contact Information” in the management dashboard.
Update any wrong details. Namecheap uses this info to contact you about your domain. Accurate details help avoid losing your domain or missing important alerts.
Enabling Domain Privacy
Domain privacy hides your personal contact info from public WHOIS databases. This stops spammers and scammers from seeing your details. In the domain management area, find “Privacy Protection.”
Turn it on with a simple toggle. Privacy is free for many domains on Namecheap. Protect your identity and reduce spam by enabling this feature.
Connecting Domain To Hosting
Connecting your domain to hosting is an important step in setting up your website. It links your domain name with the server where your site files live. Without this connection, visitors cannot access your website by typing your domain name.
This process involves selecting the right hosting plan, updating DNS settings, and verifying the connection to ensure everything works correctly.
Choosing A Hosting Plan
Start by choosing a hosting plan that fits your website needs. Namecheap offers shared, VPS, and dedicated hosting options. Shared hosting is best for small websites with low traffic. VPS hosting suits medium-sized sites needing more control. Dedicated hosting is for large sites needing full server resources.
Pick a plan based on your budget and expected website traffic. After purchase, you will get access to your hosting dashboard.
Updating Dns Records
Next, update your domain’s DNS records to point to your hosting server. Log in to your Namecheap account and go to the Domain List. Find your domain and click “Manage.”
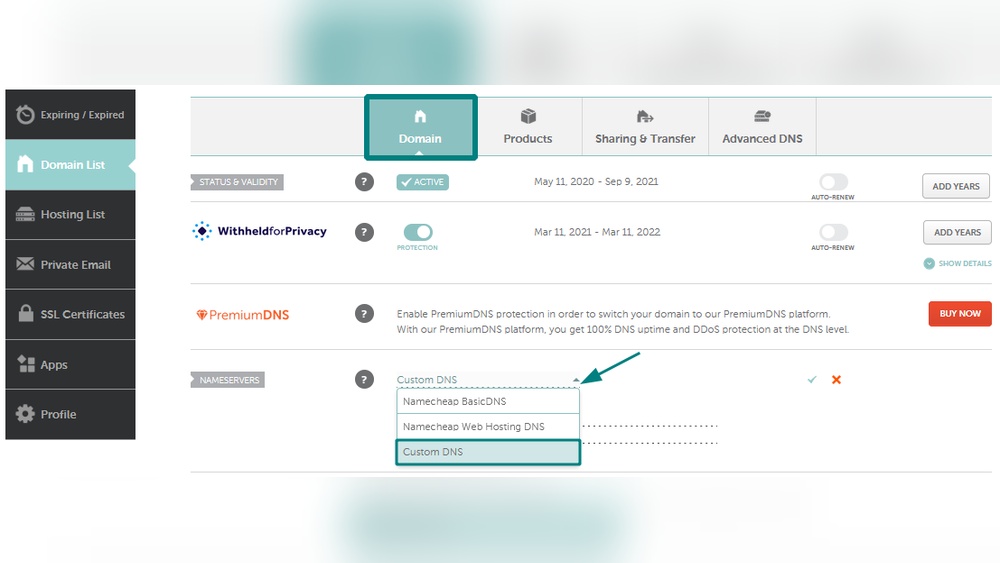
Locate the “Nameservers” section and select “Custom DNS.” Enter the nameservers provided by your hosting provider. Save the changes. DNS updates can take a few hours to propagate worldwide.
Verifying Connection
After DNS updates, verify the connection to ensure your domain points to the hosting server. Use online tools like DNS checker to confirm nameserver changes. You can also try visiting your domain in a browser. If your website loads, the connection is successful.
If the site does not load, recheck your DNS settings or contact your hosting support for help.
Managing Your Domain
Managing your domain is a key part of hosting with Namecheap. It keeps your website online and secure. You control how your domain works here. Simple steps help you keep your domain active and connected. This section explains important tasks like renewing, transferring, and setting up email forwarding.
Renewing Domains
Domains expire after a set time. Renew your domain before it runs out. Namecheap sends reminders to help you remember. You can renew for one year or longer. Just log into your account and select the domain. Click renew, choose the time, and pay. Keep your domain live and avoid losing it.
Transferring Domains
Transferring moves your domain from another provider to Namecheap. It helps to manage all domains in one place. Start by unlocking your domain at the old provider. Get the transfer code from them. Then, enter this code in Namecheap’s transfer page. Follow the steps and confirm the transfer. The process takes a few days.
Setting Up Email Forwarding
Email forwarding sends messages from your domain to another email. It is easy to set up with Namecheap. Go to the domain settings and find email forwarding. Add the email address you want to use. Next, enter the address where emails should go. Save the changes. Now, emails sent to your domain will reach your chosen inbox.
Troubleshooting Common Issues
Troubleshooting common issues with Namecheap hosting can save time and reduce frustration. Many users face similar problems that are easy to fix. Understanding these issues helps keep your domain running smoothly.
Dns Propagation Delays
DNS changes do not happen instantly. It can take up to 48 hours for changes to spread worldwide. This delay is called DNS propagation. During this time, your website may not appear correctly. Patience is key. You can check propagation status using online tools to see where your domain is updated.
Domain Not Resolving
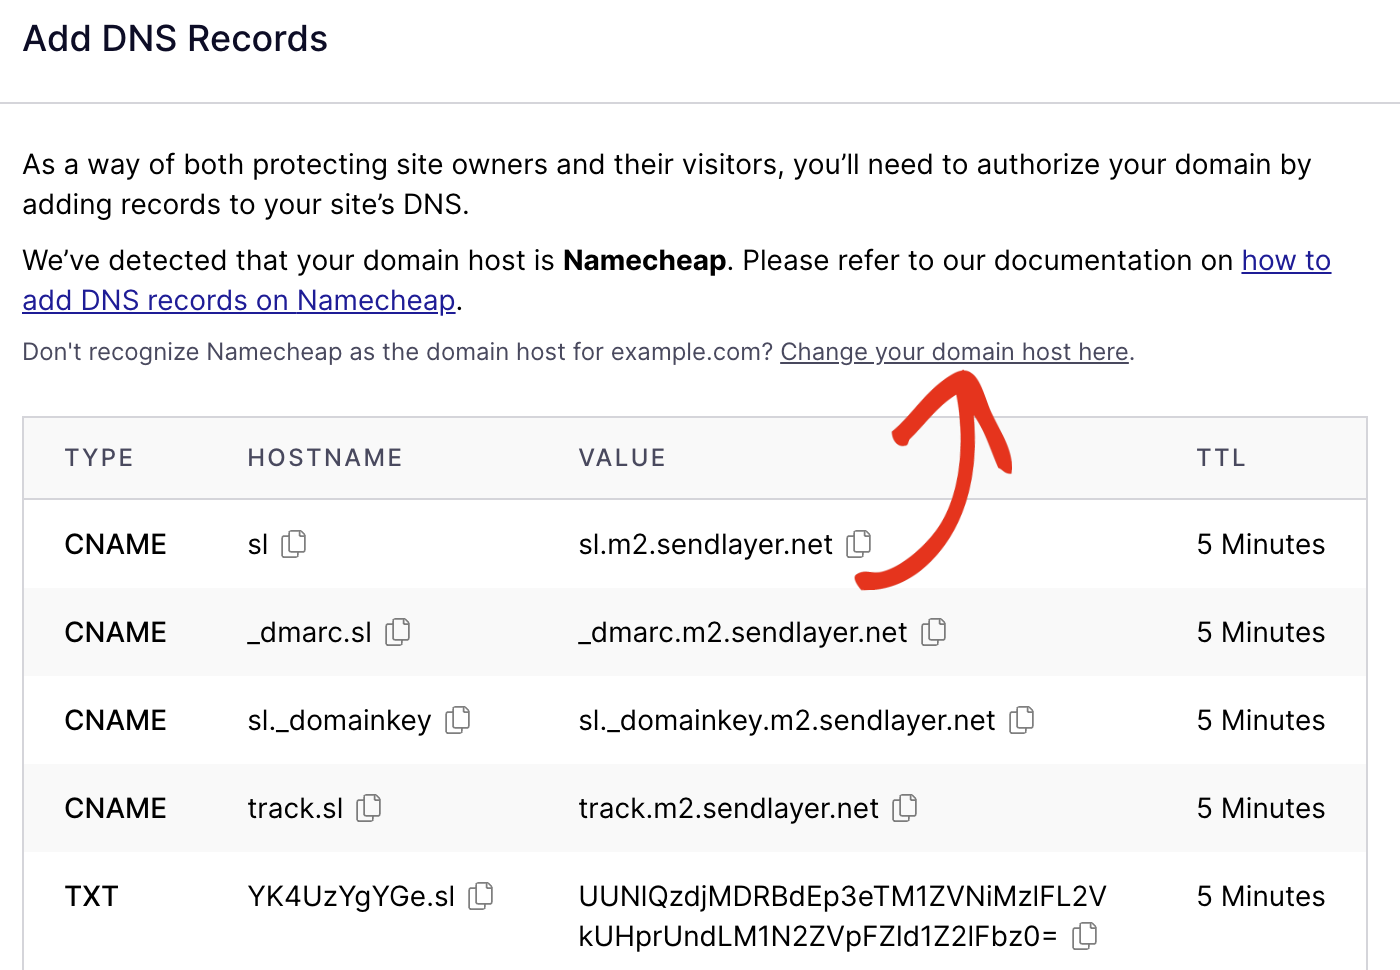
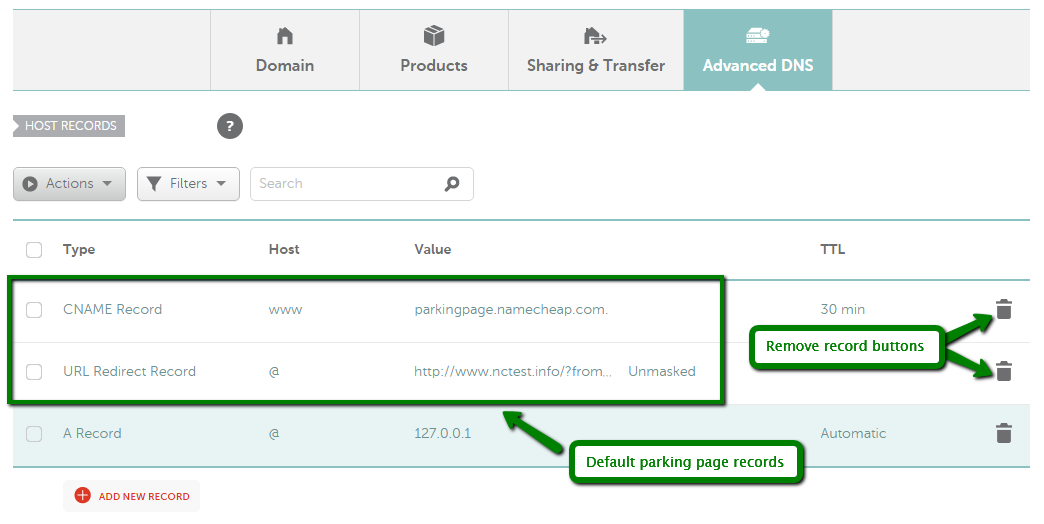
When a domain does not resolve, the website does not load. This issue often comes from incorrect DNS settings. Double-check your Namecheap DNS records, like A, CNAME, and NS records. Make sure they match your hosting provider’s instructions. Clear your browser cache and try again. Sometimes, a simple restart of your device helps.
Contacting Namecheap Support
Namecheap offers support via live chat and tickets. Use live chat for quick answers. Be clear and concise about your problem. Provide your domain name and account details. Keep your questions simple. Support agents can guide you through complex fixes. Save chat transcripts for future reference.
Credit: www.namecheap.com
Frequently Asked Questions
How Do I Host A Domain On Namecheap?
To host a domain on Namecheap, first purchase the domain. Then choose a hosting plan, connect the domain to hosting, and upload your website files. Namecheap provides step-by-step guides for easy setup and domain management.
Can I Use Namecheap Hosting With Other Domain Providers?
Yes, you can use Namecheap hosting with domains from other providers. Simply update your domain’s nameservers to point to Namecheap’s servers. This allows you to host your website on Namecheap while keeping your domain registered elsewhere.
What Hosting Plans Does Namecheap Offer?
Namecheap offers shared, VPS, and dedicated hosting plans. Shared hosting is ideal for beginners, while VPS and dedicated hosting suit larger websites. Each plan includes easy domain integration, SSL certificates, and 24/7 customer support.
How To Connect My Namecheap Domain To Hosting?
Log in to your Namecheap account, go to Domain List, select your domain, and update the DNS settings. Set the nameservers to your hosting provider’s details to link your domain with your hosting service.
Conclusion
Hosting your domain with Namecheap is simple and clear. You just need to follow a few easy steps. Setting up your website will not take much time. Namecheap offers reliable service and good support. You can focus on building your site without worries.
Start hosting today and see your site live online. Trust the process and keep your site updated. Your online presence begins with a strong domain host.


