
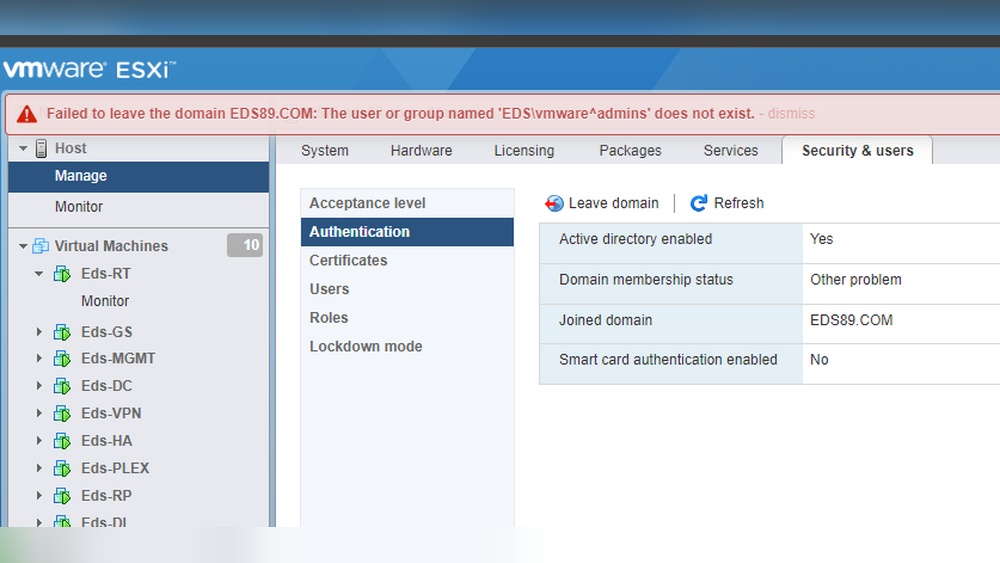
Are you struggling to remove your ESX host from a Windows domain? It might seem complicated, but with the right steps, you can do it quickly and safely.
Whether you’re managing a small setup or a large network, knowing how to properly disconnect your ESX host is crucial to avoid downtime and security issues. In this guide, you’ll discover clear, simple instructions that make the process straightforward. Keep reading, and you’ll gain the confidence to handle this task on your own without any hassle.
Prepare For Domain Removal
Preparing your ESX host for domain removal is a critical step. It helps avoid data loss and connection problems. This preparation ensures a smooth transition out of the Windows domain. Follow these key steps to get ready.
Backup Important Data
Backing up data protects your files during the removal process. Save all configurations and settings related to the ESX host. Use reliable backup tools or export data manually. Store backups in a safe location outside the host.
Check Host Connectivity
Ensure the ESX host has stable network connections. Test access to other servers and resources in the network. Confirm there are no firewall or routing issues. A connected host prevents errors during domain removal.
Verify Domain Credentials
Confirm you have the right username and password to remove the host. Use an account with domain administrator rights. Double-check credentials before starting the process. Correct credentials avoid permission failures and delays.
Access Esx Host Settings
Accessing the ESX host settings is the first step to remove the host from a Windows domain. This allows you to change network and authentication configurations directly. You can manage these settings through different interfaces, depending on your access and preference.
Two common ways to access the ESX host settings are using the vSphere Client or the Direct Console User Interface (DCUI). Each method offers a straightforward path to control your ESX host.
Use Vsphere Client
Open the vSphere Client and connect to your ESX host or vCenter Server. Use your administrator credentials to log in. Once logged in, select the host from the inventory panel. Click on the Configure tab to see the settings.
Find the System section, then click on Authentication Services. This area shows domain membership and related options. Here, you can start the process to remove the ESX host from the Windows domain.
Login To Direct Console User Interface
Access the physical or remote console of your ESX host. The Direct Console User Interface (DCUI) appears after booting. Press F2 to customize the system. Enter the root username and password to log in.
Navigate through the menu to find network and authentication settings. The DCUI allows you to view domain information and adjust settings without needing the vSphere Client. Use this to disconnect the host from the Windows domain.
Remove Host From Domain
Removing an ESX host from a Windows domain helps manage your network and security better. This process stops the host from using domain services and controls. Follow clear steps to remove the host safely without affecting other systems.
Navigate To Authentication Services
Start by logging into your ESX host’s management interface. Find the section labeled “Authentication Services” or “Security.” This area controls domain connections and user access. Access it to prepare for disconnecting from the domain.
Disconnect From Active Directory
In Authentication Services, locate the option to disconnect from Active Directory. Click this button to remove the host’s domain membership. You may need to enter administrator credentials to confirm the action. This step breaks the link between the host and the domain controller.
Confirm Host Removal
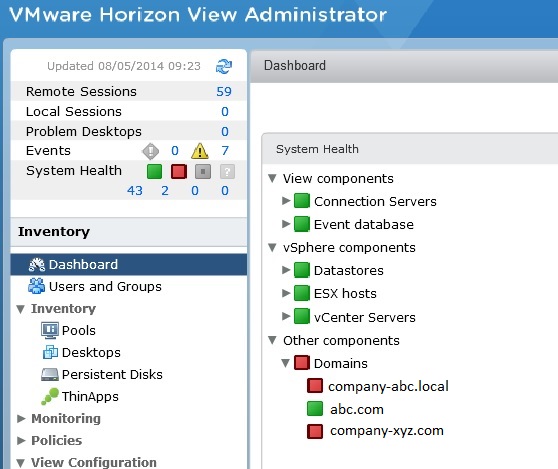
After disconnecting, verify the host no longer belongs to the domain. Check the host’s status in the Authentication Services section. Look for messages confirming successful removal. Restart the host if necessary to apply the changes fully.
Credit: www.vmadmin.co.uk
Post-removal Tasks
After removing an ESX host from a Windows domain, some important tasks remain. These steps ensure the host works correctly and stays secure. Follow them carefully to keep your system stable and efficient.
Restart Management Services
Restarting management services is crucial after the removal. It refreshes the host’s connection settings and clears any cached domain information. Use the ESXi Shell or SSH to run the command /etc/init.d/hostd restart. This quick step helps the host operate smoothly without domain dependencies.
Verify Host Status
Check the host status in your vSphere client or web interface. Ensure the host shows as connected and healthy. Look for warning or error messages that might hint at issues from the domain removal. Confirming the host’s status early avoids future problems.
Update Network Settings
Review the network settings on the host. Remove any domain-related configurations like DNS entries or authentication settings. Adjust firewall rules if they depended on domain policies. Keep the network setup simple and aligned with your current environment for better performance.
Troubleshooting Tips
Removing an ESX host from a Windows domain can sometimes cause problems. Troubleshooting helps find and fix these issues quickly. Following simple steps makes the process smooth and less stressful.
Common Errors And Fixes
Errors often happen due to network or permission problems. One common error is access denied. Check the user account has the right permissions to remove the host. Another issue is DNS errors. Ensure the ESX host and domain controllers can talk to each other. Time mismatch also causes failures. Sync the ESX host clock with the domain controller. These fixes solve most errors during removal.
Review Logs For Issues
Logs hold clues to what went wrong. Check the ESX host logs in /var/log/vmware/. Look for messages about domain or authentication errors. Also, review Windows event logs on the domain controller. Look under security and system logs. These logs help pinpoint the exact cause. Save important log entries for further help if needed.
Rejoin Domain If Needed
Sometimes the host does not leave the domain cleanly. Rejoining the domain may help. First, remove the host from the domain again. Restart the host after removal. Then add the host back to the domain using correct credentials. Confirm the host appears in Active Directory. This step often fixes lingering domain issues and restores normal function.

Credit: blogs.vmware.com
Credit: cloud.google.com
Frequently Asked Questions
How Do I Remove An Esx Host From A Windows Domain?
To remove an ESX host, access the vSphere Client, navigate to the host settings, then select “Authentication Services. ” Choose “Leave Domain” and enter domain admin credentials. Restart the host to apply changes. This disconnects the ESX host from the Windows domain safely.
Can I Remove An Esx Host Without Downtime?
No, removing an ESX host from the domain requires a host restart. Plan for downtime to avoid service disruption. Ensure all virtual machines are migrated or powered off before the process to maintain data integrity.
What Permissions Are Needed To Remove Esx Host From Domain?
You need domain administrator credentials or equivalent permissions to remove the ESX host from the Windows domain. These rights allow you to disjoin the host securely and update domain-related configurations without errors.
Will Removing Esx Host Affect Virtual Machines?
Removing the ESX host from the domain does not directly affect virtual machines. However, ensure VMs are safely managed as the host will reboot during the process, which temporarily impacts VM availability.
Conclusion
Removing an ESX host from a Windows domain is straightforward. Follow the steps carefully and double-check each one. This helps avoid common errors and downtime. Keep backups before making changes for safety. After removal, verify the host works correctly on your network.
Regular maintenance keeps your system running smoothly. Stay calm and methodical during the process. This ensures success without stress. Now, you can manage your ESX hosts more confidently.


