
Are you ready to make your website live but don’t know how to connect your domain to your hosting account on GoDaddy’s cPanel? You’re not alone.
Many people struggle with this crucial step, but once you get it right, your site will be up and running smoothly. In this guide, you’ll learn exactly how to link your domain to your hosting with simple, clear instructions. By the end, you’ll have the confidence to manage your website like a pro.
Let’s get started and make your online presence real!
Choosing The Right Domain
Choosing the right domain is the first step to building your website. A good domain name helps visitors remember your site. It also improves your website’s search engine ranking. Keep your domain short, clear, and related to your content. Avoid using numbers or hyphens that confuse people.
Focus on finding a domain that matches your brand or business name. Think about your target audience and what they might type to find you online. A strong domain name makes your site look professional and trustworthy.
Checking Domain Availability
Start by checking if your desired domain name is free to use. Use online tools to quickly see if others have taken it. If your first choice is not available, try different variations or extensions like .net or .org. Avoid domains that are too similar to popular brands to prevent confusion.
Be sure to check common spelling mistakes or alternate spellings. This helps protect your brand and keeps visitors from going to the wrong website. Confirm the domain is not linked to any negative history or spam to keep your site’s reputation clean.
Selecting A Domain Registrar
Choose a reliable domain registrar for purchasing and managing your domain. Look for companies with good customer support and transparent pricing. Check if they offer easy domain management tools and security features like privacy protection.
Compare the renewal fees and any extra costs. Some registrars charge more after the first year. Pick one that fits your budget and offers simple setup with GoDaddy’s cPanel hosting. Reliable registrars make connecting your domain faster and easier.
Credit: www.godaddy.com
Setting Up Hosting With Godaddy
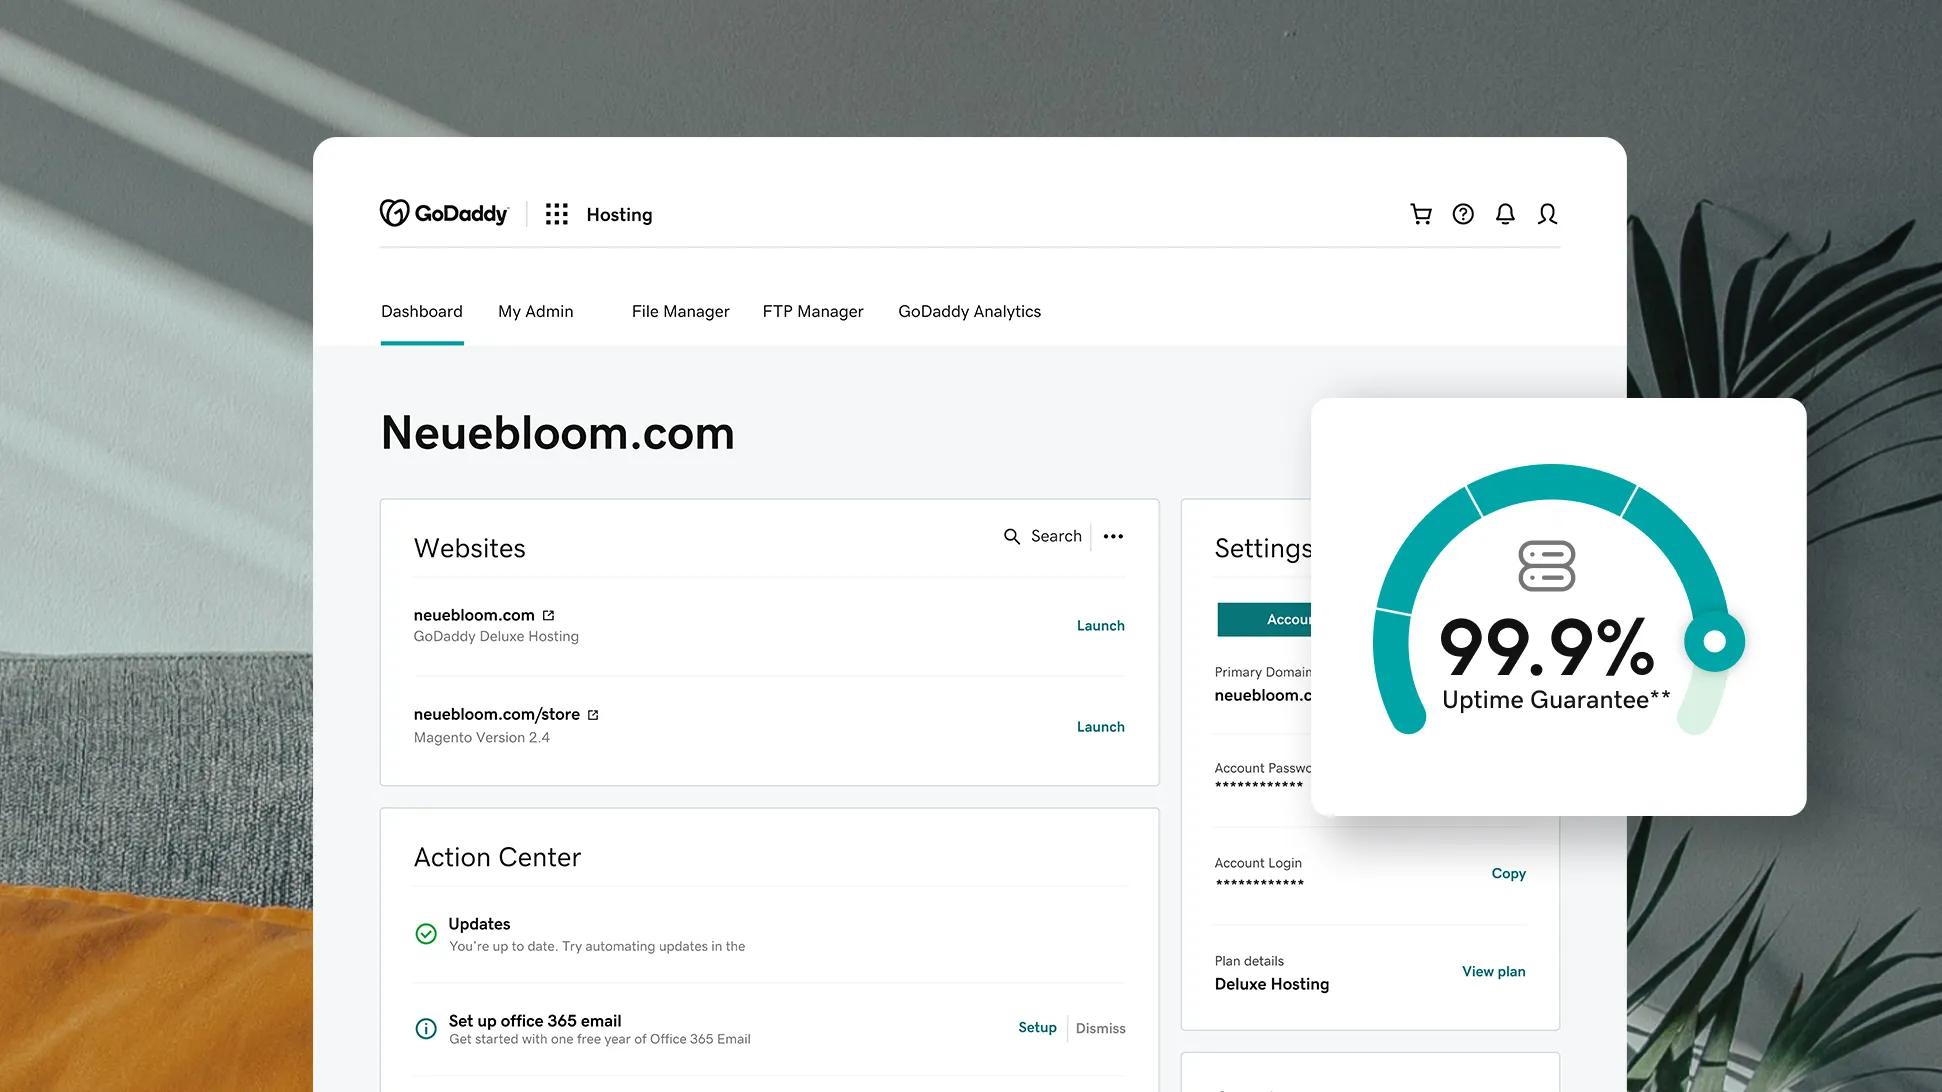
Setting up hosting with GoDaddy is a simple process that lets you start building your website quickly. It involves choosing the right hosting plan and accessing the cPanel dashboard to manage your site. Both steps are easy to follow and require no advanced technical skills.
Picking A Suitable Hosting Plan
GoDaddy offers various hosting plans to fit different needs. Shared hosting is best for small websites and beginners. It is affordable and easy to use. For more power, choose VPS or dedicated hosting. These plans give better speed and control. Think about your website size and traffic before choosing a plan. Pick a plan that matches your budget and growth goals.
Accessing Cpanel Dashboard
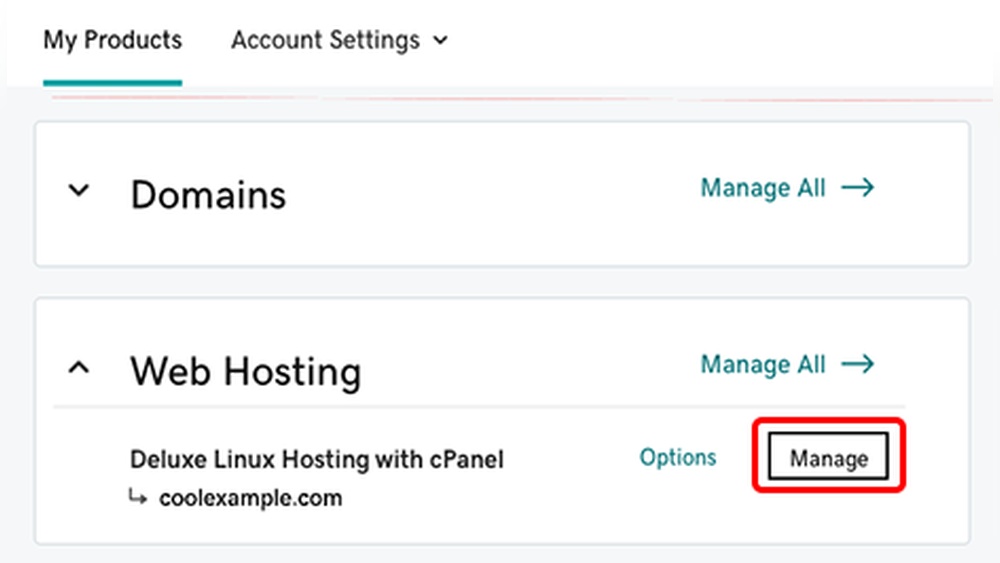
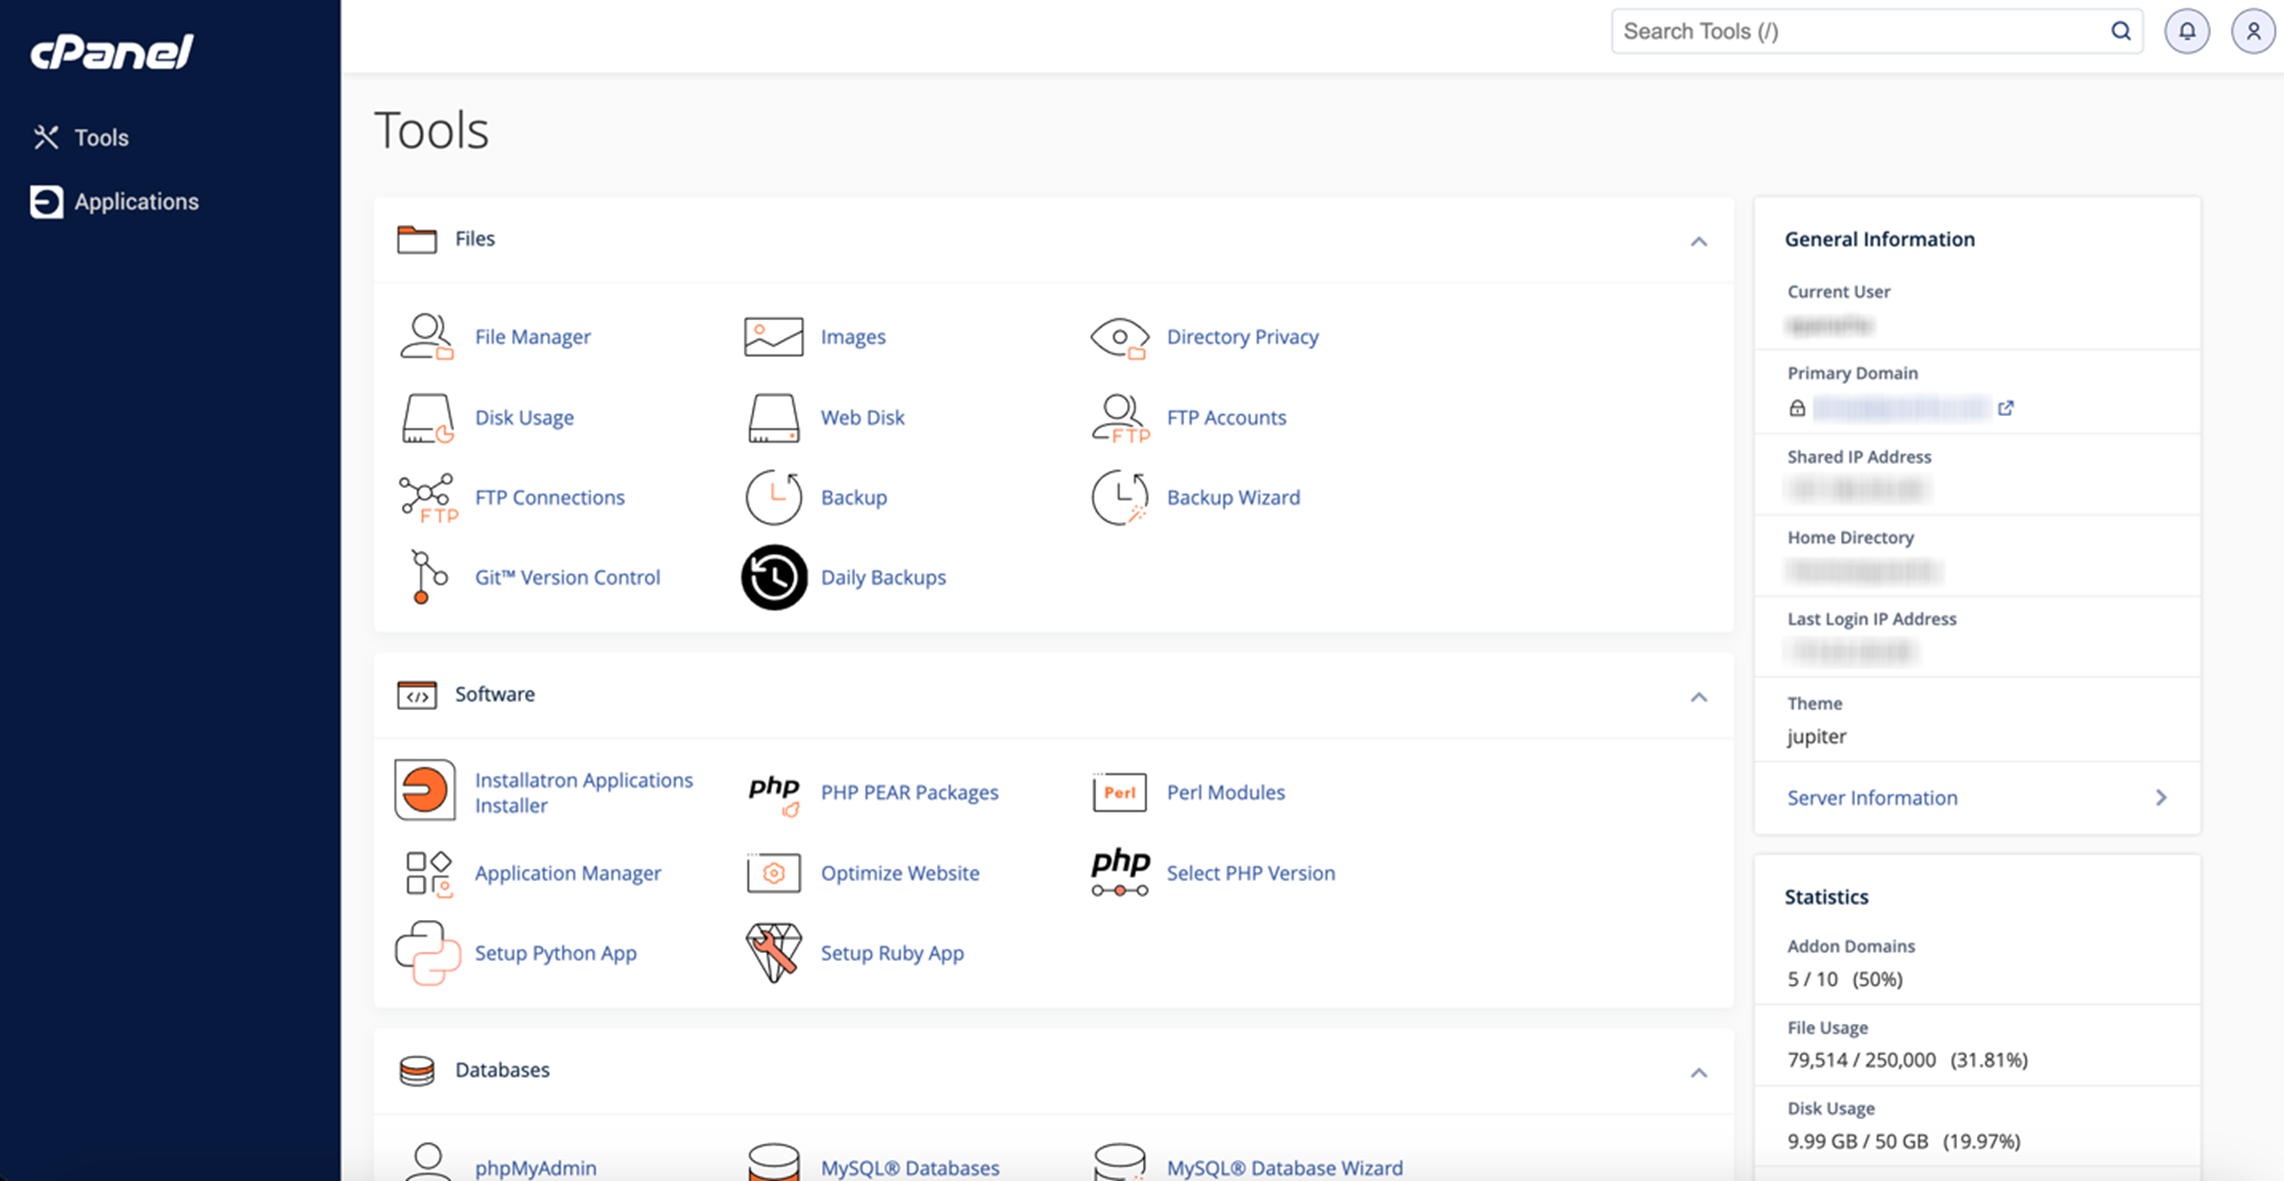
After buying a hosting plan, log in to your GoDaddy account. Find your hosting product and click “Manage.” This opens the hosting control panel. Look for the cPanel button and click it. The cPanel dashboard lets you control files, databases, and emails. It also helps you install WordPress and other apps with a few clicks. Use cPanel to keep your website running smoothly.
Configuring Domain Dns Settings
Configuring your domain’s DNS settings is a key step to connect your domain to your hosting cPanel on GoDaddy. DNS settings tell the internet where to find your website. This process involves updating the nameservers of your domain to point to your hosting provider.
Proper DNS configuration ensures your website loads correctly and fast. Incorrect settings can cause your site to be unavailable. Follow these steps carefully to set up your domain with GoDaddy.
Locating Nameservers In Godaddy
First, log in to your GoDaddy account. Go to the “My Products” page to see your domains. Find the domain you want to connect.
Click on “DNS” or “Manage DNS” next to your domain name. Scroll down to the “Nameservers” section. Here, you will see the current nameservers.
If you already have hosting, you need the nameservers provided by your host. Copy those nameservers for the next step.
Updating Domain Nameservers
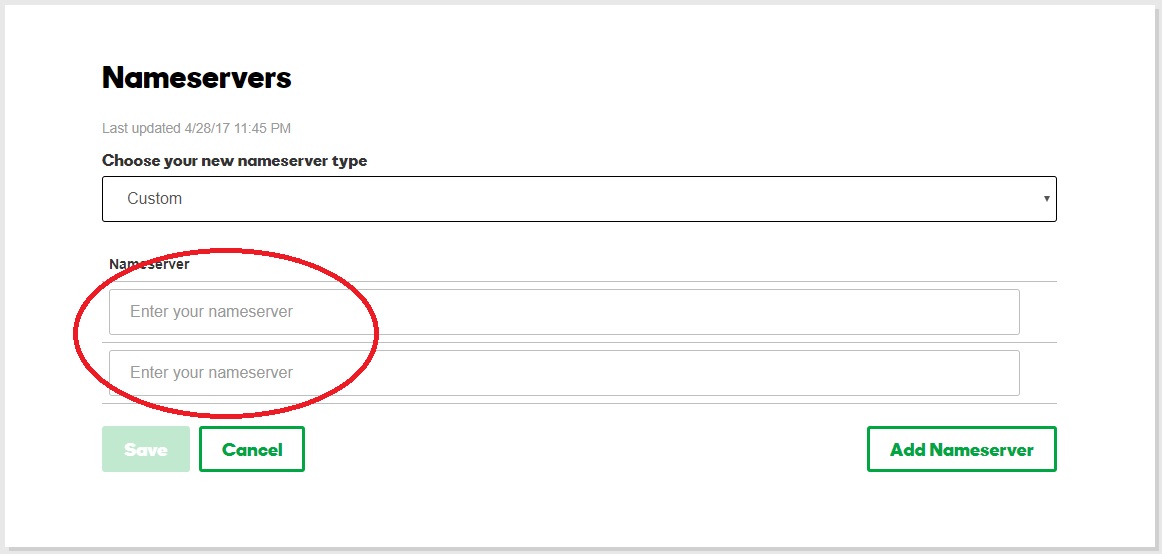
Stay in the “Nameservers” section on GoDaddy. Click on “Change” to update the nameservers. Choose “Custom” to enter your host’s nameservers.
Paste the nameservers you copied from your hosting provider. Usually, there are two or more entries to fill. Save your changes once done.
Nameserver updates can take some time to spread across the internet. This delay is called DNS propagation and may last up to 48 hours.
Credit: www.godaddy.com
Linking Domain To Hosting Account
Linking your domain to your hosting account is a key step in making your website live. It allows visitors to find your site using your domain name. This process connects your domain registered with GoDaddy to your hosting space managed via cPanel. Follow the steps carefully to ensure your domain points correctly to your hosting server.
Adding Domain To Cpanel
Log in to your cPanel dashboard provided by your hosting. Find the “Domains” section and click on “Addon Domains.” Enter your domain name in the “New Domain Name” box. The system will fill in the “Subdomain” and “Document Root” fields automatically. Confirm these details and click “Add Domain.” This action links your domain to your hosting account, allowing you to upload your website files.
Verifying Domain Connection
After adding the domain, check if it points to your hosting server. Use online tools like “DNS Checker” to confirm your domain’s DNS records. Look for the “A Record” to match your hosting server’s IP address. It may take a few hours for the DNS changes to propagate worldwide. Once updated, visit your domain in a browser to see your website or hosting default page.
Troubleshooting Common Issues
Troubleshooting common issues helps solve problems fast. Connecting your domain to GoDaddy hosting may face some hurdles. Understanding typical errors saves time and avoids confusion. Follow these tips to fix common problems quickly.
Dns Propagation Delays
DNS propagation means updating internet servers worldwide. This process takes time and can cause delays. Usually, it takes a few hours but may last up to 48 hours. During this time, your site may not appear or work properly. Patience is key. Avoid making changes repeatedly, as this can slow propagation.
Incorrect Nameserver Entries
Nameservers tell the internet where to find your website. Wrong nameserver entries cause your domain to not link correctly. Double-check the nameservers in your GoDaddy account. They should match the nameservers given by your hosting provider. Correct any typos or missing details. Save changes and wait for updates to take effect.
Credit: www.godaddy.com
Optimizing Site Performance
Optimizing your website’s performance is key to keeping visitors happy and engaged. A fast, secure site builds trust and improves search engine rankings. Small changes in your hosting settings can make a big difference in speed and security.
Using Ssl Certificates
SSL certificates protect your site by encrypting data between the browser and server. This keeps user information safe and boosts your site’s credibility. GoDaddy offers easy SSL installation via cPanel. Simply locate the SSL/TLS manager, upload your certificate, and activate it. Once enabled, your site will use HTTPS, which also helps improve search rankings.
Enabling Caching In Cpanel
Caching stores website data temporarily to speed up load times. With caching enabled, visitors see your site faster. cPanel provides several caching options like Apache’s mod_cache or LiteSpeed Cache. You can enable caching through the “Optimize Website” feature in cPanel. Choose “Compress all content” to reduce file sizes and improve performance. This reduces server load and boosts user experience significantly.
Frequently Asked Questions
How Do I Connect My Domain To Godaddy Cpanel?
To connect your domain to GoDaddy cPanel, update the domain’s nameservers to GoDaddy’s. Then, add the domain as an addon domain in cPanel. This links your domain with your hosting account and ensures proper website functionality.
What Are The Nameservers For Godaddy Hosting?
GoDaddy nameservers typically are nsXX. domaincontrol. com and nsYY. domaincontrol. com. Replace XX and YY with your specific numbers from your hosting account details. Updating these at your domain registrar points your domain to GoDaddy hosting servers.
How Long Does Domain Connection To Godaddy Take?
Domain connection to GoDaddy hosting usually takes 24 to 48 hours. This delay is due to DNS propagation worldwide. Once propagation completes, your website becomes accessible via the connected domain.
Can I Use An Existing Domain With Godaddy Cpanel Hosting?
Yes, you can use an existing domain by changing its nameservers to GoDaddy’s. After that, add the domain in your cPanel as an addon domain. This process links your domain to the hosting without transferring it.
Conclusion
Connecting your domain to GoDaddy’s cPanel is simple with clear steps. Just follow the instructions carefully to avoid errors. You control your website and hosting smoothly this way. Check your settings to ensure everything works well. Take your time and review each step before moving on.
Your website will be live and ready for visitors soon. Keep this guide handy for future reference or updates. Easy and quick setup leads to a strong online presence.


