
Are you ready to give your website a fresh identity by changing your domain name on HostGator? Whether you’re rebranding, switching to a catchier name, or correcting a typo, this process might seem tricky at first.
But don’t worry—this guide will walk you through every step clearly and simply. By the end, you’ll have the confidence to update your domain without losing traffic or SEO value. Keep reading, and you’ll discover exactly how to make this important change smoothly and quickly.

Credit: www.hostgator.com
Prepare For Domain Change
Preparing for a domain name change on HostGator needs careful steps. This process helps avoid data loss and downtime. Taking time to prepare makes the change smooth and safe.
Backup Your Website Data
Start by backing up all your website files and databases. Use HostGator’s control panel or an FTP client. Saving a copy protects your content from accidental loss. Keep backups on your computer or cloud storage for safety.
Check Domain Availability
Verify if your new domain name is free to use. Use domain search tools available on HostGator or other registrars. Choosing a unique and easy-to-remember domain helps visitors find your site. Avoid domains that are too long or confusing.
Review Hostgator Policies
Read HostGator’s rules about domain changes and transfers. Some plans may have limits or fees for domain modifications. Knowing the policies prevents surprises during the process. Contact HostGator support for any unclear details.
Access Hostgator Control Panel
Accessing the HostGator control panel is the first step to change your domain name. This panel holds all the tools you need to manage your website and domains. Knowing how to navigate it makes the process simple and fast.
HostGator’s control panel, known as cPanel, is user-friendly. You can find options for domains, files, databases, and more. Starting here sets a solid base for making domain changes.
Login To Cpanel
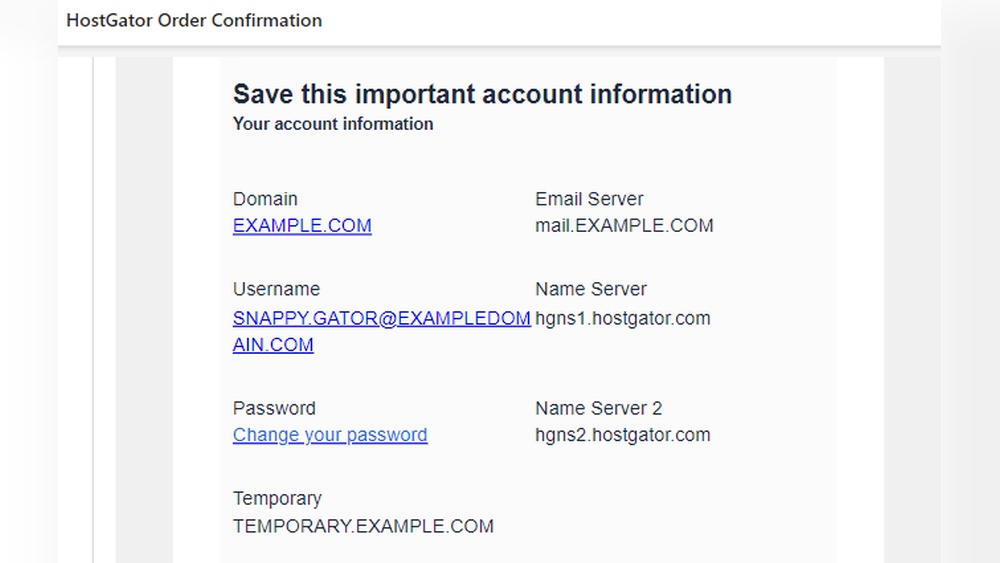
Open your web browser and go to the HostGator login page. Enter your username and password. These details were sent to you when you signed up. After logging in, look for the cPanel access link. Click it to open the control panel interface.
Navigate To Domain Settings
Inside cPanel, scroll to the “Domains” section. Here, you will find all options related to your website domains. Click on “Addon Domains” or “Domain Manager” depending on your account type. This area allows you to add, remove, or change domain names linked to your hosting.
Update Domain Name
Updating your domain name on HostGator is an important step when you want a fresh web address. This process involves adding your new domain, setting it as the main domain, and removing the old one. Each step is simple and can be done through your hosting control panel.
Add New Domain To Hosting Account
First, log in to your HostGator cPanel. Find the “Domains” section and click on “Addon Domains.” Enter your new domain name in the space provided. Choose a folder for the new domain files or use the default. Click “Add Domain” to complete this step.
Set Primary Domain
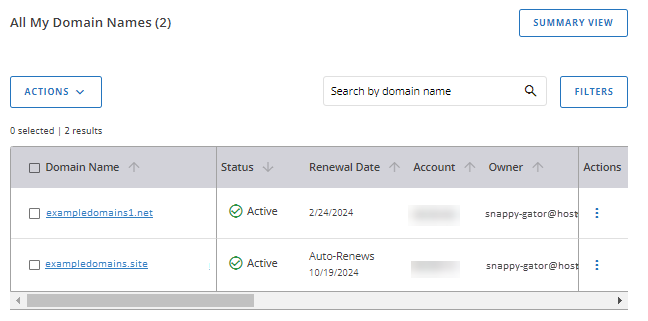
HostGator allows you to change the main domain linked to your account. Access the billing portal or contact support to request this change. Provide the new domain name you added. Wait for confirmation that the primary domain has been updated.
Remove Old Domain
After setting your new domain as primary, remove the old one from your hosting account. Return to the “Addon Domains” section in cPanel. Find the old domain and choose the option to remove it. Confirm removal to free up your hosting space.
Modify Dns Settings
Modifying DNS settings is a key step when changing your domain name on HostGator. These settings tell the internet where to find your website. Changing them correctly ensures your site works with the new domain. Understanding this process helps avoid downtime or errors.
Update Nameservers
Nameservers connect your domain to HostGator’s servers. You must update these to point to the new domain. Log in to your domain registrar’s control panel. Find the nameserver settings. Replace old nameservers with HostGator’s default ones. Save the changes. This update can take up to 48 hours to spread worldwide.
Configure Dns Records
DNS records control how your domain behaves online. Common types include A, CNAME, MX, and TXT records. Access HostGator’s cPanel to manage these records. Change the A record to your server’s IP address. Update CNAME records to match the new domain. Check MX records for email delivery. Save all changes carefully. Proper setup keeps your website and email running smoothly.
Adjust Website Configuration
After changing your domain name on HostGator, adjusting your website configuration is crucial. This step ensures your site works smoothly with the new domain. Your website files and database need updates to reflect the new address. Testing your site after changes helps catch errors early. Follow these simple steps to adjust your website configuration effectively.
Change Urls In Website Files
Search your website files for the old domain name. Replace every instance with the new domain name. This includes CSS, JavaScript, and HTML files. Use a text editor or a search-and-replace tool. Make sure no old URLs remain. This prevents broken links and missing resources.
Update Database References
Your website database stores many URLs. These URLs must match your new domain. Access your database via phpMyAdmin or a similar tool. Run a search-and-replace query for the old domain. Update links in posts, pages, and settings. This step is vital for dynamic websites like WordPress.
Test Website Functionality
After updates, check your website carefully. Test all pages and links to confirm they work. Look for broken links or missing images. Use different browsers and devices for testing. Fix any errors immediately to ensure smooth visitor experience. This step confirms your domain change is successful.

Credit: www.youtube.com
Manage Email Accounts
Managing email accounts is important after changing your domain name on HostGator. You need to set up new email addresses with the new domain. Also, redirect emails from the old domain to keep receiving messages. Finally, update your email client settings to continue sending and receiving emails smoothly.
Create Email With New Domain
Log in to your HostGator control panel. Find the Email section and click on Email Accounts. Click “Create” or “Add New.” Enter the new email name using your new domain. Set a strong password. Click “Create Account” to finish. Your new email is ready to use.
Redirect Old Emails
In the Email section, find Forwarders or Email Routing. Choose the old email address. Set it to forward all incoming emails to your new email address. Save the changes. This keeps your old emails forwarding to your new account. You won’t miss any important messages.
Update Email Client Settings
Open your email client like Outlook or Apple Mail. Go to account settings. Change the email address to your new one. Update the incoming and outgoing server settings if needed. Use the new domain’s mail servers from HostGator. Save the changes. Now your email client works with the new domain.
Verify And Launch
After changing your domain name on HostGator, verifying and launching your site is vital. This step ensures your website works smoothly with the new domain. It also helps confirm that visitors can access your site without problems.
Clear Cache And Propagation Time
Clear your browser cache to see the updated site. Cached data can show old versions of your website. DNS changes take time to spread across the internet. This process, called propagation, can last up to 48 hours. Patience is key during this period.
Monitor Website Performance
Check your website regularly after the switch. Look for slow loading times or broken links. Use tools like Google Analytics to track visitor behavior. Monitor traffic to ensure it stays consistent. Fix any drops quickly to keep visitors happy.
Troubleshoot Common Issues
Sometimes errors appear after a domain change. Common problems include missing images or 404 errors. Double-check your site’s URL settings in HostGator. Make sure all links use the new domain. Contact HostGator support for help if needed.
Credit: www.hostgator.com
Frequently Asked Questions
How Do I Change My Domain Name On Hostgator?
Log in to your HostGator cPanel. Go to the Domains section and select “Addon Domains” or “Domain Manager. ” Remove or update your current domain and add the new domain. Update your website files and databases to reflect the new domain name.
Will Changing My Domain Affect My Website Seo?
Changing your domain can impact SEO if not done correctly. Use 301 redirects from the old domain to the new one. Update all internal links and submit the new sitemap to search engines. This helps maintain your SEO rankings during the transition.
Can I Keep My Email With Hostgator After Domain Change?
Yes, you can keep your email services. Update your email settings to the new domain in HostGator’s cPanel. Ensure MX records and email accounts reflect the new domain for uninterrupted email service.
How Long Does Domain Name Change Take On Hostgator?
Domain changes usually take a few minutes to a few hours to reflect. DNS propagation might take up to 48 hours globally. Plan accordingly to minimize downtime during the transition.
Conclusion
Changing your domain name on HostGator is simple with the right steps. Follow each part carefully to avoid errors. Double-check your settings before finishing the process. Your website will reflect the new domain quickly. Keep your visitors informed about the change.
This helps maintain your site’s traffic and ranking. Stay patient as updates may take some time. Now, you can manage your domain with confidence.


