

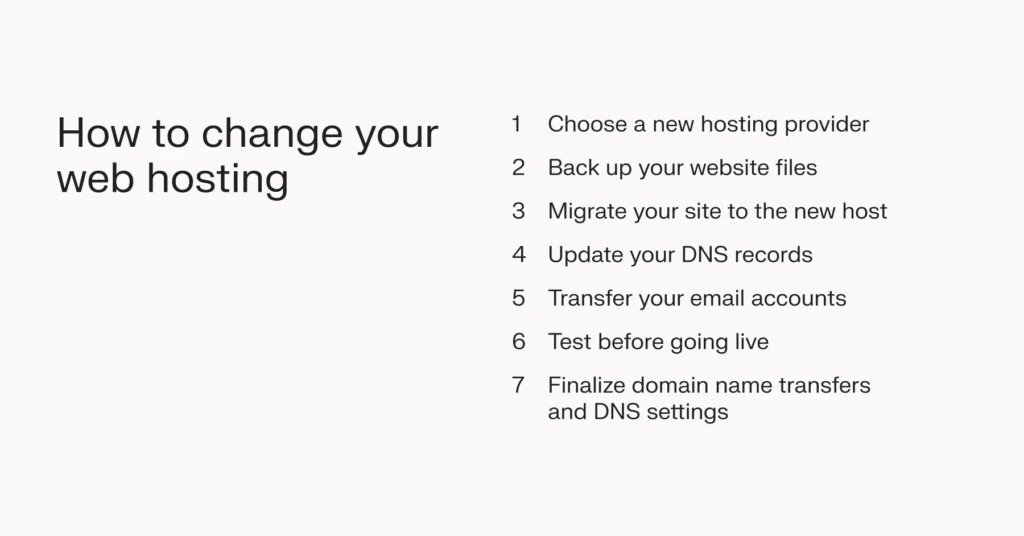
Are you ready to take control of your website by changing your domain hosting? Whether your current provider isn’t meeting your needs or you found a better deal, switching hosting can feel confusing.
But don’t worry—this guide will walk you through every step clearly and simply. By the end, you’ll know exactly how to move your domain hosting without losing traffic or data. Keep reading, and you’ll gain the confidence to make the switch smoothly and quickly.
Credit: www.liquidweb.com
Preparing For Domain Transfer
Preparing for a domain transfer is an important first step. It ensures a smooth move to your new hosting provider. Careful preparation helps avoid downtime and data loss. Follow these simple steps before you start the transfer process.
Check Domain Eligibility
Not all domains can be transferred at any time. Your domain must be at least 60 days old. It should not be locked or on hold. Check with your current registrar if your domain meets these rules. This saves time and prevents transfer failures.
Backup Website Data
Backing up your website is crucial before any transfer. Save all files, databases, and emails linked to your domain. Use tools or plugins offered by your hosting provider. This backup protects your content if something goes wrong during transfer.
Unlock Your Domain
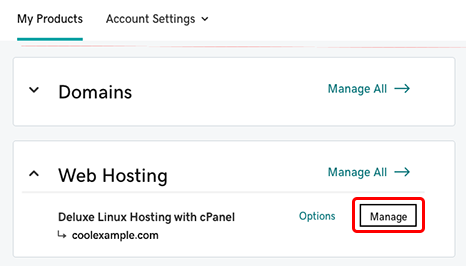
Most domains are locked to prevent unauthorized moves. You must unlock your domain before transferring. Log in to your current registrar’s control panel. Find the domain settings and disable the lock feature. This step allows the new host to take control.
Credit: www.godaddy.com
Choosing A New Hosting Provider
Choosing a new hosting provider is a key step in changing your domain hosting. The right host affects your website’s speed, security, and uptime. Take time to pick a provider that fits your needs and budget. Consider your website’s size and the type of hosting you require. Here are important factors to check before deciding.
Compare Hosting Plans
Look at different hosting plans carefully. Check what each plan offers in storage, bandwidth, and features. Some plans include free SSL certificates or daily backups. Shared hosting is cheaper but slower. VPS or dedicated hosting costs more but offers better performance. Match the plan with your website’s needs for best results.
Evaluate Customer Support
Good customer support saves time and frustration. Choose a host with 24/7 support through chat, phone, or email. Test their response time before buying. Read reviews about their support quality. A helpful support team can solve issues quickly and keep your website running smoothly.
Consider Pricing And Features
Compare prices and what you get for each plan. Low prices may mean fewer features or slower speeds. Check for hidden fees like setup or renewal charges. Look for extra features such as free domain transfers or website builders. Balance cost with the features you need for your site.
Initiating The Transfer Process
Starting the domain hosting transfer is the first big step. It requires a few clear actions to make the process smooth. Each step has to be done carefully to avoid delays or errors. Following these steps helps you keep control of your domain during the move.
Obtain Authorization Code
The authorization code is key to transfer your domain. It is sometimes called EPP code or transfer key. You get this code from your current domain registrar. Check your account or contact support to request it. Keep this code safe, as you need it for the next step.
Start Transfer With New Host
Next, go to your new hosting provider’s website. Look for the domain transfer option. Enter your domain name and the authorization code you received. This starts the transfer process with the new host. You may need to pay a transfer fee at this stage.
Confirm Transfer Request
After starting the transfer, check your email. Both old and new registrars send confirmation messages. You must approve these to continue the process. Confirming the transfer ensures you agree with the move. Without this, the transfer cannot finish.
Managing Dns Settings
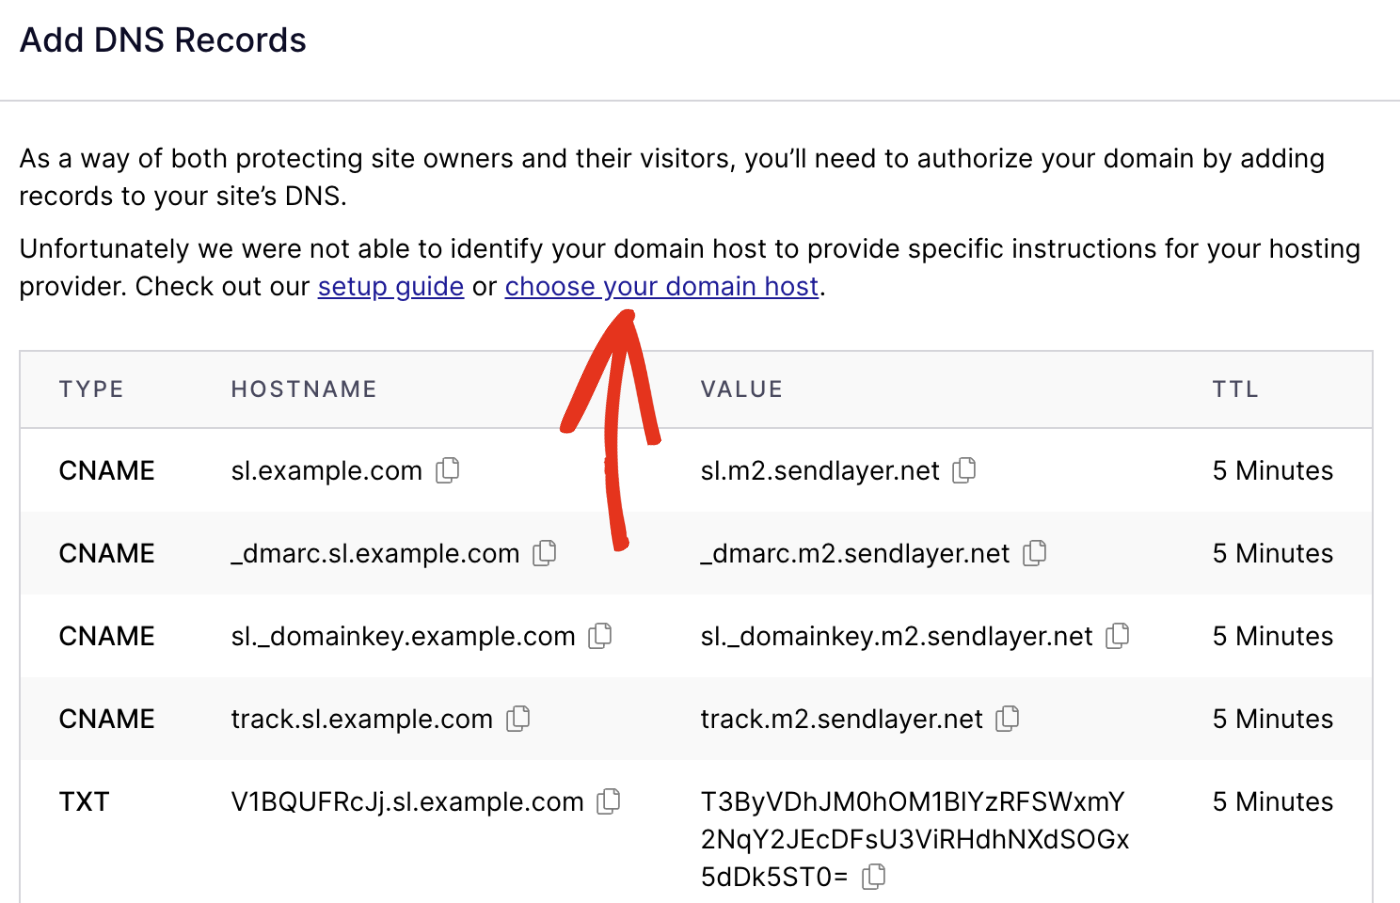
Managing DNS settings is a key step when changing your domain hosting. DNS controls where your website points on the internet. It tells browsers how to find your site. Proper DNS management ensures visitors reach your new hosting without trouble.
Careful updates and checks help avoid downtime. Your website stays live and functional during the switch. Understanding DNS basics makes this process smoother and faster.
Update Nameservers
Start by logging into your domain registrar account. Find the DNS or nameserver settings section. Replace the old nameservers with the new host’s nameservers. These usually look like ns1.example.com and ns2.example.com. Save your changes to apply them. This step directs your domain to the new hosting provider.
Verify Dns Propagation
DNS changes do not take effect immediately. Propagation can take from a few minutes to 48 hours. Use online DNS checker tools to track this process. Check if the new nameservers appear worldwide. Complete propagation means your domain now points to the new host.
Test Website Functionality
After propagation, visit your website to test it. Make sure pages load correctly and quickly. Check email services if they use your domain. Fix any issues by reviewing DNS settings or contacting your host. Confirm your site works well on the new hosting setup.
Finalizing And Troubleshooting
Finalizing your domain hosting change is crucial for smooth website operation. This stage ensures everything is set correctly and your site stays live. Troubleshooting helps fix small problems fast to avoid downtime. Focus on key steps to wrap up the transfer process.
Cancel Old Hosting Account
Check your new hosting is active and working. Backup all important files and emails before canceling. Contact your old host to confirm cancellation procedures. Do not cancel too early to avoid service interruption. Keep records of cancellation confirmation for future reference.
Monitor Transfer Status
Track the domain transfer progress through your new host’s control panel. Watch for emails about verification or additional steps. DNS changes may take up to 48 hours to update worldwide. Test your website regularly to ensure it loads correctly. Stay alert to any unusual behavior during this period.
Resolve Common Issues
Clear your browser cache if the website shows old content. Check domain name settings if the site does not resolve. Confirm your DNS records match your new hosting provider’s details. Contact your new host’s support for help with technical problems. Keep calm; most issues are easy to fix quickly.
Credit: sendlayer.com
Frequently Asked Questions
How Do I Transfer My Domain Hosting Step-by-step?
To transfer domain hosting, first unlock your domain at the current registrar. Get the authorization code. Then, start the transfer at your new host and enter the code. Confirm the transfer via email. The process may take a few days to complete.
Can I Change Domain Hosting Without Downtime?
Yes, you can avoid downtime by updating DNS records before switching hosts. Keep your old hosting active until DNS fully propagates. This ensures visitors access the new host without interruption during the transition.
How Long Does Domain Hosting Transfer Usually Take?
Domain hosting transfers typically take 5 to 7 days. The exact time depends on the registrars involved and domain extensions. Some transfers complete faster, but it’s best to plan for up to a week.
Will My Website Data Move Automatically With Domain Hosting?
No, your website files and databases must be manually migrated or backed up. Domain hosting transfer only changes where your domain points. Ensure you copy all website data to the new host before switching.
Conclusion
Changing your domain hosting can seem tricky at first. Take it step by step and stay organized. Back up your website files and databases before starting. Choose a reliable new host that fits your needs. Update your domain’s DNS settings carefully.
Test your website after the move to ensure it works well. Keep your old hosting active for a short time. This helps avoid downtime. With patience and care, you can switch hosting smoothly. Your website will be ready to serve visitors again.
Simple actions lead to a successful domain hosting change.


