

Are you ready to get your website online but unsure how to connect your Squarespace domain to Bluehost hosting? You’re not alone.
Many people find this step confusing, but it doesn’t have to be. In this guide, you’ll discover a simple, clear way to link your domain and hosting, so your website runs smoothly. By the end, you’ll have the confidence to make your site live without headaches or delays.
Let’s dive in and make your website connection effortless.
Prepare Your Squarespace Domain
Preparing your Squarespace domain is the first step to connect it with Bluehost hosting. This process ensures your domain is ready to move. It involves checking settings, unlocking the domain, and getting a special code. Follow these simple steps carefully to avoid delays.
Locate Domain Settings
Start by logging into your Squarespace account. Go to the Home menu and select “Settings.” Find the “Domains” section. Click on your domain name to open its settings. This page shows all important information about your domain.
Unlock The Domain
Domains are locked by default to protect them. You need to unlock your domain to transfer it. In the domain settings, find the “Lock Domain” option. Switch it off to unlock your domain. This action allows Bluehost to accept your domain.
Get The Authorization Code
The authorization code is a key needed for domain transfer. In the same domain settings page, look for “Transfer Out” or “Get Authorization Code.” Click the option to receive the code. Copy this code carefully. You will enter it in Bluehost later.

Credit: www.youtube.com
Set Up Bluehost Hosting Account
Setting up your Bluehost hosting account is the first step to connect your Squarespace domain. This process is simple and quick. You will have your website ready to go online in no time.
Follow these steps carefully to create a Bluehost account and start hosting your site. Each step focuses on clear actions to avoid confusion.
Choose A Hosting Plan
Visit the Bluehost website and check the hosting plans available. Pick the plan that fits your website needs and budget. The basic plan works well for most new websites.
Look for features like storage space, bandwidth, and email accounts. These are important for your website’s performance and growth.
Complete Account Registration
Enter your personal and payment details on the registration page. Use a valid email address for account confirmation and future communication.
Create a strong password to keep your account secure. Double-check all information before submitting the form.
Access Bluehost Dashboard
After registration, log in to your Bluehost dashboard. This is where you manage your hosting settings and website files.
Explore the dashboard to find tools for setting up your domain, installing WordPress, and checking your account status.
Update Dns Settings On Squarespace
Updating DNS settings on Squarespace is a key step to connect your domain to Bluehost hosting. This process tells the internet where to find your website files stored on Bluehost servers. You will change the nameservers on Squarespace to point to Bluehost. This ensures visitors reach your new hosting site correctly.
Follow these steps carefully to update your DNS settings. The process is simple and takes only a few minutes. You don’t need any special technical skills to complete this.
Access Dns Management
Log into your Squarespace account. Navigate to the Domains section from the main menu. Select the domain you want to connect with Bluehost. Find the DNS settings or DNS management option. This area controls your domain’s server details. You will update these settings next.
Change Nameservers To Bluehost
Look for the nameservers section in DNS management. Replace the current nameservers with Bluehost’s nameservers. Typically, Bluehost nameservers look like ns1.bluehost.com and ns2.bluehost.com. Enter these exactly as provided by Bluehost. This change tells the internet to use Bluehost’s servers.
Save Dns Changes
After entering Bluehost nameservers, save your changes. Double-check the nameservers are typed correctly. Save the settings to apply the update. DNS changes may take some time to spread across the internet. Usually, it completes within a few hours to 48 hours. Your domain will then connect to Bluehost hosting smoothly.

Credit: www.reddit.com
Verify Domain Connection In Bluehost
Verifying your domain connection in Bluehost is a key step to ensure your Squarespace domain works with Bluehost hosting. This step confirms that Bluehost recognizes your domain. It also helps avoid downtime for your website. The process involves adding your domain, checking DNS settings, and fixing common problems.
Add Domain To Bluehost
Start by logging into your Bluehost account. Go to the Domains section. Click on “Assign a Domain.” Enter your Squarespace domain name. Choose the option “Use a domain that is not already hosted here.” Select “Point to Bluehost Name Servers.” Finally, click “Assign This Domain.” This action links your domain to Bluehost hosting.
Confirm Dns Propagation
After adding your domain, DNS changes need time to spread. This process is called DNS propagation. It can take up to 48 hours. You can check propagation using online tools like DNS Checker. Enter your domain name and look for the Bluehost IP address. Once you see the correct IP, your domain is connected successfully.
Troubleshoot Common Issues
Sometimes, issues arise during domain connection. If your site does not load, check your DNS settings. Make sure the nameservers point to Bluehost. Clear your browser cache to see updated results. If problems persist, contact Bluehost support for help. Following these steps ensures a smooth connection process.
Configure Website On Bluehost
Configuring your website on Bluehost is the next step after connecting your Squarespace domain. This process helps you build and manage your site effectively. Bluehost provides tools and features that make website setup straightforward.
Follow these simple steps to get your website running smoothly on Bluehost. Each task ensures your site is ready for visitors and works well online.
Install Cms Or Website Builder
Bluehost supports popular content management systems (CMS) like WordPress. Installing a CMS lets you create and manage your website easily. Use the Bluehost control panel to find the “One-Click Install” option. Select WordPress or any other builder you prefer. Follow the prompts to complete the installation. Your site will have a solid platform to build on.
Upload Website Files
Uploading your website files is simple with Bluehost’s file manager or FTP access. Use the file manager in the control panel for quick uploads. Drag and drop your files into the public_html folder. For larger sites, use an FTP client like FileZilla. Make sure all files are in the right directory. This step makes your website visible to visitors online.
Set Up Email Accounts
Create professional email addresses linked to your domain. Bluehost offers easy email setup within the control panel. Choose “Email & Office” and click “Create.” Enter the email name and password. Use your new email for business communication. It helps build trust and keeps messages organized.
Secure Your Website
Securing your website is vital for protecting your data and visitors. A secure site builds trust and improves your search rankings. This section explains how to enable SSL and configure HTTPS on Bluehost hosting with your Squarespace domain.
Enable Ssl Certificate
Start by logging into your Bluehost account. Find the ‘My Sites’ section and select your website. Look for the SSL certificate option. Bluehost offers free SSL certificates for all domains. Turn on the SSL certificate to activate it. This action encrypts data transferred between your site and visitors. Wait a few minutes for the SSL to become active. Check your site URL; it should start with https://. This change shows your site is secure.
Configure Https Settings
Next, force your website to use HTTPS only. Go to your Bluehost control panel. Find the ‘Security’ tab and select ‘SSL/TLS’. Enable the option to redirect all HTTP traffic to HTTPS. This step ensures visitors always access the secure version. In Squarespace, open your domain settings. Verify that the domain uses HTTPS. Save any changes you make.
Test Your Website Connection
Testing your website connection is a key step after linking your Squarespace domain to Bluehost hosting. This step confirms that your domain points correctly to your hosting server. It also ensures visitors can access your website without issues. Take your time to check every detail carefully.
Check Domain Resolution
Start by checking if your domain name resolves to your Bluehost server. Use online tools like DNS lookup or ping your domain in the command prompt. The domain should show the IP address of your Bluehost hosting. If it shows a different IP or an error, the connection may not be set up properly. Wait a few hours if you recently changed DNS settings. DNS updates can take time to spread worldwide.
Verify Website Functionality
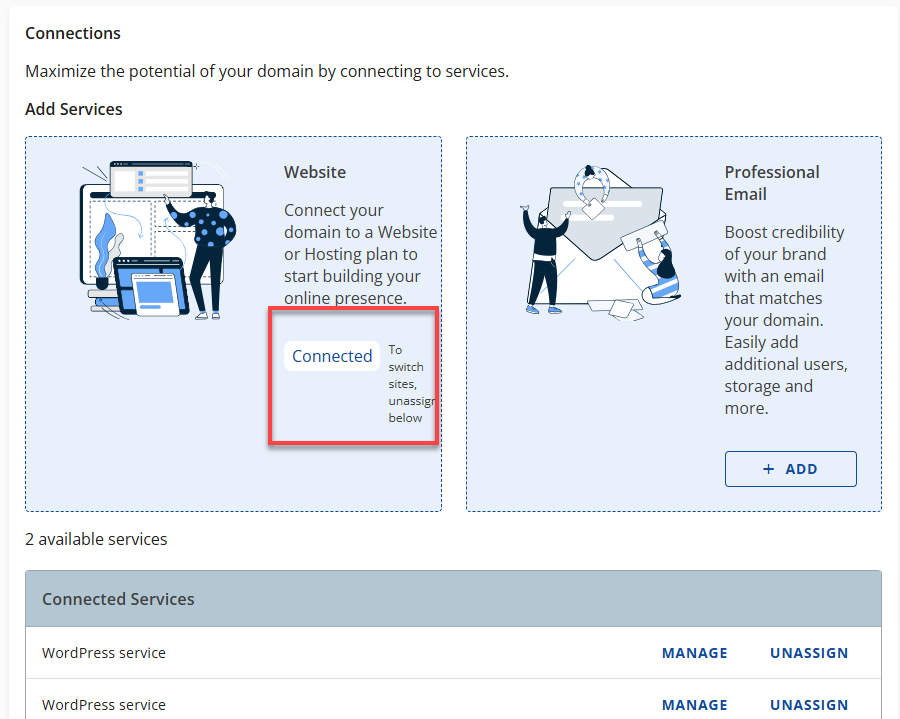
Next, visit your domain in a web browser. Your website should load fully without errors. Check all pages and features to confirm they work correctly. Make sure images, links, and scripts load without problems. If you see any error messages or a default Bluehost page, your website might not be connected properly. Clear your browser cache and try again. Testing on multiple devices and networks adds extra confirmation.
Credit: www.bluehost.com
Frequently Asked Questions
How Do I Link My Squarespace Domain To Bluehost Hosting?
To link your Squarespace domain to Bluehost hosting, update your domain’s DNS settings. Change the nameservers to Bluehost’s servers. This directs your domain traffic to Bluehost hosting. It usually takes a few hours to propagate worldwide.
Can I Keep My Domain On Squarespace With Bluehost Hosting?
Yes, you can keep your domain registered on Squarespace while hosting with Bluehost. Simply update the domain’s DNS settings to point to Bluehost. This lets you manage the domain on Squarespace but host your website on Bluehost.
How Long Does Dns Change Take To Connect Squarespace To Bluehost?
DNS changes typically take 24 to 48 hours to propagate fully. Sometimes it happens faster, within a few hours. During this time, your site might be intermittently accessible. Be patient and avoid making further DNS changes until propagation completes.
What Bluehost Settings Are Needed For Squarespace Domain Connection?
You need to update the domain’s nameservers to Bluehost’s default nameservers. Alternatively, set custom A records pointing to Bluehost’s IP address. This ensures your Squarespace domain resolves correctly to your Bluehost-hosted site.
Conclusion
Connecting your Squarespace domain to Bluehost hosting is simple with clear steps. Follow the instructions carefully to avoid common mistakes. Double-check your DNS settings to ensure smooth connection. Wait for propagation time before changes take effect. Your website will be live and ready to use soon.
Keep this guide handy for future reference. Enjoy building your site with confidence and ease.


