
Are you looking to expand your website’s functionality or personalize a new section without starting from scratch? Creating a subdomain in Namecheap cPanel might be exactly what you need.
Imagine having a unique, dedicated space under your main domain that can serve various purposes—be it a blog, a shop, or a special event page. With Namecheap’s user-friendly cPanel, setting up a subdomain is a breeze. You don’t need to be a tech wizard to achieve this; just follow our straightforward guide, and you’ll have your subdomain up and running in no time.
Dive in to discover how you can effortlessly enhance your online presence today!
Getting Started With Namecheap Cpanel
Creating a subdomain in Namecheap’s Cpanel is a straightforward process. First, you need to get familiar with the Namecheap Cpanel. It helps manage your web hosting effectively. Let’s walk through the initial steps to get started.
Accessing Your Namecheap Account
Begin by logging into your Namecheap account. Use your username and password. Once logged in, navigate to the “Dashboard” section. This is where you manage your domains and hosting services. Ensure you have access to the domain you want to modify.
Navigating To Cpanel
In the dashboard, locate the “Hosting List” section. Find the domain linked to your hosting plan. Click the “Manage” button next to it. You will see the option to access Cpanel. Click on “Go to Cpanel” to enter the control panel.
Once inside Cpanel, you can manage various aspects of your website. Familiarize yourself with the different tools available. This will help you create and manage subdomains efficiently.
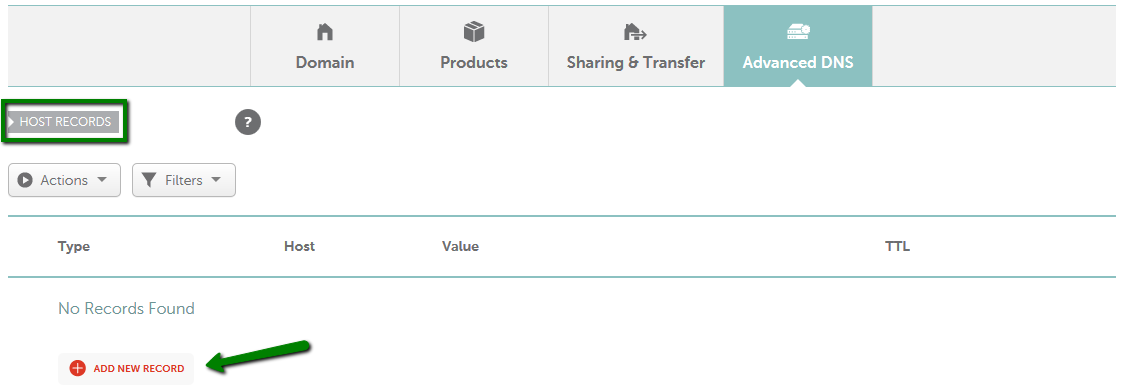
Credit: www.namecheap.com
Understanding Subdomains
Creating a subdomain in Namecheap’s cPanel is simple. Log into cPanel, find the “Subdomains” option, and click it. Enter your desired name and choose the domain to attach it to.
Creating a subdomain is like adding a new room to your digital house, allowing you to expand your website’s functionality and content. Whether you’re starting a blog, setting up a store, or launching a new project, subdomains offer a seamless way to organize and present your online presence. But what exactly is a subdomain, and why should you consider using one?What Is A Subdomain?
A subdomain is a prefix added to your main domain name, creating a separate web address within your existing site. Think of it as a unique section within your website that can host different content. For example, if your main domain is example.com, a subdomain could be blog.example.com or shop.example.com. This structure helps you keep different areas of your site organized without needing a completely new domain.Benefits Of Using Subdomains
Subdomains offer several advantages that can enhance your web strategy. First, they allow you to segment your website effectively. This is particularly useful if you’re managing different types of content or services. They also help in improving SEO by targeting specific keywords associated with the content on the subdomain. Imagine running a food blog under your main domain while your online store is neatly tucked away under a subdomain. Moreover, subdomains provide the flexibility to experiment with different layouts and designs. You can tailor each section to cater to its audience without affecting the main site. Have you ever thought about how you can test new ideas without altering your entire website? Creating subdomains is straightforward and can be managed directly from your Namecheap cPanel. This approach not only saves you time but also keeps your website organized and user-friendly. So, are you ready to explore the possibilities subdomains can offer your website?Creating A Subdomain In Cpanel
Accessing Namecheap’s cPanel allows users to create subdomains with ease. Navigate to the Domains section and select Subdomains. Enter the desired name and choose the root domain to complete the setup.
Creating a subdomain in Cpanel can enhance your website’s organization. Subdomains help you manage different sections under one main domain. Namecheap provides an intuitive Cpanel for this purpose. Follow these steps to create a subdomain quickly. The process is simple and beneficial for your online presence. ###Locating The Subdomains Section
First, log into your Namecheap Cpanel account. Look for the “Domains” section on the homepage. Click on it to find the “Subdomains” option. This section allows you to create and manage subdomains. Ensure you have the right permissions to access it. ###Entering Subdomain Details
Once in the Subdomains section, enter your desired subdomain name. The field labeled “Subdomain” is where you type it. Ensure it’s unique and relevant to your content. This helps with SEO and user navigation. ###Choosing A Domain For Subdomain
Next, choose the domain under which the subdomain will reside. There is a dropdown menu for selecting your main domain. Pick the correct one to avoid any errors. This ensures that your subdomain functions correctly. By following these steps, you can easily create a subdomain in Namecheap Cpanel. This feature can improve site structure and user experience.
Credit: www.youtube.com
Configuring Subdomain Settings
Creating a subdomain in Namecheap’s Cpanel is a simple process. Access the Cpanel, navigate to the ‘Subdomains’ section, and enter your desired subdomain name. Save the changes, and your subdomain is ready for use.
Creating a subdomain on Namecheap’s cPanel is just the beginning. The real magic happens when you start configuring its settings. This is where you can customize how your subdomain functions and interacts with the world. It’s like setting up a new home—choosing the right location, decorating it to your taste, and ensuring everything runs smoothly. ###Dns Settings For Subdomains
DNS settings are the backbone of your subdomain’s existence. They help the internet locate your subdomain. Think of them as the GPS coordinates for your online space. To manage these settings, navigate to the DNS management section in your Namecheap account. Here, you can add or modify records that direct traffic to your subdomain. Ensure the A record points to the correct IP address. This ensures your visitors are taken to the right destination. ###Customizing Subdomain Directory
Your subdomain deserves its own space, separate from the main domain. This is where customizing the subdomain directory comes into play. In cPanel, you can specify a directory for your subdomain. This is like assigning a room in your house for a specific purpose. Choose a directory name that’s easy to remember and reflects your subdomain’s purpose. For instance, if your subdomain is for a blog, naming the directory “blog” makes navigation intuitive. Setting the directory correctly ensures your files are organized and your subdomain runs efficiently. This organization can save you headaches in the future when you’re managing or updating content. By tailoring these settings, you’re not just creating a subdomain; you’re crafting a personalized online experience. What will you do to make your subdomain stand out?Troubleshooting Common Issues
Creating a subdomain in Namecheap’s cPanel can sometimes lead to unexpected issues. These challenges might seem daunting, especially for beginners. But don’t worry. Addressing common problems will help ensure your subdomain works smoothly.
Resolving Dns Propagation Delays
DNS propagation delays can be frustrating. These occur after you set up a new subdomain. The DNS changes may take some time to update worldwide. It usually takes 24 to 48 hours. During this period, your subdomain might not be accessible. To minimize delays, clear your browser cache. Try using different devices or networks. You can also check propagation status online.
Fixing Subdomain Access Problems
Access problems can arise if the subdomain isn’t set up correctly. First, ensure you have created the subdomain in cPanel. Check if the DNS settings match your main domain. Incorrect settings can block access. Verify the subdomain’s folder path. Ensure it points to the correct directory. If the problem persists, review permissions for the subdomain files. Incorrect permissions may restrict access.
Tips For Managing Subdomains
Creating subdomains in Namecheap Cpanel is straightforward. Log into Cpanel, find the “Subdomains” section, and enter your desired subdomain name. Choose the primary domain, select the document root, and click “Create. “
Managing subdomains effectively ensures a seamless user experience. Proper organization and monitoring can boost your site’s functionality. Let’s explore some essential tips.Organizing Subdomain Content
Keep your subdomain content clear and consistent. Use a logical structure. This helps visitors find information easily. Label folders and files with descriptive names. Avoid clutter by removing outdated files. Regularly review and update content. This keeps your subdomain relevant.Monitoring Subdomain Performance
Regularly check your subdomain’s performance. Use analytics tools for insights. Track visitor behavior and page load times. Identify any technical issues promptly. This helps maintain optimal user experience. Monitor search engine rankings for your subdomain. Adjust strategies to improve visibility.
Credit: www.youtube.com
Frequently Asked Questions
How To Create A Subdomain On Namecheap?
Log into your Namecheap account. Go to “Domain List” and click “Manage” next to your domain. Select “Advanced DNS,” then “Add New Record. ” Choose “A Record,” enter your subdomain, and assign an IP address. Save changes to create your subdomain successfully.
How To Create A Subdomain With Cpanel?
Log into cPanel. Click “Subdomains” under the “Domains” section. Enter the desired subdomain name and choose the domain. Click “Create” to finish the process. Your subdomain is now ready for use.
How Many Subdomains Can A Domain Have In Namecheap?
Namecheap allows you to create an unlimited number of subdomains for each domain you own. This flexibility helps manage and organize different sections or services of your website effectively. Subdomains can enhance your site’s structure and improve user navigation.
Is A Subdomain Bad For Seo?
Subdomains aren’t inherently bad for SEO. Google treats subdomains and root domains separately, affecting SEO strategies. Properly optimized subdomains can rank well. Ensure consistent content quality and structure. Consider linking between subdomain and main domain to strengthen SEO performance.
Conclusion
Creating a subdomain in Namecheap cPanel is simple. Follow the steps outlined. Each click brings you closer to more organized content. Subdomains help manage separate sections of your website. Useful for blogs, stores, or portfolios. Remember to verify your settings.
Test your subdomain to ensure it works. Namecheap offers reliable tools. With practice, this process becomes easier. Now, you can enhance your website’s structure. Enjoy the benefits of a well-organized online presence. Happy managing your subdomains!


