
Are you ready to bring your website to life but unsure where to start? Godaddy’s web hosting services might just be the solution you need.
Whether you’re launching a personal blog, an online store, or a business portfolio, Godaddy offers a reliable platform to host your digital presence. But how do you make the most out of their services? In this guide, you’ll discover easy-to-follow steps that will help you navigate through Godaddy’s offerings without any hassle.
Imagine having the power to control your website with confidence. Intrigued? Keep reading to find out how you can transform your online experience with Godaddy web hosting. Your journey to a seamless and efficient website begins here.
Getting Started With Godaddy
Visit the Godaddy website. Click on the Sign Up button. Fill in your details. Choose a username and password. Make sure your password is strong. Check your email for a confirmation link. Click the link to activate your account. Now, you have a Godaddy account!
Go to the Hosting section on Godaddy. Look at the different plans. Pick the one that fits your needs. Think about your budget and website size. Choose a plan that gives you enough space. Make sure it has good support. Click to buy the plan. Follow the steps to pay.
Setting Up Your Domain
Godaddy makes it easy to get a new domain. First, search for your desired name. Make sure it is available. Then, choose the best domain extension. Common extensions are .com, .net, and .org. Add your chosen domain to the cart. Proceed to checkout. Create an account if needed. Fill in your details. Pay for your new domain. Now, it’s yours!
Have a domain already? Connect it to Godaddy hosting. Sign in to your account. Go to the domain section. Select the domain you want to connect. Use the DNS settings. Update the name servers to Godaddy’s. Save your changes. Wait for them to take effect. It may take a few hours. Your domain is now linked!
Accessing The Control Panel
Login to your Godaddy account first. You need to find the “My Products” section. Click on it. You will see your hosting plans. Choose the one you want to manage. Look for the “Control Panel” button. Click it to enter.
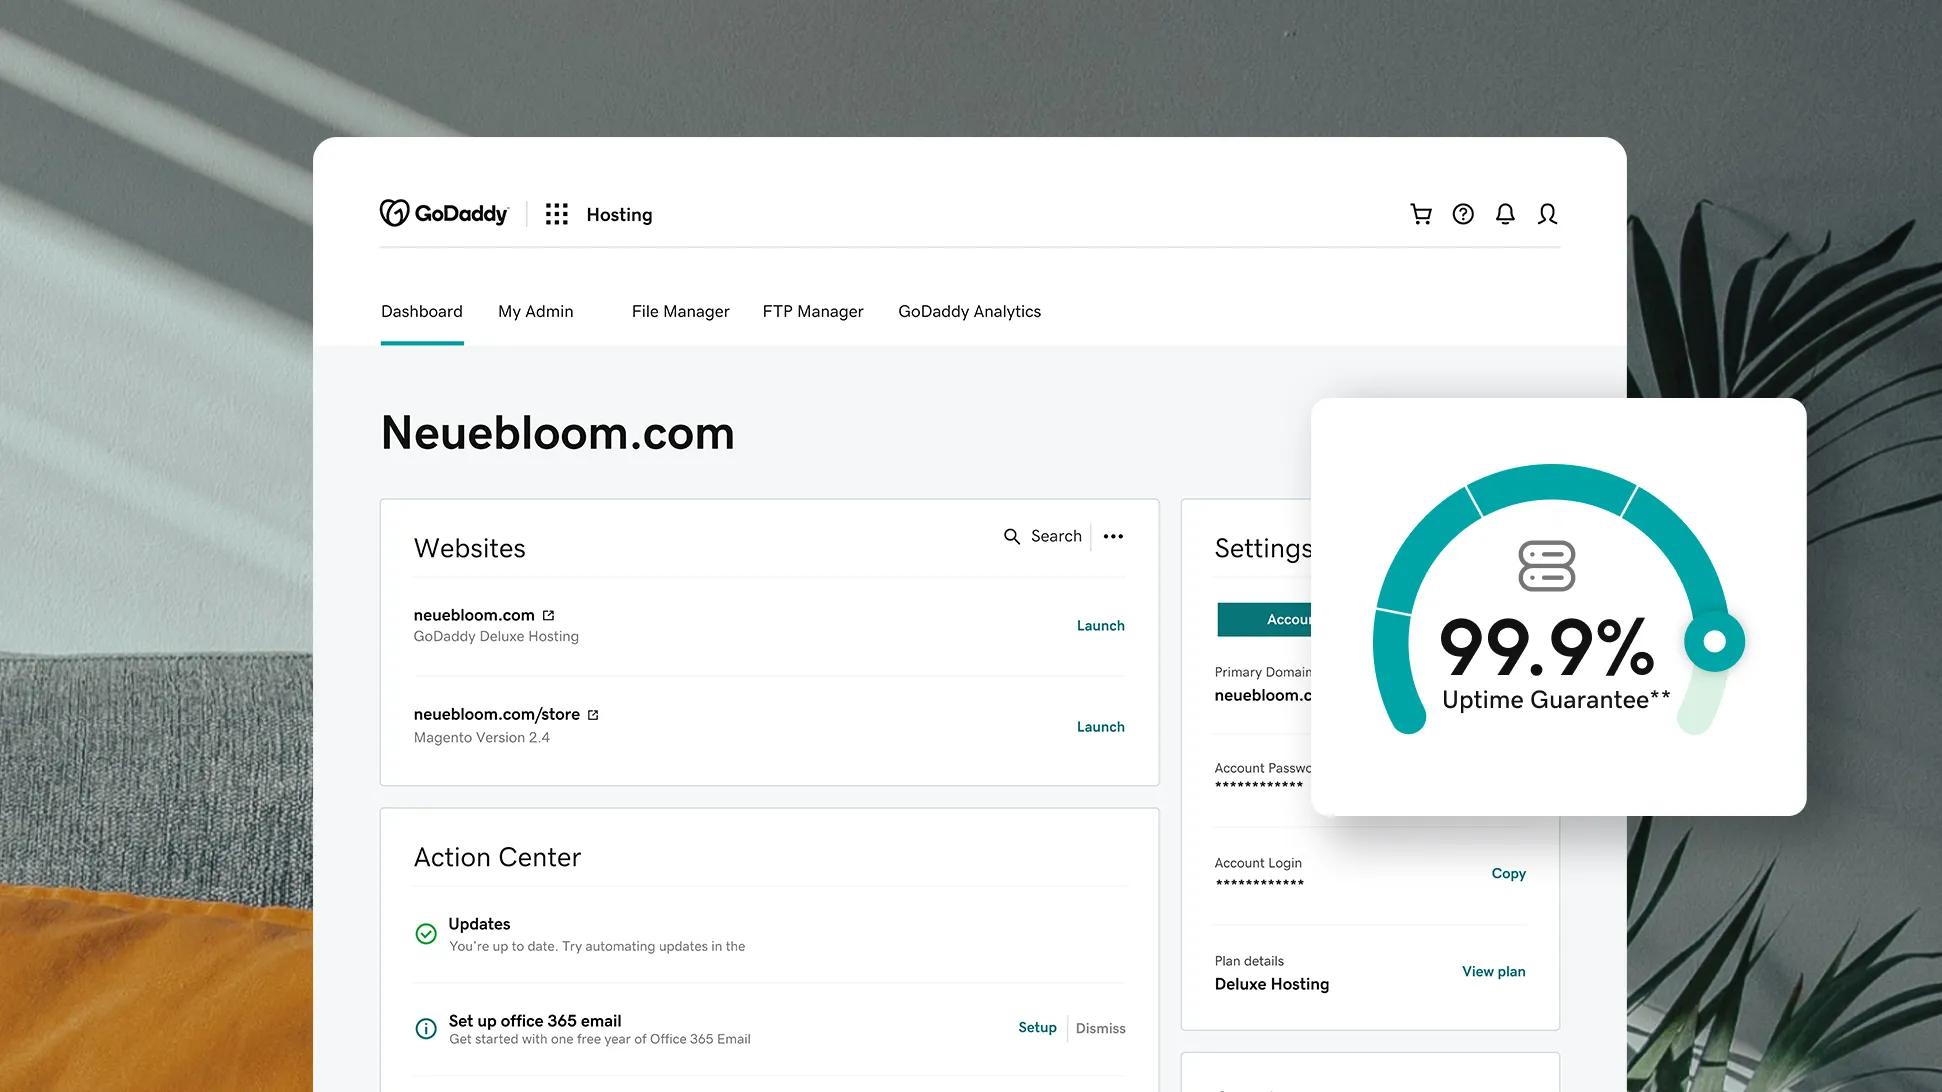
The dashboard shows many options. You will see tabs for domains, emails, and settings. Click on the tabs to explore more features. Find the file manager for managing files. Use the database tab to check databases. All options are easy to find.
File Manager lets you upload and edit files. The email setup helps you create mail accounts. Use the SSL tab for secure sites. Backup options keep your data safe. Check the analytics for site visits. Each feature is simple to use.
Credit: www.godaddy.com
Installing A Website
Godaddy makes website setup simple. Use the one-click installer to get started. First, log into your Godaddy account. Find the hosting dashboard. Look for the “Install Apps” section. Click on it.
Installing WordPress
WordPress is a popular choice. Select “WordPress” from the app list. Click “Install Now”. Enter your site name and admin details. Choose your domain from the dropdown menu.
Godaddy will handle the rest. The installation process begins. Wait a few minutes. Once done, you’ll receive a confirmation. Your website is ready to use. Access the WordPress dashboard through your Godaddy account. Now, you can start customizing your site!
Managing Website Files
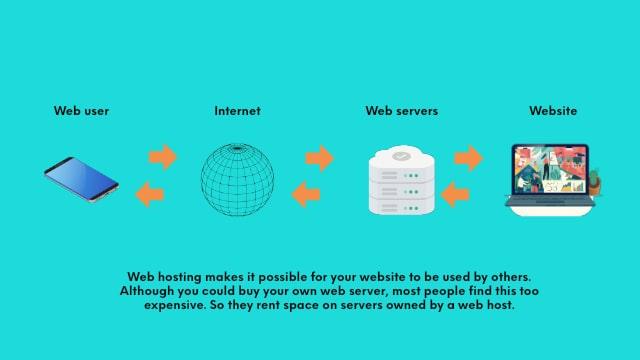
Godaddy’s File Manager is simple to use. Access it from the control panel. You can see all your files here. Upload, download, and edit your files easily. Click on the file name to open or edit. Need to delete? Select the file and hit the delete button. Organize your files in folders for easy access. Always keep your files organized.
FTP stands for File Transfer Protocol. It’s used to transfer files. Connect using an FTP client like FileZilla. Enter your host name, username, and password. You can now upload or download files. FTP is useful for large file transfers. It’s fast and efficient. Use FTP for backup and restore tasks. Always keep your login details safe.
Credit: www.godaddy.com
Setting Up Email Accounts
First, log in to your GoDaddy account. Click on the Email & Office tab. Select Manage to create a new email. Enter your desired email name. Then, choose your domain from the dropdown. Click Create to finish. Your new email is ready now. Remember to choose a strong password. This keeps your email safe.
Open your email client, like Outlook or Thunderbird. Go to settings and select Add Account. Enter your new GoDaddy email. Use your email address as the username. Type the password you created. Choose IMAP or POP3 for incoming server. For outgoing, use SMTP. Save the settings to complete. Now, you can send and receive emails easily.
Enhancing Website Security
SSL certificates keep data safe. They protect it from hackers. Godaddy offers easy SSL setup. This boosts trust with visitors. A green padlock shows security. It means the site is safe. Sensitive information stays private. Always choose SSL for your site.
Godaddy has many security tools. These tools keep your site safe. They scan for threats. They block harmful attacks. Firewalls protect your website. Regular scans find weak spots. Fixing them makes your site stronger. Always update these tools for best safety.
Optimizing Website Performance
Caching makes your website faster. It stores parts of your site. This helps pages load quickly next time. Use tools like W3 Total Cache or WP Super Cache. These tools save your site’s data. Users get content faster.
Choose the right caching tool for your site. Each tool works differently. Some need more setup than others. But all help improve speed.
Faster load times make users happy. Compress images on your site. Use tools like TinyPNG or ImageOptim. Smaller files load faster.
Reduce the number of plugins on your site. Too many plugins slow your site down. Only keep the ones you need. Check your site’s speed with Google PageSpeed Insights. Follow its tips to make your site faster.
Troubleshooting Common Issues
Server errors can be frustrating. Start by checking your internet connection. Ensure it is working well. If the error persists, try restarting your server. This often fixes many problems. Also, check for any maintenance updates on Godaddy’s site. These updates can affect your server.
DNS issues can cause websites not to load. Begin by verifying your DNS settings. Make sure they are correct. Use Godaddy’s DNS Management Tool for this. If changes are needed, update them. Remember, DNS updates may take time. Be patient. If problems continue, reach out to Godaddy Support for help.
Accessing Customer Support
Godaddy offers live chat support for its users. This service helps you get help fast. Click the live chat icon on their website. Type your question. A support person will chat with you. They will help you with your issue. You can ask about hosting or any problem. The live chat is easy to use. It’s like texting a friend. This is a quick way to get answers. You don’t need to call. You don’t need to wait long.
Another way to get help is by submitting support tickets. This option is useful for more complex issues. Log into your Godaddy account. Find the support ticket section. Fill out the form with your issue details. Be clear and concise. Submit the form. Godaddy will reply to your ticket. They may ask for more information. Check your email for updates. Support tickets are good for tracking issues. You can see responses and updates. This helps keep everything organized.

Credit: www.godaddy.com
Frequently Asked Questions
How To Connect To Godaddy Hosting?
Log into your GoDaddy account. Access “My Products” and select your hosting. Click “cPanel Admin” to enter cPanel. Use FTP client details provided in cPanel for connection. Ensure domain points to GoDaddy servers. Check DNS settings under “Domains” in your account.
How To Web Hosting Step By Step?
Choose a hosting provider, select a plan, register a domain, configure settings, and upload your website files.
Should I Use Godaddy To Host My Website?
GoDaddy is a popular hosting choice offering various plans. Consider their pricing, customer support, and features. Ensure it fits your website needs. Compare with other providers to make an informed decision. Always check reviews and uptime reliability before choosing.
How Much Does Godaddy Charge To Host A Website?
GoDaddy hosting plans start at $5. 99 per month for basic shared hosting. Prices vary based on plan features. Advanced options like VPS or dedicated servers cost more. Check GoDaddy’s website for current promotions and detailed pricing. Always review plan specifics to ensure it meets your website needs.
Conclusion
Using GoDaddy web hosting services is straightforward and effective. You can easily set up your website in minutes. The platform offers user-friendly tools and resources. Ideal for beginners and small businesses. You can also enjoy reliable customer support. This ensures your website runs smoothly.
Remember to explore all features. They can enhance your site’s performance. GoDaddy provides a solid web hosting solution. Consider it for your next online project. With these tips, you’re ready to get started. Happy website building!


