
Are you looking to streamline your web hosting experience right from your Synology NAS? With the Synology Web Station’s Virtual Host feature, you can easily manage multiple websites without the hassle of complex setups.
Imagine having the power to host your personal blog, your business site, and even your hobby project—all from one place. It’s simpler than you think, and we’re here to show you how. By the end of this guide, you’ll not only understand the process but feel empowered to make your web hosting dreams a reality.
Dive in, and discover how you can transform your Synology NAS into a robust web server that works for you.

Credit: stackoverflow.com
Setting Up Synology Web Station
First, open the Package Center on your Synology NAS. Search for Web Station and click on it. Press the Install button to start. Wait for the installation to finish. This step prepares your NAS for hosting websites. The process is simple and quick.
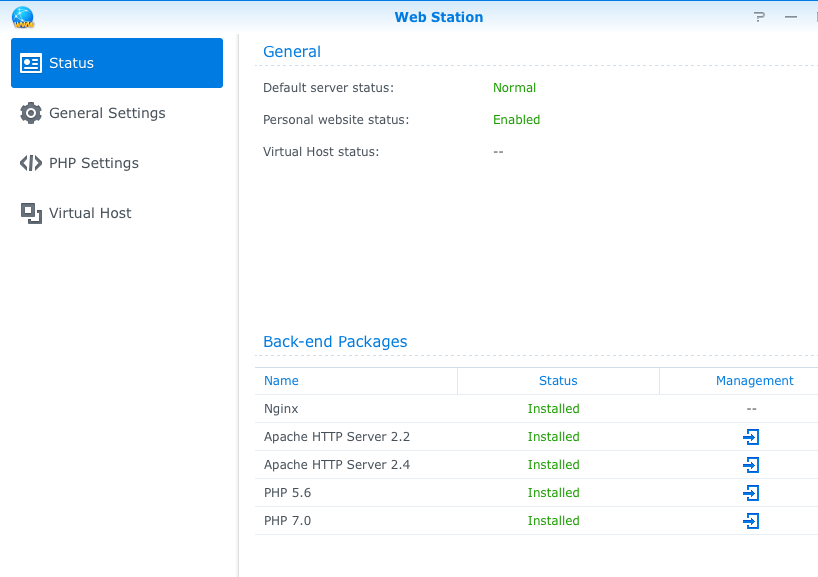
After installation, open the Web Station application. Go to the settings tab. Choose the HTTP back-end server you want. Select either Apache or NGINX. Next, set the PHP profile. Enable PHP if needed. Adjust settings to fit your needs. Save changes when done.
Credit: community.synology.com
Creating A Virtual Host
Open your Synology Web Station. Find the Virtual Host tab. Click on it. Look for settings. They are easy to find. Follow the instructions. These will guide you. Don’t skip any steps. You might miss important details. It’s simple but crucial. Use the settings for your needs. Make sure everything is correct. You can change settings later. But start with correct settings first.
Enter a host name. This is your website name. Choose a port number. Port numbers are important. They help with connections. Use a common port number. Like 80 or 443. These are good choices. Ensure your host name is unique. Avoid using common names. It makes your site special. Double-check your entries. Mistakes can cause problems later. Keep it simple and clear.
Assigning Document Root
First, select a special folder for your website files. This is where your site lives. Make sure the folder is easy to find. Name it something clear. Maybe “MyWebsite”. This helps to keep things tidy.
Always remember the folder name. It’s important for later steps. Organize your files well in this folder. This keeps your website running smoothly.
Give the right permissions to your folder. This lets people see your site. But not change it. Use the right numbers for permissions. Like 755. This means read and execute rights. But only you can write.
Check permissions regularly. This keeps your site safe. If something breaks, look at permissions first. Fix them if needed. Keep your site secure by checking often.
Customizing Php Settings
Adjusting PHP Version on Synology is simple. First, open the Control Panel. Find the “Web Services” section. Choose “PHP Settings” from the menu. You can see different PHP versions there. Pick the version you need. This helps your website run better. Older versions might be slow. Newer versions are faster and safer.
Configuring PHP Extensions is also easy. Extensions add more features to PHP. Go back to the “PHP Settings” menu. Click on “Extensions”. A list of available extensions appears. Check the boxes for the ones you want. These extensions help your website do more tasks. Make sure the extensions are compatible with your PHP version.
Enabling Https
An SSL certificate is crucial for site security. Access the Synology DSM interface. Find Security in the Control Panel. Click on Certificate to start. Choose Add for a new certificate. Follow the steps to complete the setup. Ensure the certificate is valid. Check for any errors.
HTTP traffic should redirect to HTTPS. This keeps data safe. Open Web Station on Synology. Go to Virtual Host. Select your host and click Edit. Set the URL redirection to HTTPS. Save changes to apply. Test the site to confirm redirection. Visitors will see a secure connection.
Credit: www.synology.com
Testing The Virtual Host
Open your browser. Type the website’s domain name in the address bar. Hit enter. The website should load on your screen. If it doesn’t, check the URL. Ensure the domain name is correct. Also, ensure the server is running. These steps help confirm your virtual host is working.
Sometimes, the website won’t load. Check the server settings. Make sure the server is active. Also, verify the DNS settings. Ensure the domain points to your server. Another issue could be the firewall. It might block access. Adjust the firewall rules if needed. If problems persist, restart the server. This fixes many small issues.
Advanced Virtual Host Configurations
Many websites need multiple virtual hosts. Each host serves different content. Set up is simple. First, go to the Web Station. Click Virtual Host. Add a new host. Type the domain name. Choose the folder for files. Repeat for each site. This helps keep things organized. Users get the right pages.
Databases store important data. Web Station can connect with them. First, make sure the database is ready. Use tools like MySQL or MariaDB. In Web Station, choose Database settings. Enter the connection details. Test the link to ensure it works. This allows sites to show dynamic content. Data updates become easy. Sites become interactive and user-friendly.
Maintenance And Security
Ensure your Synology Web Station Virtual Host is secure and maintained with simple steps. Keep configurations updated and check regularly for vulnerabilities. Protect your data by using strong passwords and enabling two-factor authentication.
Regular Backups
Always keep data safe with regular backups. Use Synology tools for simple backups. Save backups to external storage or cloud. This helps in case of data loss. Schedule backups weekly. Never forget to check backup success. Backup files must be easy to restore.
Monitoring And Logging
Keep an eye on server activities. Monitor logs daily. Look for any strange activity. Use Synology’s logging features. These help track changes and issues. Alerts can notify you of problems. Fix issues quickly to keep the server safe.
Frequently Asked Questions
Can I Run A Vm On A Synology Nas?
Yes, you can run a VM on a Synology NAS using Synology’s Virtual Machine Manager. It supports various operating systems like Windows and Linux. Ensure your NAS model supports virtualization and meets hardware requirements for optimal performance.
How Do I Create A Virtual Drive In Synology?
To create a virtual drive in Synology, open DSM and access Storage Manager. Select “Create” under “Storage Pool. ” Choose “Virtual Disk” and follow the on-screen instructions. Ensure your settings are correct, then confirm to create the virtual drive.
What Is Virtual Hosting In A Web Server?
Virtual hosting allows multiple websites to share a single server. Each site has a unique domain name, enabling efficient resource use and cost savings. This technology is ideal for hosting providers, enhancing scalability and management. Virtual hosting supports both IP-based and name-based configurations.
Can A Nas Server Host A Website?
Yes, a NAS server can host a website. It offers storage and can run web server software like Apache. Ensure it supports necessary protocols and has sufficient processing power. NAS servers are ideal for small websites or personal projects due to their cost-effectiveness and ease of use.
Conclusion
Setting up a Synology Web Station virtual host is simple. Follow the steps carefully. You’ll create and manage websites efficiently. Understanding the process boosts your web hosting skills. Remember to check settings regularly. This ensures a smooth operation. Troubleshooting becomes easier with practice.
Keep exploring Synology’s features for better results. Always back up your data. It’s crucial for safety. With patience, managing virtual hosts gets easier. Your websites will run smoothly. Enjoy the convenience and flexibility Synology offers. Happy hosting!


