
Have you ever felt overwhelmed by the technical jargon surrounding web hosting services? You’re not alone.
Navigating the world of web hosting can seem daunting at first. But what if we told you it’s easier than you think? Imagine having a seamless, user-friendly online presence that works for you around the clock. That’s the power of understanding how to use web hosting services effectively.
By mastering this essential skill, you can transform your website into a powerful tool for success. Whether you’re launching a personal blog, an online store, or a portfolio, the right web hosting can make all the difference. So, are you ready to unlock the potential of your website? Stick around, and we’ll guide you through the process, step by step, ensuring you feel confident and in control. Let’s dive in and simplify web hosting for you!
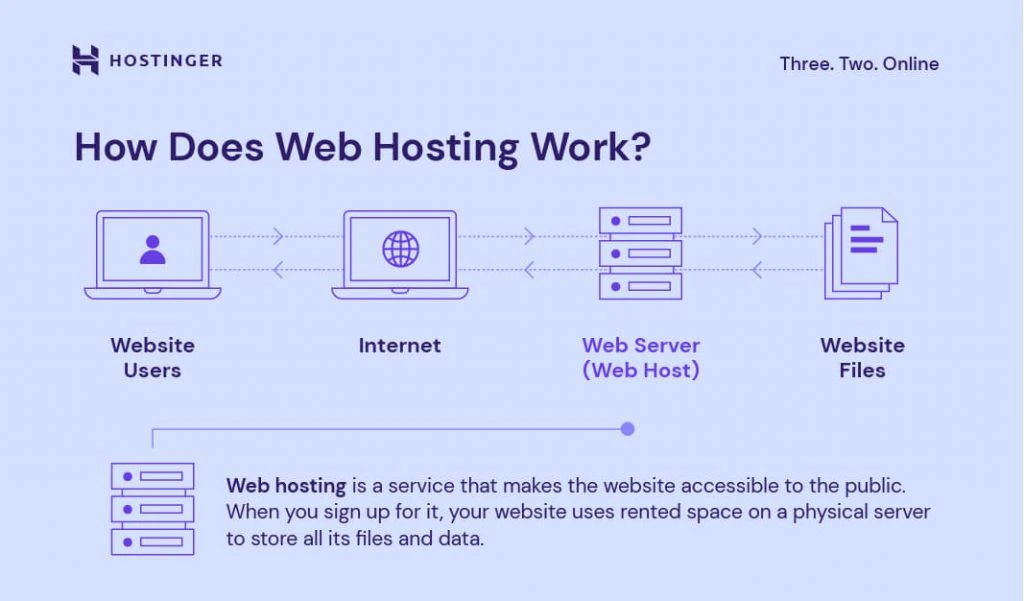
Credit: www.hostinger.com
Choosing The Right Web Hosting Service
Think about what you need from a hosting service. Do you want to host a blog or an online store? Choose a service that fits your needs. Storage and bandwidth are important. If you expect many visitors, look for more bandwidth.
There are different hosting types. Shared hosting is cheap. VPS offers more control. Dedicated servers are for big sites. Cloud hosting is flexible. Each type has advantages and disadvantages. Understand them before choosing.
Check for important features. Security is a must. Look for SSL certificates and backup options. Customer support should be good. Read reviews online. Pricing matters too. Make sure it fits your budget.
Setting Up Your Hosting Account
First, you need a domain name. This is your website’s address. Choose a name that is easy to remember. You can buy a domain from domain registrars. Some popular ones are GoDaddy and Namecheap. Check if your name is available. Once confirmed, register it.
After registering a domain, choose a hosting plan. Hosting plans vary in price and features. Pick a plan that fits your needs. For small websites, start with shared hosting. Bigger sites might need VPS or dedicated hosting. Compare options to find the best one.
Once you have a plan, access the control panel. This is where you manage your site. Use it to set up email accounts and databases. Install software like WordPress with a few clicks. The control panel is your website’s toolbox.
Uploading Your Website
FTP helps move files to your web server. Download an FTP client like FileZilla. Connect using your server’s IP address, username, and password. Drag and drop your website files into the server window. This process is simple and quick. Always check your files after upload. Ensure everything works well. FTP can be fast and reliable.
Many hosts offer a control panel for file uploads. Login to your control panel. Find the file manager option. Use it to upload files directly. This way is easy and useful. It allows file management in one place. No need for extra software. Check each file after uploading. Ensure they display correctly on the web.
File permissions control access to your files. Use your control panel or FTP to set them. Permissions are numbers like 755 or 644. They decide who can read, write, or execute files. Incorrect settings may lead to errors. Check permissions for each file. Ensure your website functions smoothly and securely.
Managing Dns Settings
DNS stands for Domain Name System. It acts like a phonebook for the internet. DNS translates domain names into IP addresses. This process allows browsers to load websites. Every domain name has DNS records. These records tell the internet where to find your site.
DNS records control different parts of your domain. You might need to edit these records for various reasons. Changes can include updating IP addresses or adding new records. Always check your hosting provider’s guide. This ensures you make changes correctly.
DNS changes do not happen instantly. They need time to propagate. This means spreading the update across servers. Propagation can take up to 48 hours. During this time, some users might see old data. Be patient while waiting for changes to complete.
Configuring Email Accounts
Use web hosting services to create new email accounts. Access the control panel. Find the email section. Click “Create New Email”. Choose a username. Set a strong password. Save changes. Your email is ready. Easy steps for everyone.
Email forwarding sends messages to another address. Open your email settings. Find forwarding options. Enter the new email address. Save your settings. Emails will go to the new address. Forwarding is useful for managing messages. Keeps everything organized.
Email clients help read and send emails. Use Outlook or Thunderbird. Open your email client. Enter your email details. Server settings are needed. Choose IMAP or POP3. Save your settings. Now read your emails easily. Email clients are handy tools.

Credit: chrisgidds.com
Enhancing Website Security
An SSL certificate protects your site. It keeps data safe. It also makes your website appear trustworthy. Visitors feel secure when they see the padlock icon. This can help build trust. It is important to keep this certificate up to date.
Security plugins help keep your site safe. They detect threats and block them. Some plugins also monitor suspicious activity. Choose a plugin that suits your needs. Keep it updated for the best protection.
Backups are important for site safety. They save your data. If something goes wrong, you can restore your site. Schedule backups often. Use a reliable backup tool. This ensures you do not lose important information.
Monitoring And Optimizing Performance
Web hosting services help track and improve website performance. Regular monitoring ensures fast loading times and minimal downtime. Optimizing settings can enhance user experience and boost search engine rankings.
Track Site Analytics
Watching your website’s numbers is important. Site analytics help you understand visitors. See what pages they like most. Find out how long they stay. Analytics tools show visitor’s path. You can make your site better with these insights.
Optimize Loading Speed
A fast website makes users happy. Reduce image sizes to speed up loading. Use fewer plugins. Keep your code clean. Fast loading means more visitors stay. They are less likely to leave early.
Handle Traffic Spikes
Sometimes many people visit at once. Traffic spikes can slow your site. Choose a host that handles these spikes. Use content delivery networks (CDNs). They help manage large traffic. Keep your site running smoothly.
Troubleshooting Common Issues
Server downtime can be frustrating. First, check your internet connection. It might be slow or disconnected. Next, look at the hosting provider’s website. They might report issues. Contact support if the problem persists. They can help restore service quickly.
Broken links can confuse visitors. Use tools like Broken Link Checker. Scan your website for errors. Update links that don’t work. Replace them with correct URLs. This improves your site’s user experience. Visitors find what they need easily.
Emails not sending? Check your email settings first. Ensure they’re correct. Look for errors in your SMTP configuration. Sometimes, spam filters block emails. Adjust settings to avoid this. Contact support if needed. They can resolve technical problems fast.
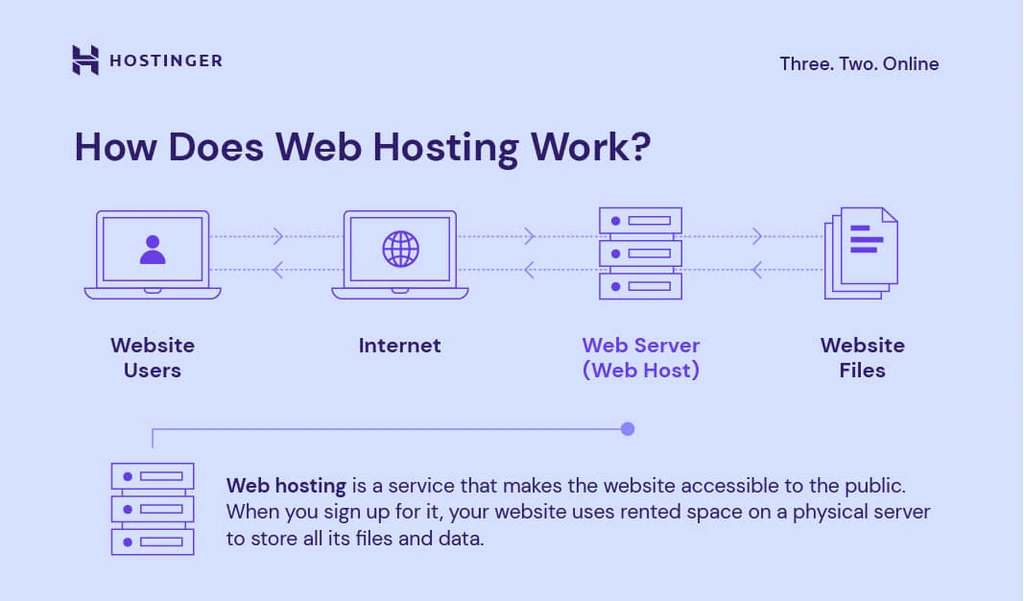
Credit: www.hostinger.com
Frequently Asked Questions
How Does A Web Hosting Service Work?
A web hosting service stores your website files on a server, enabling online access. It provides the necessary technology and resources for your site to be viewed on the internet. Visitors access your site through a domain name, which directs them to the hosting server.
How Do I Start Using My Hosting?
Begin by logging into your hosting account. Access the control panel. Set up your domain and website. Install necessary applications and scripts. Manage files and databases using provided tools.
What Is An Example Of A Web Hosting Service?
An example of a web hosting service is Bluehost. It offers reliable hosting plans, domain registration, and 24/7 customer support. Bluehost provides easy WordPress integration and a user-friendly interface, making it ideal for beginners and businesses. Their services ensure website security and optimal performance.
Can I Host My Website By Myself?
Yes, you can host your website yourself. It requires a server, internet connection, and technical skills. Ensure reliable hardware and software configurations for smooth performance. Regular maintenance and security updates are essential. Self-hosting offers control but demands time and expertise.
Consider professional hosting if you prefer convenience.
Conclusion
Mastering web hosting is simpler than it seems. Start with the basics. Choose a reliable provider. Understand your needs. Use user-friendly tools. They make managing your website easier. Security and support are crucial. Always keep them in mind. Regular backups protect your data.
Keep your website updated. It boosts performance and security. Practice makes perfect. With time, you’ll gain confidence. Explore and experiment. It’s a learning process. Remember, every expert was once a beginner. Stay curious and patient. You’ll see success in your web journey.


