
Have you ever wondered how to get your MySQL database onto your web hosting server? You’re not alone.
Many people find this process daunting, but it doesn’t have to be. By understanding a few key steps, you can seamlessly transfer your database and ensure your website runs smoothly. Imagine the relief you’ll feel once your database is safely on your server, ready to power your site with reliable data.
It’s simpler than you think, and by following the right steps, you can avoid common pitfalls and ensure a smooth transition. Whether you’re setting up a new site or moving an existing database, this guide will walk you through the process. Keep reading to discover how easy it can be to load your MySQL database and boost your website’s performance.

Credit: learn.microsoft.com
Choosing The Right Web Hosting
Web hosting services vary greatly. Shared hosting is often cheap. Dedicated hosting gives full control over the server. VPS hosting offers a balance. It has shared and dedicated elements. Cloud hosting is flexible. It grows with your needs. Each type fits different needs and budgets.
Reliability is key for web hosting. The server must stay online. Speed affects user experience. Slow sites lose visitors. Security protects data. Choose hosts with strong security measures. Support is important. Problems happen; good support helps fix them. Cost matters but don’t choose only by price. Consider the service quality too.
Preparing Your Mysql Database
Always start by creating a backup of your database. This protects your data. Use tools like phpMyAdmin for easy backups. You can export the database as a SQL file. Save this file in a safe location. Ensure the backup is complete and error-free.
A well-optimized database runs faster. Remove any unnecessary data or duplicates. Index your tables for quick access. Use queries that are simple and efficient. Regularly check for updates to database software. This helps keep performance at its best.
Accessing Your Web Hosting Control Panel
Begin by logging into your web hosting account. Use your username and password. You will see the control panel dashboard. Look for icons or menus. These help you manage your website.
Find the section labeled Databases. It might be called MySQL Databases. This is where you manage your databases. Look for tools like phpMyAdmin. These help you load your database.
Creating A New Database On The Server
Choose a unique name for your database. This name helps you find it later. Create a username for access. Make a strong password. Use letters, numbers, and symbols. Keep it safe and secret.
Write down the name and password. You will need them soon. Never share them with anyone. Keep them in a safe place.
Permissions control who can use the database. Decide which users can read or write data. Limit access for safety. Only trusted users should have full access.
Use your hosting panel to set these. Check that all settings are correct. Save changes before you leave. Double-check permissions for security.
Uploading Database Files
FTP helps to move files to the server. Use a FTP client like FileZilla. Connect it to your web host. Find the database files on your computer. Drag them to the right folder on the server.
File Manager is another tool. It’s in your web hosting account. Open File Manager. Choose the upload option. Select your database files. Upload them directly to the server. It’s fast and simple.
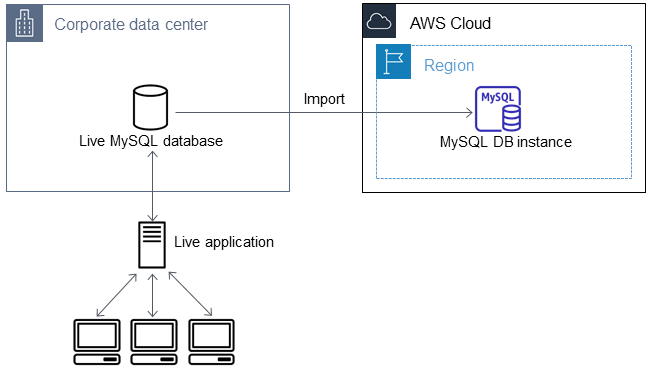
SQL files are important. Use a tool like phpMyAdmin. It’s in your hosting account. Open phpMyAdmin. Find the import tab. Choose your SQL file. Click the import button. Wait a few seconds. Your data will be ready.
Another way is through command line. Log in to your server. Use the MySQL command. Type the right command. Your SQL file will load. It’s quick if you know the commands.
Credit: docs.aws.amazon.com
Configuring Database Connections
Start by locating the configuration files on your server. These files hold important settings for connecting to the database. Open the file using a text editor. Look for lines that mention host, username, and password. Make sure these details match your database information. Save any changes you make. Double-check for any mistakes in the entries. Correct entries ensure a smooth connection.
Testing is crucial to confirm the database connection works. Use a simple script to test the connection. This script will try to connect using the details from the configuration files. If the connection is successful, you’ll see a confirmation message. If not, check the configuration files again. Errors in host, username, or password can cause failures. Ensure all entries are correct.
Troubleshooting Common Issues
Loading a MySQL database onto a web hosting server can be challenging. Start by ensuring compatibility between your database and server. Use tools like phpMyAdmin for easy database import, and check permissions to avoid errors during the process.
Handling Connection Errors
Connection errors happen often. Make sure the database details are correct. Check username, password, and database name. Also, verify the server address. It should match the hosting server details. Sometimes, firewalls block connections. Ensure firewall settings allow database access. Permissions can cause problems too. Check if the user has rights to access the database. If the server uses a different port, adjust settings accordingly. A simple typo can cause errors, so double-check everything.
Resolving Import Failures
Import failures are frustrating. Ensure the SQL file is not too big. Large files need special settings on the server. Check for format issues in the SQL file. It should match the database version. Sometimes, character encoding causes trouble. Use UTF-8 for best results. Syntax errors in the SQL file can stop imports. Review the SQL file for mistakes. If the file is corrupted, fix it first. Always back up data before importing.
Credit: docs.oracle.com
Optimizing Database Security
Use strong passwords for your database. A strong password is hard to guess. It should have a mix of letters, numbers, and symbols. Do not use simple words or your name. Change your password often. This keeps your database safe.
Keep your database software up-to-date. Updates fix bugs and security issues. Set up automatic updates if you can. This helps protect your data. Updated software runs better and is more secure. Always check for new updates.
Frequently Asked Questions
How To Upload Mysql Database To Web Hosting?
To upload a MySQL database, access your hosting control panel and open phpMyAdmin. Create a new database, select it, and click “Import. ” Choose your SQL file and start the upload. Ensure your database name matches the configuration in your website’s files for seamless integration.
How To Connect A Database In Web Hosting?
Access your hosting control panel and find the database section. Create a new database and user. Use the provided credentials to connect through your web application. Configure the database connection settings in your app’s configuration file. Test the connection to ensure it’s working properly.
How Do I Connect A Mysql Database To My Website?
Connect a MySQL database using PHP. Install MySQL and PHP on your server. Use mysqli_connect() function in PHP script. Define server name, username, password, and database name. Execute the connection script. Confirm connection success by checking mysqli_connect_errno().
How Do I Host My Mysql Database?
Choose a web hosting provider offering MySQL support. Set up the database using their control panel. Use phpMyAdmin for management. Connect applications with correct credentials. Ensure regular backups for data safety.
Conclusion
Loading your MySQL database onto a web hosting server is simple. Follow the steps carefully. Start by exporting your database. Use phpMyAdmin for ease. Next, access your web hosting control panel. Import the database file there. Check configurations for accuracy.
Ensure all credentials match. Test your website thoroughly. Look for any errors. Resolve them promptly. A smooth database setup boosts website performance. Keep backup copies safe. Regular updates are crucial. Stay informed about security. Your website can run efficiently with the right database setup.
Enjoy your seamless online presence!


