
Have you ever wondered how to host your web service on an IIS server? You’re in the right place.
Whether you’re a seasoned developer or just getting started, hosting a web service on IIS can seem like a daunting task. But it doesn’t have to be. With the right guidance, you can make this process smooth and straightforward. Imagine the satisfaction of seeing your web service up and running, accessible to users worldwide.
That’s the power of IIS, a robust server designed to deliver your content efficiently. This guide will walk you through each step, ensuring you understand the process without feeling overwhelmed. You’ll learn how to configure settings, deploy your service, and optimize for performance. As you read on, you’ll discover tips and tricks that make hosting on IIS not just possible, but easy. You’ll gain confidence in managing your web services and find solutions to common challenges. So, let’s dive in and unlock the potential of your web service on IIS.
Setting Up Iis
To install IIS, first, open the Control Panel. Next, click on “Programs” and then “Turn Windows features on or off.” A list will appear. Look for “Internet Information Services” and check the box. Click “OK” to start the installation. Wait for Windows to finish. Once done, IIS is installed on your computer.
Open the IIS Manager from the Start menu. This is where you can manage your web services. Click on the server name on the left panel. Then, go to “Sites” and click “Add Website.” A new window will appear. Enter a name for your site. Choose a folder where your files are stored. Set a port number for your site. Click “OK” to create the site. Your basic settings are now configured.
Preparing The Web Service
First, open IIS Manager on your computer. Click on the “Sites” folder. Then, choose “Add Website” from the right panel. Enter the site’s name. Next, set the physical path to your web files. Choose a port number. Ensure the port is not in use. Click “OK” to create the application.
Write your code for the web service. Use a language like C# or JavaScript. Test your code locally first. Fix any errors you find. Make sure the service returns data correctly. Save your work often. When ready, deploy it to the server. Use IIS to host your service.
Deploying To Iis
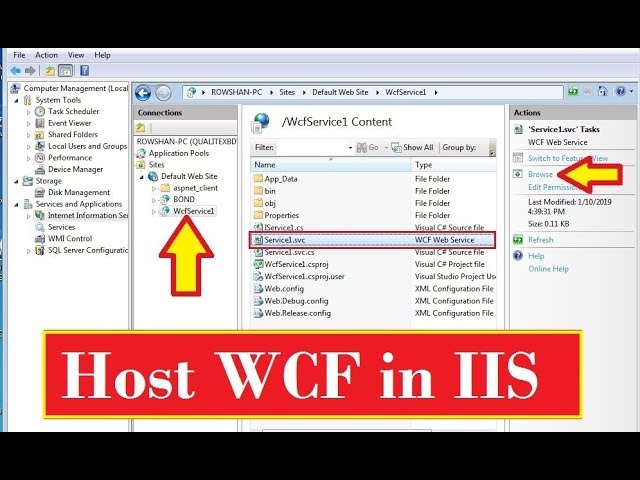
First, open your project in Visual Studio. Choose “Build” and then “Publish”. Select “Folder” as the target. This will create a folder with your service files. It’s crucial to ensure that all files are included.
Access your IIS server via Remote Desktop. Open “Internet Information Services (IIS) Manager”. Navigate to the site where you will host the service. Use “File Explorer” to drag your service files into the site’s folder. Make sure all files are copied correctly.
Credit: www.youtube.com
Configuring Application Pool
The Application Pool Identity is crucial for security. Choose a suitable identity for your app. Options include NetworkService and LocalSystem. Each has different permissions. Ensure you pick the right one.
NetworkService has limited access. Good for most apps. LocalSystem has full access. Use with caution. Setting the right identity protects your server.
Adjusting parameters helps with app performance. Set the CPU limit to manage resources. Another parameter is the timeout. It defines how long a request waits.
Recycling is another setting. It helps refresh the app. These settings keep the app running well. Make sure to review them regularly.
Binding And Authentication
Hosting a web service on an IIS server requires configuring binding and authentication settings. Binding connects your service to the correct network protocol. Authentication ensures that only authorized users access your service.
Setting Up Bindings
Bindings connect your web service to a domain. Start by opening the IIS Manager. Click on the server name. Find your site in the list. Double-click it. Choose Bindings from the menu. Click Add. Pick http or https. Enter the hostname. Click OK. Bindings help your site respond to domain requests.
Configuring Authentication
Authentication checks who is accessing the site. Open IIS Manager. Click on the site name. Find Authentication in the list. Double-click it. Select Anonymous Authentication. Click Edit. Choose your preferred setting. You can set users who need to log in. Authentication keeps your web service secure. It controls who can see your site.
Credit: stackify.com
Testing The Web Service
Open a web browser and enter your service URL. Wait for the page to load. Check if the web service responds. If it shows an error, note the message. Look for issues in the URL. Ensure the server is running. Also, verify the firewall settings. Sometimes, these block access.
Check the event logs for errors. They provide clues to problems. Review the IIS settings for any misconfigurations. Ensure the application pool is correct. Also, verify the file permissions. They should allow access. Sometimes, files are locked or missing. Restart the server if needed. This can fix minor glitches.
Monitoring And Maintenance
IIS Logs are very useful. They help track user activity on your site. Each log shows requests made to the server. You can see what users are doing. This helps find errors. Fix problems quickly with logs. Logs are like a diary for your server. Always keep them safe.
Keeping your server updated is key. Updates fix bugs and add new features. They keep your server safe. Backups are important too. They save a copy of your data. If something goes wrong, you can restore it. Make backups regularly. Use a schedule. This keeps your data safe.

Credit: learn.microsoft.com
Frequently Asked Questions
How To Host Web Services In Iis?
To host web services in IIS, open IIS Manager. Click “Add Website,” input site details, and select application pool. Set the physical path and configure bindings. Start the site to enable web services. Ensure the correct permissions and firewall settings for seamless access.
How Do I Add A Web Service To Iis?
Open IIS Manager, right-click on “Sites,” select “Add Web Service,” input necessary details, and click “OK” to deploy.
How To Host The Web Api In Iis?
To host a web API in IIS, first install IIS on your server. Publish your web API project, then create a new site in IIS, and point it to your published folder. Configure application pool settings, bind a domain, and ensure necessary permissions are set.
How To Host A Web Service?
Choose a reliable hosting provider. Set up a server environment. Deploy your web service files. Configure domain settings. Ensure security measures are in place. Regularly monitor and maintain the service.
Conclusion
Setting up a web service on IIS is straightforward. Start by installing IIS, then configure your site. Ensure your service is correctly deployed. Check your settings for security and performance. Test to confirm everything works smoothly. Regularly update your server.
Keep an eye on traffic and errors. Troubleshooting helps maintain your service. With these steps, hosting becomes easier. Anyone can follow these simple directions. You gain confidence managing your web services. Enjoy the benefits of a reliable server. Your website stays accessible and efficient.
Happy hosting on your IIS server!


