
Imagine transforming your computer into a server that can share your web services with the world. Hosting a web service in IIS (Internet Information Services) might sound complex, but it’s easier than you think.
You have the power to make your application accessible to users anywhere, anytime. Whether you’re a developer looking to deploy an application or someone curious about the technical magic behind websites, understanding IIS is crucial. You’re about to discover how to effortlessly set up and manage your web services in IIS, ensuring they run smoothly and securely.
Dive in, and unlock the potential to share your digital creations with anyone, anywhere.
Credit: www.cloudfronts.com
Setting Up Iis
Start by opening the Control Panel. Go to Programs and then Turn Windows features on or off. Look for Internet Information Services (IIS). Check the box next to it. Click OK to install. Wait for the installation to finish. Restart your computer to complete the setup. Now, IIS is installed on your system.
Open the IIS Manager. Find it in the Start menu. Select your computer name on the left. Look for the Default Website. Right-click it and choose Edit Bindings. Set the Port to 80 for HTTP. Ensure the IP address is set to All Unassigned. Click OK. Your basic settings are now configured.
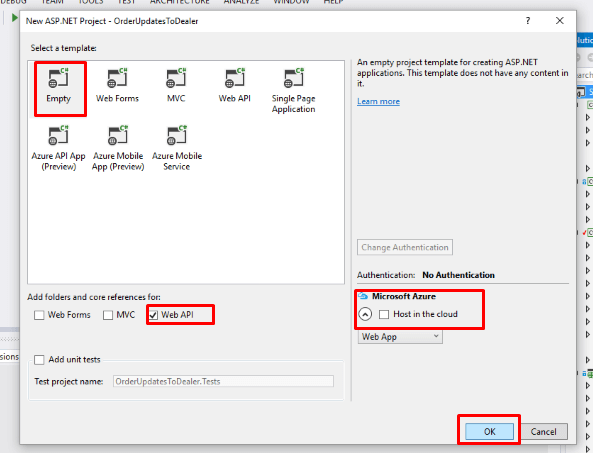
Creating A Web Service
Selecting a framework is important. Many options exist. ASP.NET is popular. It is easy to use. Node.js is another choice. It handles many requests. Think about your needs. Choose what fits best. Both have strong support. Many developers like them. They are reliable and efficient.
Start with a simple plan. Write code in small parts. Test each part often. This helps find problems early. Use clear names for everything. This makes code easy to read. Check code for errors. Fix them right away. Using comments is helpful. They explain what code does. Others can read them too.
Deploying To Iis
Begin by creating a build of your web service. Use your development tool for this task. Once the build is ready, select a folder for output files. This folder will hold all the files you need. Ensure all files are there. This includes configuration files and DLLs. These files are important for the service. Check twice to avoid missing files.
Open the IIS Manager on your server. Find the “Sites” section on the left panel. Right-click and select “Add Website”. Enter a name for your site. Choose the folder with your web service files. For the “Physical Path”, browse and select this folder. Assign a port number for the site. A common choice is 80. Finally, click “OK” to add the site. Your web service is now in IIS.

Credit: learn.microsoft.com
Configuring Web Service
Start by opening Internet Information Services (IIS) manager. Find the Application Pools section. Click on Add Application Pool. Name it as you like. Choose the correct .NET Framework version. Make sure the Managed Pipeline Mode is set correctly.
Click OK to create the pool. Now, your pool is ready. It helps in managing your web services efficiently. Application Pools keep your sites running smoothly. They also help in isolating different applications. This is important for security and performance.
Go to the Sites section in IIS. Click on your site. In the Actions pane, click Bindings. A new window will open. Click on Add to set up a new binding. Choose HTTP or HTTPS as the type. Enter the IP address and port number.
Specify the host name if needed. Click OK to save your settings. Site Bindings are crucial. They determine how your site is accessed. Without correct bindings, users can’t reach your site. Always double-check your settings.
Security Measures
Ensure your web service in IIS is secure by implementing strong authentication and encryption. Regularly update your server to protect against vulnerabilities. Use firewalls to block unauthorized access.
Implementing Https
Websites need HTTPS to keep data safe. It encrypts information. This stops bad people from seeing your data. HTTPS uses a certificate. The certificate proves the site is real. Always use HTTPS for web services in IIS. It protects user information. It makes sure no one can steal data. Installing SSL certificates is easy. Many guides are available online. These guides help you step by step.
Managing User Access
Managing user access is important for security. Only trusted people should have access. Use strong passwords for users. Change passwords regularly. This keeps accounts safe. Use permissions wisely. Only give access to what is needed. This stops unauthorized access. Keep a list of who can access the service. Update this list often. Remove access from people who don’t need it. Monitoring access helps find problems early. Use tools to check who logs in. Keep user data safe and secure.

Credit: learn.microsoft.com
Testing The Service
Open a web browser to test your service. Enter the service URL in the address bar. Hit enter and wait for the page to load. A successful connection shows the service page. If the page loads, your service is live. You can now access it from different devices. Always check from another computer too. This ensures your service is not blocked by local settings.
Sometimes the service won’t load. Check your firewall settings first. Make sure the port is open. Next, verify the web server is running. Restart the server if necessary. Confirm the web service file paths are correct. Incorrect paths can cause errors. Also, check for any typos in the URL. Small errors can prevent connectivity. Always review your configurations carefully.
Monitoring And Maintenance
IIS logs help track your web service’s activity. These logs record important events and errors. They show who accessed your site and when. Use this data to spot issues early. Regular checks can prevent bigger problems later.
You can find logs in the IIS Manager. Learn to read them. Understand common error codes. This knowledge makes maintaining your site easier.
Keep your web service updated with the latest software. Updates fix bugs and improve security. Make a habit of checking for them often.
Backups are your safety net. They protect your data. Schedule regular backups to avoid data loss. Store backups in a secure place. This practice keeps your service safe and sound.
Frequently Asked Questions
How To Host Web Services In Iis?
Open IIS Manager. Select “Add Website” from the Actions pane. Enter site name and physical path. Choose a port. Click “OK” to host your web service.
How Do I Add A Web Service To Iis?
Open IIS Manager. Right-click on “Default Web Site” or your site. Select “Add Application”. Enter alias and physical path. Click “OK” to add your web service. Refresh to see changes.
How Do I Host A Web Service?
To host a web service, choose a reliable web hosting provider. Register a domain name, and install necessary software. Upload your web service files via FTP or a control panel. Configure your server settings for optimal performance. Ensure security measures are in place, like SSL certificates.
How To Host Windows Service In Iis?
You can’t directly host a Windows service in IIS. Instead, convert the service to a web application using technologies like WCF or ASP. NET, then deploy it on IIS for web-based access.
Conclusion
Hosting a web service in IIS is straightforward with the right steps. Begin by installing IIS on your server. Configure your application settings carefully. Test your web service thoroughly to ensure functionality. Security measures are crucial; always keep them updated.
Optimize performance by monitoring server resources regularly. Troubleshooting common issues can save time and effort. Remember, practice makes perfect. The more you work with IIS, the easier it becomes. Now you’re ready to host your web service successfully. Share your experience with others, and keep learning to improve your skills.


