
Have you ever developed a stunning ASP.NET web page and wondered how to make it accessible to the world? You’re not alone.
Hosting your ASP. NET web page in Internet Information Services (IIS) is a crucial step that can seem daunting at first. But don’t worry, you’re in the right place. By the end of this guide, you’ll have the confidence and knowledge to host your web page smoothly and effectively.
Imagine the satisfaction of seeing your creation live on the web, ready for users to explore. With clear steps and practical tips, this article will transform your hosting process from a challenge into a straightforward task. Ready to unlock your web page’s potential? Let’s dive in and make your hosting worries a thing of the past.
Setting Up Your Environment
Windows has a tool called Internet Information Services. You need to install it. Go to Control Panel. Find Programs and Features. Click ‘Turn Windows features on or off’. Look for IIS. Check the box next to it. Click OK to install.
After installing IIS, enable some features. Go back to the same window. Find ASP.NET and Web Management Tools. Check the boxes for these features. Press OK to apply changes.
.NET Framework is needed for ASP.NET. Check if it’s installed. Go to Control Panel. Look for .NET Framework. If not installed, you must download it. Follow the steps to install. Once done, your system is ready.
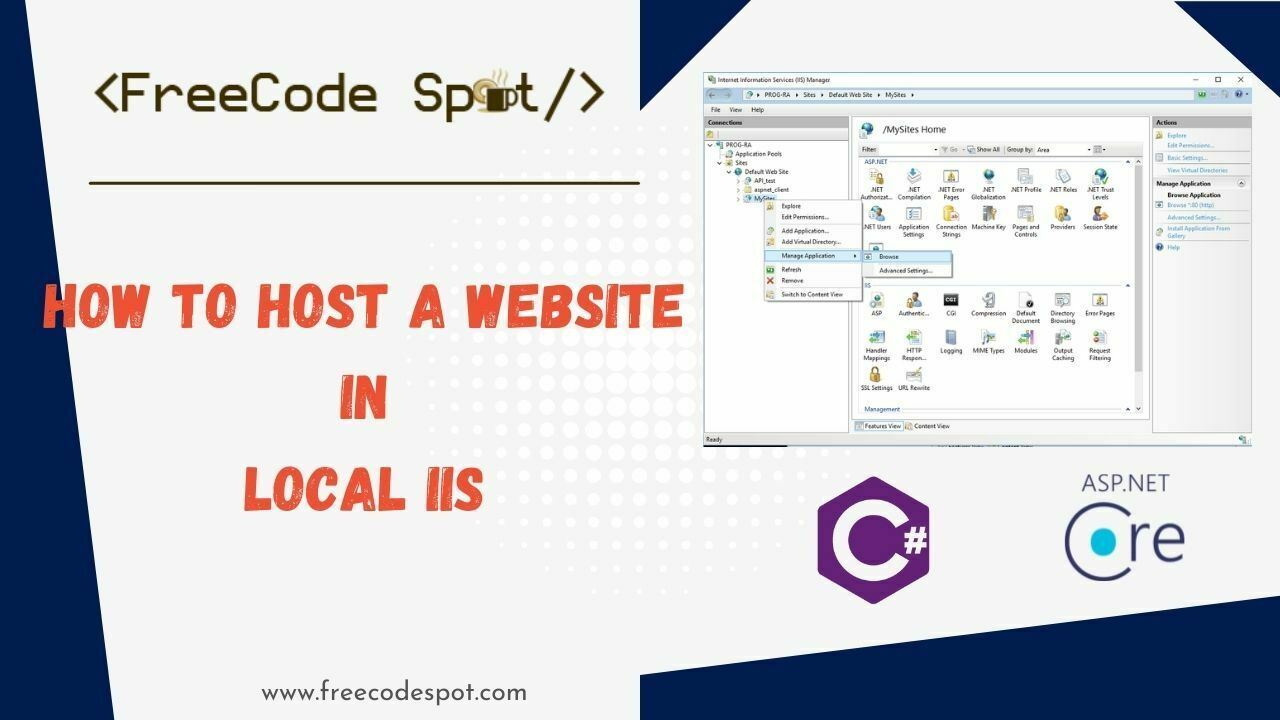
Credit: www.freecodespot.com
Preparing Your Asp.net Application
First, build your ASP.NET application using Visual Studio. Click on the “Build” menu and select “Build Solution”. This compiles your code. Next, publish your application by right-clicking on the project. Choose “Publish” and select a folder or server. The publish wizard helps you through the steps. Once complete, your application is ready for deployment.
Create a deployment package using Visual Studio. Click “Build” and select “Package”. This creates a folder with all needed files. The package includes your code and settings. Use this package to deploy your application. It simplifies moving your application to IIS.
Configure settings in the web.config file. Open this file in Visual Studio. Change settings like connection strings and authentication. Save changes to apply them. Review settings carefully. Incorrect settings can cause errors. Test your application locally first.
Configuring Iis For Asp.net
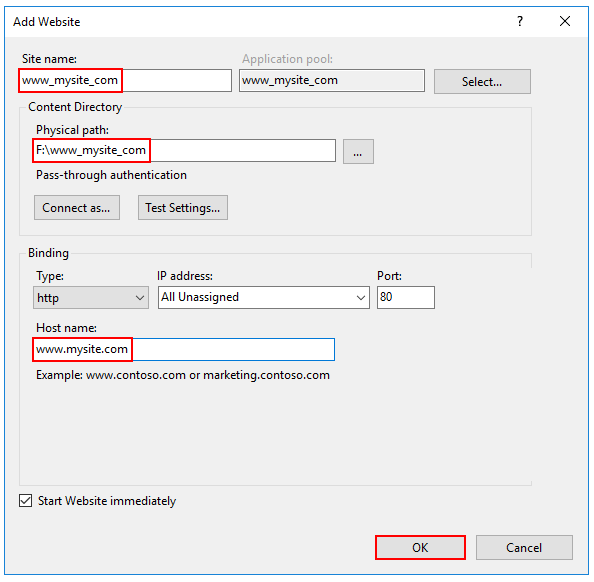
Open the IIS Manager on your computer. Find the option to add a new website. Choose a name for your website. Make sure it is easy to remember. Enter the path where your website files are stored. This path tells IIS where to find your website files. Click the “OK” button to save your settings.
An application pool helps manage your website. Right-click on your website in IIS Manager. Choose the option to set the application pool. Select the right version of ASP.NET. This is important for your website to work well. Save your settings by clicking “OK”.
Website bindings help direct traffic to your site. Click on your website in IIS Manager. Choose the option for bindings. Add a new binding if needed. Enter your website’s domain name. Use the correct port number. Save your changes by clicking “OK”. Now your website is ready to be visited!
Credit: learn.microsoft.com
Deploying The Web Application
Start by copying all your files to the server. Use a secure method. FTP is a common choice. Make sure all necessary files are included. Double-check to avoid missing files. A complete set ensures smooth deployment.
Set folder permissions correctly. This allows your app to run. Permissions protect files from unauthorized access. Use IIS to manage these settings. Ensure the app pool user has access. This is crucial for app functionality.
Check your app after deployment. Open the web page in a browser. Ensure everything loads correctly. Look for errors or missing parts. Fix any issues promptly. Testing ensures a successful deployment. A well-deployed app means happy users.
Managing Iis Security
Authentication helps keep your web pages safe. IIS supports multiple authentication types. Basic, Digest, and Windows are examples. Choose the right one for your site. Use Windows Authentication for private sites. It checks user accounts. Basic Authentication asks for a username and password. Always protect this data. Digest Authentication is more secure. It encodes the information.
SSL Certificates protect data. They make connections secure. First, get a certificate. Choose a trusted provider. Install it in IIS. Go to the server settings. Use the “Server Certificates” feature. Select your certificate. Apply it to your site. Make sure to use HTTPS. It makes pages safe. No one can steal data. Always renew your certificate.
Authorization Rules decide who can see your site. Set rules carefully. Use role-based access. It limits user actions. Only admins can change settings. Guests can view pages. Use the Web.config file. Add rules there. Test your settings. Ensure they work correctly. Check user permissions. Update rules as needed. Keep your site secure.

Credit: www.dotnetcurry.com
Troubleshooting Common Issues
Setting up an ASP. NET web page in IIS often presents common challenges. Ensure IIS is correctly installed and configured. Verify application pool settings and permissions for smooth hosting.
Resolving Http Errors
HTTP errors can cause confusion. Check the URL for mistakes. Ensure the server is running. Verify your permissions are correct. Sometimes, a restart helps. Update the web.config file if needed. Always keep it backed up.
Checking Application Logs
Logs provide clues. Access the Event Viewer on your system. Look for error messages or warnings. Logs can show what went wrong. Identify patterns or repeated issues. Use this information for problem-solving. Keep logs updated and organized.
Diagnosing Performance Problems
Performance issues slow down sites. Check for high CPU usage. Monitor the memory consumption. Use tools like Task Manager. Update outdated software versions. Look for inefficient code. Optimize your database queries. A well-tuned site runs smoother.
Monitoring And Maintenance
Ensure smooth hosting of your Asp. Net web page in IIS with regular monitoring and maintenance. Check server performance and update software to prevent issues. Keep backups ready to safeguard data and ensure seamless operation.
Using Iis Manager Tools
IIS Manager helps in checking your web page status. It shows logs and real-time data. This helps in finding issues quickly. Use the diagnostic tools to see errors and warnings. Regular checks ensure your site runs smoothly. Adjust settings to improve performance.
Setting Up Regular Backups
Backups protect your data from loss. Set up automatic backups for safety. This helps in restoring your site easily. Store backups in a secure location. Use cloud storage for more safety. Regular backups keep your data safe.
Updating Iis And Application
Update IIS to keep your web page secure. New updates fix bugs and add features. Always update your application too. This ensures compatibility with IIS. Check for updates monthly. Updates keep your site running fast and safe.
Frequently Asked Questions
How To Host A Classic Asp Website In Iis?
To host a classic ASP website in IIS, install IIS and enable ASP support. Create a new website under “Sites”. Point it to your ASP files’ folder. Configure application settings. Ensure required permissions and features are enabled. Test the site for functionality.
How To Deploy .net Framework Application On Iis?
To deploy a. NET Framework application on IIS, install IIS and. NET Framework, then publish your application. Configure the IIS settings, create a new website, and point to the published folder. Ensure correct application pool settings and verify the application runs correctly.
How To Publish And Deploy Asp.net Mvc Application In Iis?
To publish an ASP. NET MVC application in IIS, first build the project in Visual Studio. Use “Publish” to create a deployable package. Open IIS Manager, create a new site, and point it to the package’s folder. Set application pool to use.
NET CLR version. Finally, configure bindings and security settings.
How To Host .net Core Web Api Application In Iis?
Install. NET Core Hosting Bundle on the server. Configure IIS, create a new site, and set application pool to No Managed Code. Deploy your. NET Core Web API and point IIS to its published folder. Bind necessary ports and ensure permissions.
Test the deployment by accessing the API URL in a browser.
Conclusion
Hosting an ASP. NET web page in IIS is straightforward. Start by installing IIS on your Windows machine. Then, set up your website in IIS Manager. Use the wizard to guide you through the process. Ensure your ASP. NET application files are ready.
Configure your web application settings carefully. Test your website locally to confirm it’s working. Resolve any errors promptly. Keep your server secure and updated. Regularly monitor your site’s performance. Follow these steps, and your ASP. NET application will run smoothly on IIS.
Enjoy your seamless hosting experience. Happy web development!


