
Are you ready to take your web application to the next level? Hosting it in Azure could be your smartest move yet.
You might be wondering why Azure? Well, imagine having access to a platform that offers unparalleled scalability, security, and efficiency. With Microsoft Azure, you can empower your web application with the tools it needs to shine brighter than ever. But how do you get started?
This guide is crafted to walk you through each step, making the process straightforward and stress-free. Whether you’re a seasoned developer or a curious beginner, you’ll find all the information you need right here. By the end of this article, you’ll have the confidence to host your web application on Azure, ensuring it runs smoothly and meets your users’ needs. Keep reading, because what you’re about to learn could transform your web application into a powerhouse of performance.
Choosing The Right Azure Service
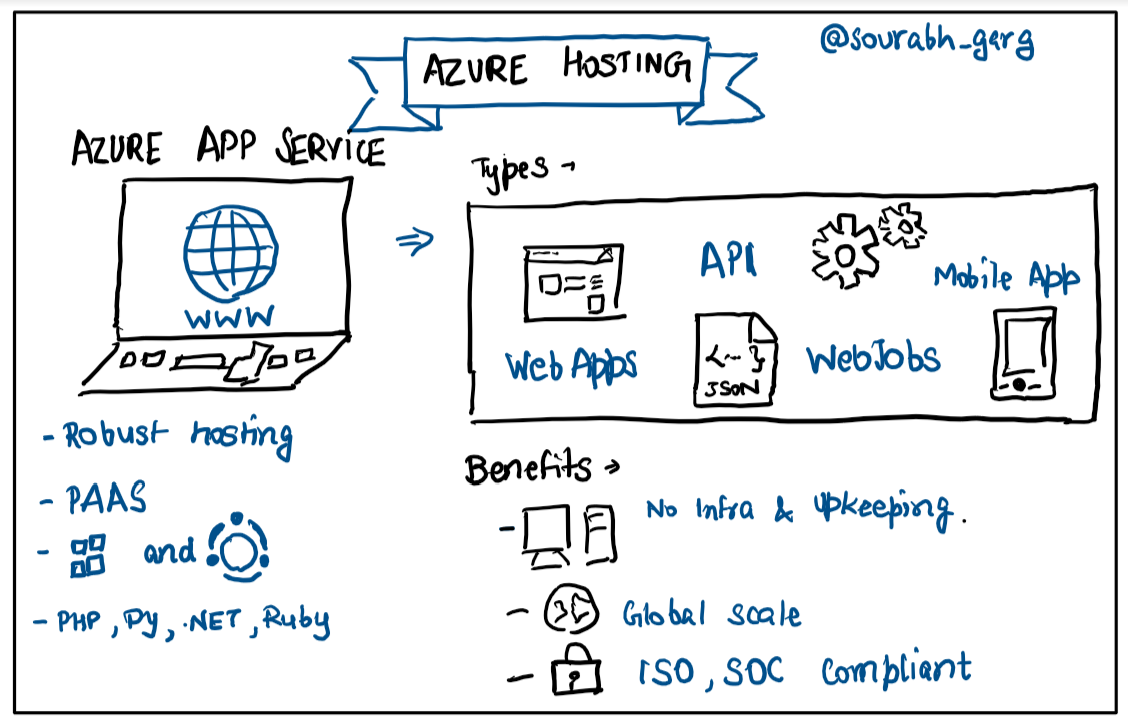
Azure App Service is a cloud platform. It is perfect for hosting web apps. It supports many languages. These include Java, Node.js, and PHP. App Service is easy to use. It offers scaling and security. This makes it a good choice for simple apps.
Azure Virtual Machines provide more control. You can choose your operating system. It is great for custom applications. Virtual Machines are flexible. But they require more management. Consider them for complex needs.
Azure Kubernetes Service, or AKS, is powerful. It is designed for containerized applications. AKS makes scaling easy. It automates many tasks. This includes updates and monitoring. AKS works well for large projects. It handles many users and tasks at once.

Credit: build5nines.com
Preparing Your Application
Clean code is important. Remove any unnecessary code or comments. Make sure your code runs fast. Slow code can cause problems. Use tools to check your code. These tools find mistakes. Fix all mistakes before hosting. This helps your application run better.
Set up the environment. Choose the right Azure tools. These tools help your app run well. Check your software versions. They must be correct. Wrong versions can cause errors. Set up the database too. Make sure it connects to your app. Test everything before you go live.
Setting Up Azure Account
Creating an Azure account is simple. Visit the Azure website. Click on the sign-up button. Enter your email address. Choose a strong password. Fill in personal details. Follow the on-screen instructions. Verify your email. Your account is ready.
Azure offers various subscription plans. Free trial is available. This trial lasts for 30 days. You get $200 credit. Pay-as-you-go is another option. You pay for what you use. Enterprise plans are for big businesses. Compare the plans. Choose what fits your needs. Understand the billing system. Keep track of usage.
Deploying To Azure
The Azure Portal is a friendly tool. It helps users deploy web applications easily. First, log in to the Azure Portal. Next, create a new Resource Group. Then, select your App Service Plan. Choose the Web App option. Fill in the needed details. Click Create to finish setup. Watch your application go live. It’s that simple.
The Azure CLI is a powerful command-line tool. It helps with quick deployments. Open your terminal or command prompt. Log in using `az login`. Create a new resource group. Use the command `az group create`. Next, deploy your app using `az webapp up`. Remember to specify your directory. It’s fast and efficient.
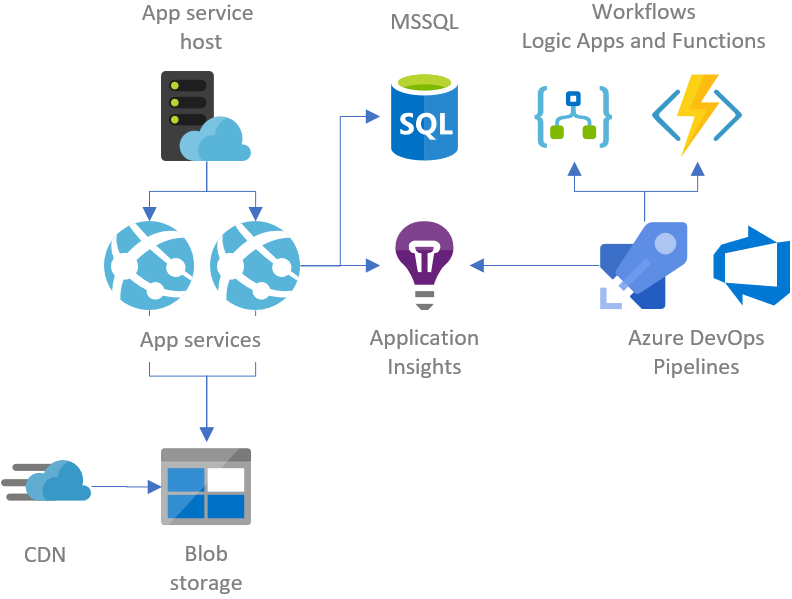
Continuous Integration (CI) and Deployment (CD) are key. They help in automating deployment processes. Use Azure DevOps for CI/CD. It provides pipelines to deploy your web app. Set up your pipeline in Azure DevOps. Connect your repository. Define your build and release stages. Watch your changes go live automatically. It’s a smart choice for developers.
Configuring Application Settings
Deploying a web application in Azure involves configuring application settings for optimal performance. Adjust settings for database connections, security, and scaling options. This ensures your application runs smoothly and efficiently in the cloud.
App Service Settings
Azure provides many tools for app settings. App Service Settings allow you to control how your app works. You can set up the environment, like production or development. Settings can be changed without touching the code. This makes updates easy. You can also add custom settings for your app.
Choose the right pricing tier. It affects performance and cost. SSL Certificates can be added for security. Enable diagnostics to track errors. You can connect to databases easily. Azure’s tools help you manage scale and performance.
Scaling And Performance
Azure helps your app grow with scaling. Scaling allows your app to handle more users. Choose between vertical or horizontal scaling. Vertical scaling adds more power to your server. Horizontal scaling adds more servers.
Auto-scaling features adjust to traffic needs. This keeps your app fast. Monitor performance metrics to understand speed. Azure tools can help with this. Use caching to make your app quicker. Optimize database queries for better performance.
Credit: gunnarpeipman.com
Monitoring And Management
Deploying a web application in Azure involves careful monitoring and management. Set up Azure Monitor to track performance and resources. Utilize Azure Management tools for efficient control and scaling of your web app.
Azure Monitor
Azure Monitor helps you watch your app. It collects data from many sources. Logs and metrics show how your app works. This tool finds problems fast. You can set alerts for different issues. These alerts warn you if something is wrong. Azure Monitor makes sure your app stays healthy.
Application Insights
Application Insights is a part of Azure Monitor. It checks how users like your app. It shows which features they use most. Performance data helps you improve the app. You can see if the app is slow or fast. It helps you find bugs in the code. Application Insights helps make your app better every day.
Security Best Practices
Data must always be encrypted. Use HTTPS for web traffic. Ensure data is safe during transmission and storage. Regularly update encryption methods. Back up data frequently. Monitor data access and keep logs. Protect sensitive information with strong passwords.
Limit user access to essential areas. Implement multi-factor authentication. Regularly review permissions. Audit user activities often. Use role-based access controls. Keep user credentials secure. Educate users about security risks. Monitor login attempts for unusual behavior.
Credit: faun.pub
Cost Management
Azure offers different pricing models. Pay-as-you-go is one option. You pay for what you use. No upfront cost. Another option is Reserved Instances. You pay upfront for one or three years. This saves money compared to pay-as-you-go. Azure also offers Spot pricing. This is cheaper but can be interrupted. Choose based on your needs. Understand each model to save money.
To save money, use the Azure Cost Management tools. These tools help track spending. Set budgets to avoid overspending. Use the Azure Advisor. It gives tips to reduce costs. Turn off unused resources. This saves money. Use Auto-scaling. It adjusts resources based on need. Review bills often. This helps find unnecessary charges. Follow these strategies to manage costs better.
Frequently Asked Questions
Can A Website Be Hosted On Azure?
Yes, Azure can host websites. It offers scalable, secure, and reliable cloud hosting services. Azure supports various programming languages and frameworks. It provides integrated tools for deployment and management. You can use Azure Web Apps or Virtual Machines for hosting.
Azure’s global network ensures optimal performance and availability.
How To Onboard An Application In Azure?
To onboard an application in Azure, first create an Azure account. Then, configure identity and access management. Deploy the application using Azure App Service or Virtual Machines. Monitor and manage through Azure Portal for efficient operation.
How To Host Desktop Applications On Azure Cloud?
Host desktop applications on Azure by using Azure Virtual Desktop. Configure virtual machines and manage resources via Azure portal. Deploy applications securely, ensuring scalability and remote access. Utilize Azure’s cloud infrastructure for optimal performance and flexibility. Enhance user experience with seamless integration and responsive support.
How Do I Host A .net Application In Azure?
Host a. NET application in Azure by creating a Web App in the Azure portal. Deploy using Azure DevOps or Visual Studio. Configure application settings and scale resources as needed. Monitor performance and manage security settings through Azure services.
Conclusion
Hosting a web application in Azure is simple and efficient. Azure provides reliable tools for seamless deployment. Follow the steps to ensure a smooth hosting process. Always keep your application secure and up-to-date. Azure’s scalability helps your app grow with ease.
Explore the available features to optimize your app’s performance. Remember, Azure’s support is there to assist you. Use the resources and community for guidance. Embrace Azure’s potential for your web application needs. Start your hosting journey with confidence and clarity.
Your web app deserves a stable and powerful platform like Azure.


