
Are you ready to launch your website but not sure how to connect your Namecheap domain to your web host? You’re in the right place!
Setting up your domain is the first crucial step in establishing your online presence, and we’re here to guide you through the process. Whether you’re a seasoned pro or a beginner, this straightforward guide will simplify the technical jargon and empower you to take control.
Imagine the satisfaction of seeing your website go live, effortlessly directing traffic to your site with your unique domain. Dive in, and let’s make sure your digital identity stands out in the crowd.
Credit: www.hostinger.com
Accessing Namecheap Account
First, open your browser and go to Namecheap’s website. Use your username and password to log in. Look for the Dashboard link at the top. Click on it. You will see a list of your domains. Choose the domain you want to connect. Next, find the button that says Manage next to it. Click on it. Now, you are ready for the next steps.
Locating Domain Settings
Start by logging into your Namecheap account. Navigate to the Dashboard. Here, you will find a list of your domains. Click on the domain you want to change. This will take you to the domain settings page. Look for the Manage button. It is usually next to the domain name. Click it to access domain settings.
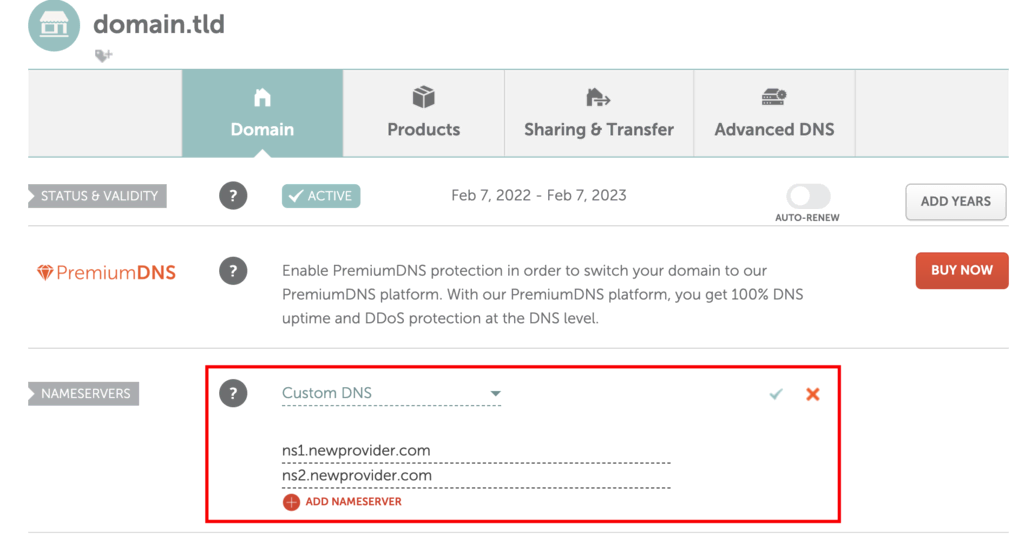
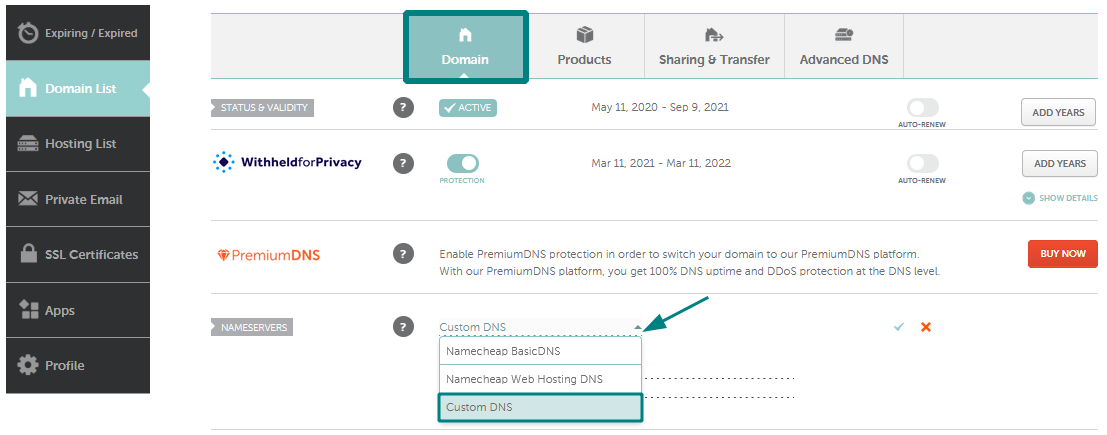
On this page, find the Nameservers section. This is where you can direct your domain. You may see options like Custom DNS or Namecheap Basic DNS. Choose the correct option to input your web host’s details. Save changes after updating the settings.
Choosing Dns Settings
DNS helps your domain find the right home. Namecheap offers different choices. Basic DNS is the default setting. It connects your domain to the internet. Premium DNS is faster and safer. It costs extra money. Custom DNS lets you use settings from your web host. Choose the best option for your needs.
Custom DNS is for using settings from your web host. Log in to your Namecheap account. Find the domain you want to change. Click on Manage. Go to the Nameservers section. Select Custom DNS from the list. Enter the details from your web host. Save your changes. It might take a few hours to update.
Entering Web Host Details
First, log into your Namecheap account. Go to the Dashboard. Find your domain name. Click it to open more settings. Look for the Nameservers option. Your web host will give you nameserver details. Usually, they are in an email. Make sure to copy them correctly.
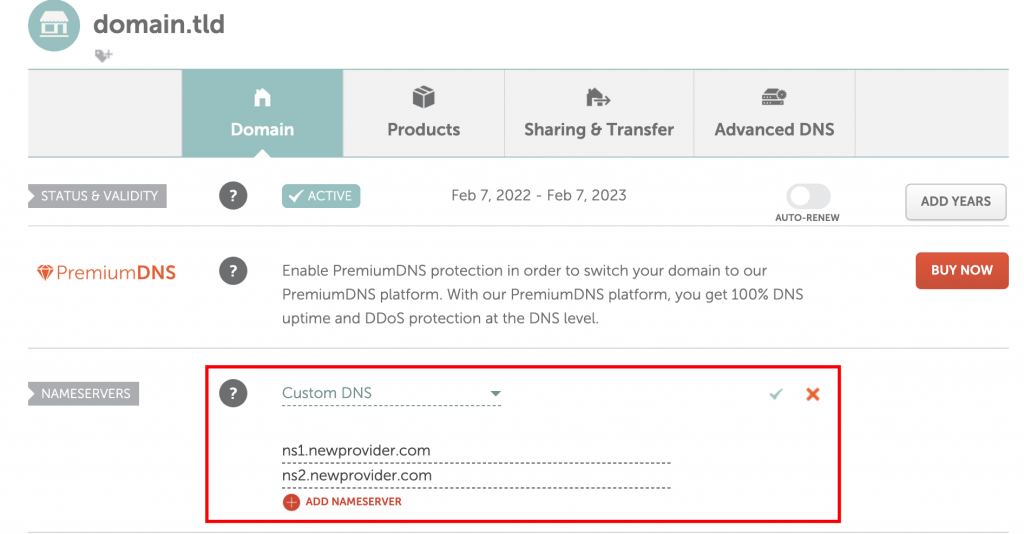
Return to your Namecheap account. On the domain settings page, find the Custom DNS option. Click it and paste your nameservers. There might be two or more nameservers. Make sure to add all of them. Once done, save your changes. It might take a few hours to update. Check back later to ensure it works.
Saving And Propagating Changes
Saving changes ensures your domain points to the right web host. First, log into your Namecheap account. Navigate to your DNS settings. Enter the new host’s DNS details carefully. Double-check for mistakes. Click the save button. Changes start to propagate after saving.
Propagation can take some time. Usually, it takes 24 to 48 hours. During this period, your website may not be accessible. Be patient while changes spread across the internet.
Confirming Configuration
Check if your domain points correctly. Use online tools for this. They verify DNS settings. Ensure no errors exist. Once confirmed, your site should work properly. Double-check settings if something seems wrong. Mistakes can cause issues.
Monitoring Propagation
Monitor DNS changes using online services. They show propagation progress. Some changes happen quickly. Others take longer. Stay informed during this process. Regular checks help ensure everything works. If problems occur, troubleshoot immediately. Fixing issues can prevent downtime.
Credit: www.hostinger.com
Troubleshooting Common Issues
Easily direct your Namecheap domain to your web host by updating DNS settings. Access your Namecheap account, locate DNS settings, and input your web host’s nameservers. Ensure accurate entries to avoid connection issues.
Verifying Dns Entries
Check your DNS settings. Ensure your domain points to the right server. Use tools like DNS Checker for confirmation. Look for A and CNAME records. They should match your host’s instructions. Incorrect entries cause errors. Double-check each record. Update any wrong information promptly. This prevents access issues. Keep a record of changes for future reference.
Resolving Propagation Delays
Propagation takes time. DNS changes are not instant. It can take up to 48 hours. Be patient during this period. Check your website after a few hours. Use online tools to check propagation status. These tools show DNS updates worldwide. If issues persist, contact support. They can help resolve delays. Make sure your settings are correct. This reduces waiting time.
Additional Resources
Explore additional resources for guidance on directing your Namecheap domain to a web host. Find easy-to-follow tutorials and helpful tools that simplify the process. Learn step-by-step instructions to ensure a smooth transition of your domain.
Namecheap Support
If problems occur, Namecheap support can help. Their help center offers guides for setting up domains. Check their FAQs for common issues. Contact them directly for more help. Use the live chat option for quick answers. Email support is available too. They reply within 24 hours. Namecheap also provides video tutorials. Watch them for step-by-step guidance.
Web Host Assistance
Your web host can offer support too. Look for their help section on the website. Many hosts have guides for connecting domains. Contact their support team for detailed help. They usually offer chat or email support. Web hosts might have forums. Join them to discuss issues with others. Follow instructions carefully for best results. Each web host may have different steps. Always check for their specific guidance.
Credit: www.namecheap.com
Frequently Asked Questions
How Do I Connect Namecheap Domain To Hosting?
Log into Namecheap, go to your domain list, and select your domain. Update DNS settings with your hosting provider’s nameservers. Save changes and allow up to 48 hours for propagation. Check hosting provider’s documentation for any specific requirements. Ensure settings are correct for a successful connection.
How Do I Direct My Domain To Hosting?
Log into your domain registrar account. Update the DNS settings to point to your hosting provider’s server IP address. Save changes. Wait for DNS propagation, which may take up to 48 hours. Confirm that your domain correctly directs to your hosting by checking your website’s functionality.
How To Redirect Namecheap Domain?
To redirect a Namecheap domain, log into your Namecheap account. Go to “Domain List” and click “Manage” next to your domain. Select “Advanced DNS” and set up a redirect under “Redirect Domain. ” Save changes to complete the process.
How Do I Redirect My Domain To Another Website?
To redirect your domain, access your domain’s DNS settings. Add a “301 redirect” pointing to the new website URL. Ensure changes propagate.
Conclusion
Directing your Namecheap domain to your web host is simple. Follow the steps. Update your DNS settings. Connect your domain. Enjoy your new website. Troubleshoot any issues quickly. This process ensures your site is accessible online. Keep your domain and hosting details handy.
Refer back to this guide anytime. You have the tools now. Your domain is ready to shine. Your website is just a few clicks away. Time to share it with the world. Happy hosting!


