
Have you just finished designing your website? Are you ready to share it with the world?
Uploading your website to web hosting is the crucial step that transforms your digital creation into a live, accessible masterpiece. Whether you’re launching a blog, a business site, or an online portfolio, getting your website online is essential for reaching your audience.
But how do you go about this process without feeling overwhelmed? Picture this: You’ve poured hours into crafting content, designing pages, and perfecting every detail. Now, it’s time to hit the ‘publish’ button and watch your hard work come to life. Don’t worry, uploading your website is easier than you think. With a few simple steps, you’ll be on your way to showcasing your site to the world. You’ll discover straightforward methods to upload your website to a web hosting service. We’ll guide you through the process, ensuring you’re equipped with the knowledge to make your website live without a hitch. Ready to dive in and see your website flourish? Let’s get started!
Choosing The Right Web Hosting
There are many types of web hosting. Shared hosting is the most common. It’s cheap and easy for beginners. VPS hosting gives more control and resources. It’s good for bigger sites. Dedicated hosting means you have your own server. It’s for very large websites. Cloud hosting is flexible. It grows with your site. Choose what fits your needs best.
Start by knowing what you need. Is your site small or big? Small sites need less space. Big sites need more. Do you need email features? What about security? Think about the traffic your site will get. More traffic needs more resources. Write down your needs. This will help you choose better.
Look at different hosting providers. Check their prices. See what features they offer. Look for customer reviews. They tell you about real experiences. Check if they offer support. Good support helps when things go wrong. Some providers give extra features for free. Compare all options before you decide. This way, you find the best host for your site.

Credit: www.youtube.com
Preparing Your Website Files
Place all website files in one main folder. Use subfolders for images, styles, and scripts. Name folders clearly. This helps you find files fast. Keep everything neat. Avoid messy folder names. Clean organization saves time.
Backup your website files often. Save copies on a hard drive or cloud. Backups protect your work. In case of file loss, backups will help. Losing files can be bad. Always have a spare copy. Keep backups in safe places.
Make sure files work with your hosting. Some hosts need special file types. Check file formats before uploading. Ask your host about file needs. Wrong files may not work. Ensure compatibility for smooth upload.
Accessing Your Hosting Account
First, open your web browser. Enter your hosting provider’s website address. Look for the login button on the page. Click on it. Enter your username and password. These are provided by your hosting company. Now, click submit to log in. You will enter the control panel. This is where you manage your website.
FTP stands for File Transfer Protocol. It helps move files from your computer to your hosting. You need FTP credentials for access. These include a host address, username, and password. Find these in your hosting account. Use them to connect and manage files.
FTP clients are tools to upload files. Popular ones are FileZilla and Cyberduck. Download and install one from its official site. Open the FTP client. Enter your FTP credentials. Host, username, and password. Click connect. Now, you can move files to your hosting server.
Uploading Files To The Server
Uploading files to a server involves transferring your website data to web hosting. Start by choosing reliable hosting. Use FTP software to move files from your computer to the hosting server. Ensure all files are correctly placed to make your website accessible online.
Using File Manager In Control Panel
File Manager is inside your hosting control panel. It helps you upload files easily. Click on the File Manager icon to open it. You can see folders and files on your server. To upload, choose the upload button. Select the files from your computer. Wait for the upload to finish. Check if the files are there once uploaded.
Uploading Via Ftp
FTP stands for File Transfer Protocol. It is a way to upload files to your server. You need an FTP client software like FileZilla. Open the software and enter your FTP details. Details include server address, username, and password. Connect to the server using the software. Choose the files from your computer. Drag them to your server folder. Wait for the transfer to complete.
Handling Large Files
Large files may need special care. Some servers have upload limits. Split large files into smaller parts. Or use FTP for large file uploads. FTP can handle bigger files easily. Check server settings for file size limits. This ensures smooth uploading of large files.
Configuring Domain Settings
First, you need to point your domain to the server. Log in to your domain provider’s site. Find the section for nameservers. Enter your hosting provider’s nameservers there. Save the changes. This step helps direct your domain to the correct server.
Next, update your DNS records. These records help your domain find the server. Go to the DNS settings on your provider’s site. Add the IP address of your server. This ensures your domain connects to the right place. Wait a few minutes for changes to save.
Lastly, check if the domain has propagated. This means your domain points to the server. Use tools like DNS Checker online. Enter your domain name. See if it resolves to the correct IP. It may take up to 48 hours for changes to show everywhere.
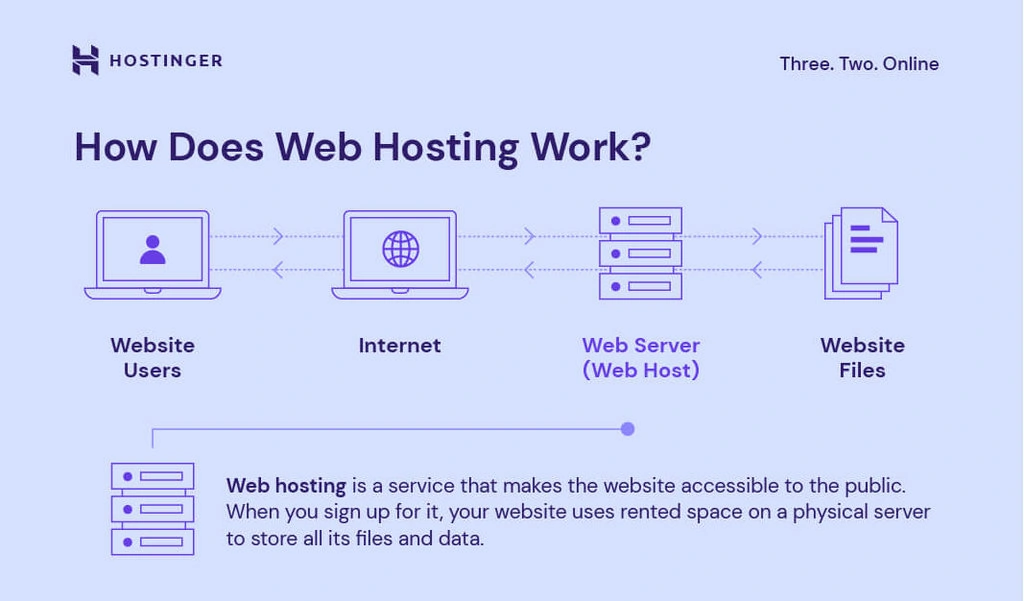
Credit: www.hostinger.com
Testing Your Website
Ensure your website is error-free. This makes it work well. Debugging tools can help find mistakes. Fixing errors is very important. It improves your website’s performance. Test each page for broken code.
Your website should look good on all devices. Use tools to test for responsive design. Check your website on phones and tablets. Make sure buttons and text are easy to read. A responsive site gives a better user experience.
Test all links to make sure they work. Click on each link to check. Ensure all images and videos load properly. Broken links and media can frustrate users. Regular checks keep your website user-friendly.
Troubleshooting Common Issues
Uploading your website to web hosting can be tricky. Troubleshooting common issues helps avoid errors and ensure a smooth process. Address file permissions, server settings, and connectivity for a successful upload.
Resolving Upload Errors
Errors in uploading can be frustrating. Check your file sizes. Files too large may fail to upload. Ensure you have a stable connection. A poor connection can cause interruptions. Use the correct file format for your server. Some formats may not be supported. Rename files if names are too long. Short names are often better.
Fixing Broken Links
Broken links make users unhappy. Scan your website for broken links. Tools can help find them. Check the URL paths. Sometimes they get mistyped. Update links to the right pages. This ensures users find what they need. Test links regularly. This keeps everything working well.
Dealing With Slow Load Times
Slow sites lose visitors. Optimize images for faster loading. Large images can slow things down. Minimize code where possible. Less code means faster loads. Use caching to speed things up. It saves time for repeat visitors. Limit external scripts. Too many scripts cause delays.

Credit: www.slideteam.net
Maintaining Your Website
Uploading your website to web hosting involves several simple steps. First, choose a reliable web hosting provider. Next, use an FTP client to transfer files from your computer to the server. Finally, ensure all files are correctly placed in the root directory for proper website functioning.
Regular Backups
Always keep your website data safe. Regular backups help protect against data loss. Use backup tools or plugins. Store backups in different places. This ensures data safety.
Monitoring Performance
Check your website speed often. Fast websites keep visitors happy. Use tools to monitor performance. Look for any errors. Fix them quickly. This keeps your site running well.
Updating Content And Software
Fresh content attracts more visitors. Update your content regularly. Also, update your website software. New versions fix bugs. They also improve security. This keeps your site safe and interesting.
Frequently Asked Questions
How Do I Connect My Website To Hosting?
To connect your website to hosting, update DNS settings at your domain registrar. Input your hosting provider’s nameservers. This links your domain to the hosting server. After updating, allow 24-48 hours for changes to propagate. Access your hosting dashboard to upload website files.
How Do I Host My Own Website?
To host your own website, choose a domain name and register it. Select a reliable hosting provider. Install a content management system like WordPress. Upload your website files via FTP. Configure DNS settings to point to your server. Regularly update and maintain your website for security.
How Do I Publish My Website?
Choose a web hosting provider, register a domain name, upload your website files, and configure settings. Ensure your site is optimized for SEO and mobile devices. Test functionality before launching.
How Do I Upload My Website For Free?
Use platforms like GitHub Pages, Netlify, or InfinityFree to upload websites for free. Sign up, then follow their instructions to deploy your site. These services offer easy-to-use interfaces and reliable hosting solutions without any cost. Ensure your website files are ready before uploading.
Conclusion
Uploading your website to web hosting is simple with practice. Follow the steps carefully. Choose a reliable hosting provider. Use a File Transfer Protocol (FTP) client. Ensure all files are correctly uploaded. Double-check your website’s functionality after uploading. Troubleshoot any issues promptly.
This process ensures your site runs smoothly. Regular updates are vital for website health. Stay informed about hosting trends. Keep learning and improving your skills. This will help maintain your site effectively. Remember, practice makes perfect. Start today and gain confidence with each upload.


