
Are you ready to take your Django web application live, but feeling a bit overwhelmed by the hosting process? You’ve poured your creativity into building an incredible app, and now it’s time to share it with the world.
Whether you’re a seasoned developer or a coding enthusiast, hosting a web application can seem daunting at first. But fear not—you’re about to discover a straightforward path to getting your Django app up and running smoothly. Imagine the satisfaction of seeing your application accessible to users worldwide, seamlessly running on a reliable server.
Hosting your Django app is the crucial step that transforms your project from a local masterpiece to a global phenomenon. In this guide, we’ll break down the hosting process into simple, manageable steps that will empower you to launch your application with confidence. You’ll learn how to choose the right server, configure your settings, and ensure that your application is optimized for performance. Get ready to unlock the secrets of successful hosting, and watch your hard work pay off as users start interacting with your app. Let’s dive in and make your web application accessible to the world!
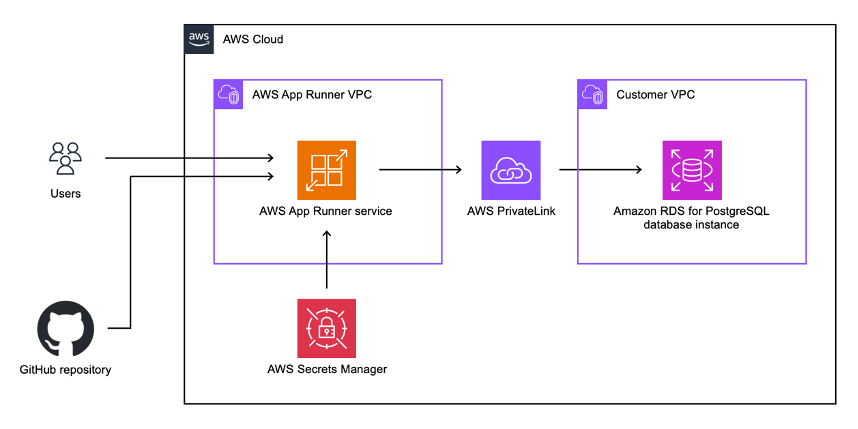
Credit: aws.amazon.com
Setting Up The Environment
First, download Python from its official website. Install it on your computer. Python is the base for Django. After Python, install Django using a simple command. Type pip install django in the terminal. This command will set up Django for you. Check the installation by typing django-admin --version. It shows the Django version installed.
A virtual environment helps keep projects separate. Use the command python -m venv myenv. This creates a folder named myenv. Activate it with source myenv/bin/activate on Mac or Linux. On Windows, use myenvScriptsactivate. Your terminal shows the virtual environment name now. It’s ready for Django.
Start a new Django project with django-admin startproject myproject. This creates a folder with project files. Change directory to myproject using cd myproject. Run the server with python manage.py runserver. Open a browser and see your project live at localhost:8000. The Django project is configured.

Credit: www.youtube.com
Database Configuration
Picking a database is very important. Django works well with many databases. PostgreSQL and MySQL are popular choices. They are fast and reliable. SQLite is good for small projects. It is easy to set up. Think about your project’s needs. Security, speed, and scalability matter. Choose wisely to ensure a smooth experience.
Connect Django to your database. Edit the settings.py file. Add your database details. Use the right engine. Enter your username, password, and database name. Double-check your settings. Make sure everything matches. A correct setup helps your app run smoothly. Always test the connection. Errors can cause problems later.
Migrations are like maps for your database. They help Django understand changes. Run migrations to update your database. Use the command: `python manage.py migrate`. This applies changes to the database. Migrations make sure everything stays organized. Keep track of your migrations. They are crucial for data management. Regularly check for updates.
Static And Media Files Management
Static files are things like CSS, JavaScript, and images. They help make your web app look good. In Django, static files are kept in a folder called static. You must tell Django where to find these files. Use the setting called STATIC_URL to do this. Also, collect all static files in one place. Use the command python manage.py collectstatic. This will make them easy to serve.
Media files are user-uploaded files like photos or documents. They are different from static files. You need to create a folder for these files. Set a path using MEDIA_ROOT. This tells Django where to save them. Use MEDIA_URL to define the URL access path. This is how users can view or download their files. Make sure your server can handle these files safely.
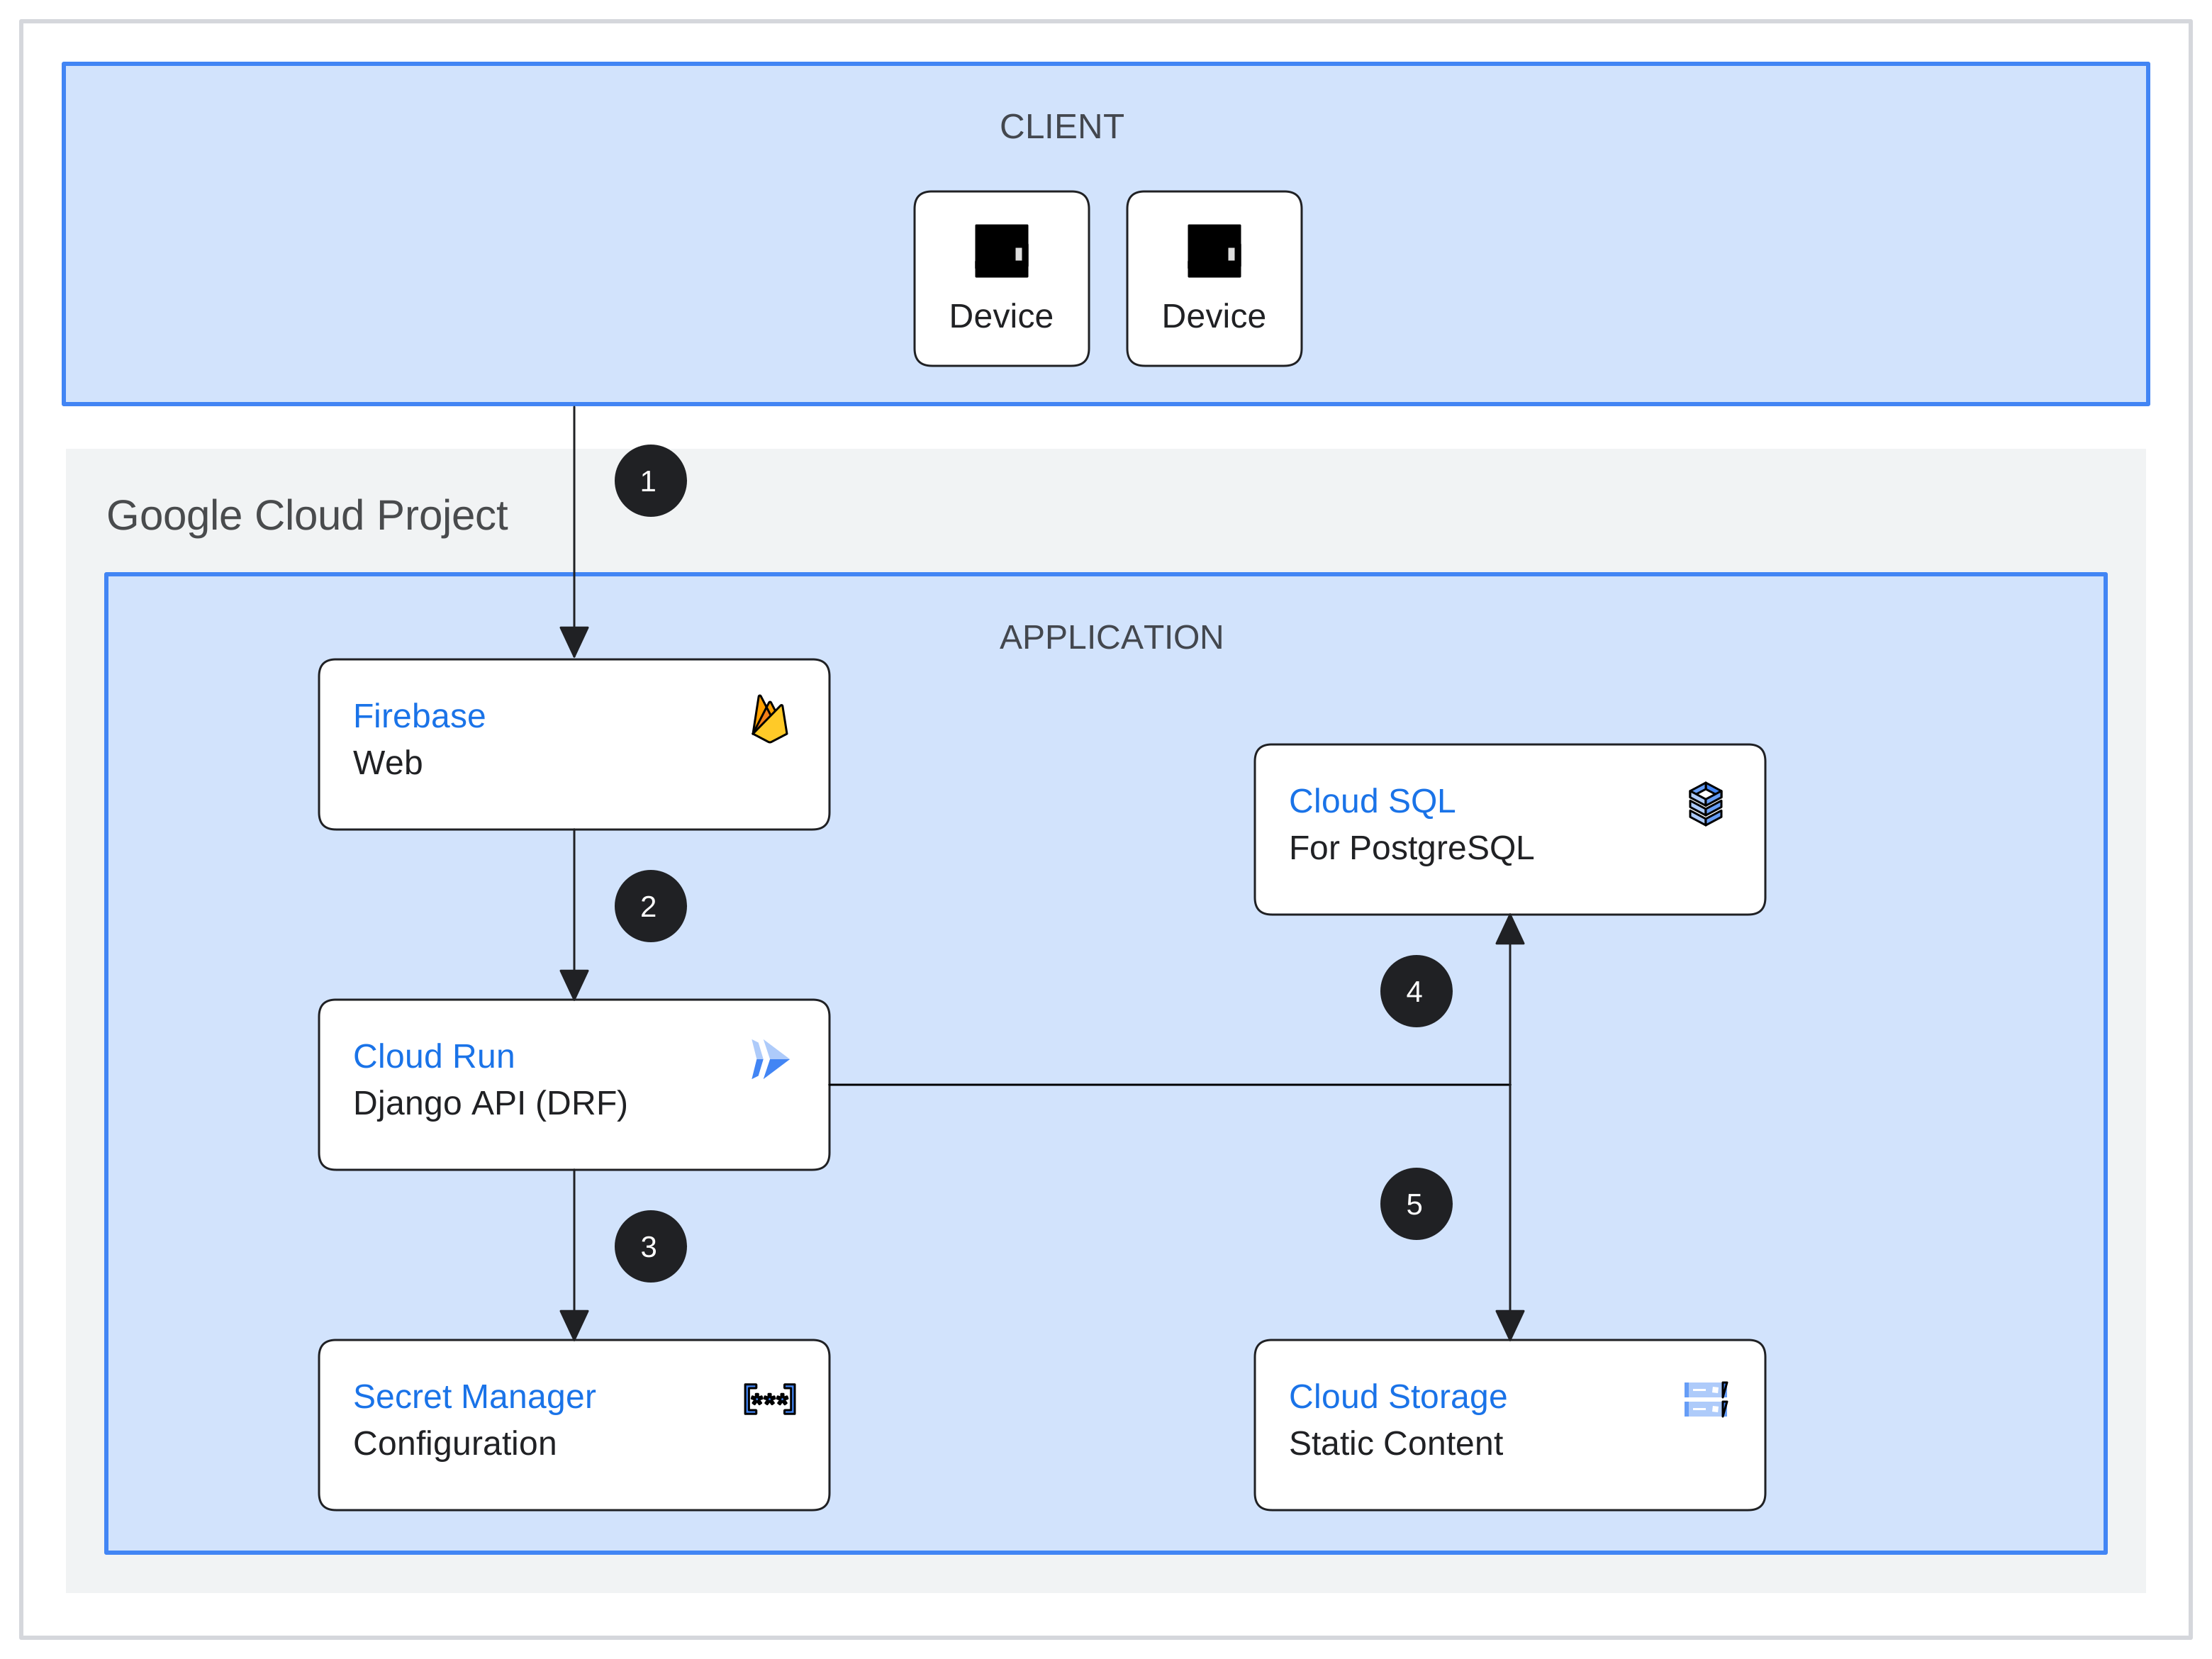
Credit: cloud.google.com
Configuring The Web Server
Gunicorn is a powerful choice for hosting Django apps. It acts as a WSGI server. This means it serves your app efficiently. Install Gunicorn using pip install gunicorn. After installation, run Gunicorn with the command: gunicorn yourapp.wsgi. Replace “yourapp” with your app’s name. Gunicorn will start your application. It listens on port 8000 by default. You can change this using flags. This way, your Django app is ready to serve requests.
Nginx helps in serving static files. It also acts as a reverse proxy. First, install Nginx on your server. Use the command: sudo apt-get install nginx. Then, configure Nginx to forward requests to Gunicorn. Edit the Nginx configuration file. Add a server block with your domain details. Set the proxy pass to Gunicorn’s address. This setup ensures efficient handling of requests. It also enhances the security of your web app.
Domain And Dns Setup
Choose a unique domain name. Make it easy to remember. Visit a domain registrar like GoDaddy. Search for your desired name. Check its availability. If available, proceed to register. Provide accurate details during registration. Once done, you own the domain name. Remember, domain names can expire. Renew them timely.
Login to your domain registrar account. Locate DNS settings. Add a new DNS record. Choose A record for IP addresses. Enter your server’s IP. Save changes. Add CNAME record for subdomains. Use MX records for email services. Point them to your mail server. Ensure all records are correct. It takes time to propagate. Check after a few hours.
Securing The Application
Hosting a Django web application involves securing the app to protect data and ensure user safety. Implement SSL certificates, use secure coding practices, and regularly update dependencies. These steps help prevent vulnerabilities and keep your application safe from threats.
Implementing Https With Ssl Certificates
HTTPS keeps your data safe. It stops hackers from stealing. You need an SSL certificate. It encrypts your data. You can buy SSL certificates online. Some sites offer free SSL certificates. Always choose a trusted provider. Install the certificate on your server. It makes your website secure. Check if your SSL is working. Look for a padlock sign in the URL bar. This shows your site is safe. Keeping data secure is important.
Setting Up Firewall Rules
Firewalls protect your server. They block bad traffic. You can set rules for firewalls. Allow only trusted IPs. Block strange IPs. This keeps your server safe. Update firewall rules often. Use a strong password for access. This makes it harder for hackers. Firewalls help keep your data safe. Always monitor your traffic. Look for anything strange. Keeping your server secure is a must.
Deployment And Automation
Fabric is a tool to help with deployment. It lets you run commands on remote servers. You can use it to upload files, restart services, or do other tasks. It saves time. You don’t need to log into each server. Fabric scripts are written in Python, making them easy to write and understand.
Continuous Integration (CI) helps make deployments faster. Every time you change code, CI checks it. It makes sure everything works well. Tools like Jenkins or GitHub Actions are popular for CI. They help find errors early. Fixing errors becomes easier and faster. This keeps your web app running smoothly.
Monitoring And Maintenance
Setting Up Monitoring Tools is crucial for a web application. Keep an eye on your app’s health. Use tools like New Relic or Datadog. They help track performance. If something goes wrong, alerts are sent. This helps fix issues fast. Always keep your tools updated. This ensures accurate monitoring.
Regular Backups and Updates are vital for data safety. Always back up your data. Use cloud services like Amazon S3. Schedule backups daily. This prevents data loss. Keep your Django version updated. New updates fix bugs. They also improve security. Updates keep your app running smoothly.
Frequently Asked Questions
How To Host Django Web Application?
To host a Django web application, choose a reliable server or cloud platform like AWS or Heroku. Set up a virtual environment, configure the database, and deploy the code using Git. Ensure security measures and monitor performance for optimal operation.
What Is The Best Platform To Host Django App?
Heroku is a popular choice for hosting Django apps due to its ease of use and scalability. DigitalOcean offers reliable performance and cost-effectiveness. AWS provides flexibility and robust infrastructure for larger projects. Consider your budget and technical needs when choosing a platform.
How To Create A Web App With Django?
Install Django via pip. Create a new project using `django-admin startproject projectname`. Define models in `models. py`. Implement views in `views. py`. Configure URLs in `urls. py`. Use `templates` for HTML. Migrate databases with `manage. py migrate`. Test locally with `manage.
py runserver`. Deploy using platforms like Heroku.
Does Django Have A Web Server?
Django includes a lightweight web server for development and testing. It’s not recommended for production use. For production, deploy with robust servers like Apache or Nginx. Django’s development server is simple to use and helps developers build applications efficiently. Always switch to a production-ready server for live environments.
Conclusion
Hosting a Django web application is simpler than it seems. Follow the steps outlined in this guide to get started. Set up your environment, configure settings, and deploy your app. Remember to test thoroughly for a smooth launch. Keep your server secure and updated.
Use Django’s features to enhance your application’s performance. With practice, you’ll host applications with ease. It’s a valuable skill for developers. Start small, learn, and grow your projects. Django makes web hosting accessible for everyone. Dive in and explore the possibilities.
Your journey begins now.


