
Are you feeling stuck with your current web hosting provider? Maybe you’re dealing with slow loading times, frequent downtimes, or unresponsive customer service.
Whatever the reason, the idea of transferring your web hosting might seem overwhelming at first. But don’t worry! By the end of this guide, you’ll see that moving your website to a new host can be straightforward and even empowering.
Imagine better performance, improved security, and support that actually supports you. Keep reading, and you’ll learn how to make the switch smoothly, without losing any of your precious data or sleep.
Choosing A New Hosting Provider
First, know what your website needs. Is it a small blog or a big store? Small websites need less space. Large websites need more. Check if you need extra features like email or databases. Some hosts give free SSL certificates. SSL makes your site safe. Think about support. Fast support helps when you have problems. Write down what you need and then look for hosts.
Many hosts offer different plans. Shared hosting is cheap. But you share space with others. VPS hosting is better for bigger sites. It costs more but gives more control. Dedicated hosting is the best but expensive. You get a whole server to yourself. Look at the prices and see what you can afford. Some hosts have discounts for new users. Always read reviews from other users. They tell you if a host is good or bad.
Preparing For The Transfer
Keep your website safe by backing up all files. Use a reliable tool or service for this task. Download all your website files to your computer. This includes images, scripts, and documents. Double-check to ensure nothing is missing. A complete backup is vital for a smooth transfer. Remember, this protects against data loss.
Databases store important information. Export them carefully to avoid losing data. Use tools like phpMyAdmin for this task. Select the database you need. Then, click the export button. Save the file on your computer. Ensure it’s in a safe place. This step ensures all data moves with your website.
Domain Name Management
DNS settings are like a map for the internet. They tell computers where to find your website. To update them, go to your domain provider’s website. Find the DNS settings option. Enter the new hosting provider’s DNS details. Save the changes. It can take up to 48 hours for changes to take effect. Patience is key during this time. Make sure the details are correct. Wrong details can cause website downtime. Double-check before saving. This ensures your site stays online.
Start by unlocking your domain. This is done with your current registrar. Request a transfer code from them. This code is important. It helps to move your domain. Go to the new registrar’s website. Enter the transfer code there. Pay the transfer fee if needed. Confirm the transfer through email. Keep an eye on your email for updates. The whole process can take a few days. Be sure to monitor progress. This ensures a smooth transfer.

Credit: www.youtube.com
Uploading To New Server
FTP helps to move files. First, get an FTP client. FileZilla is a good choice. Enter your new server’s IP address. Use the correct username and password. Once logged in, find your website files. Select and transfer them to the new server. Make sure all files are copied. Check if any files are missing. This process might take some time. Be patient and wait. Once done, your files are on the new server.
Databases hold important data. Export your database from the old server. Use phpMyAdmin for this task. Save the exported file on your computer. Next, go to the new server. Open phpMyAdmin there. Create a new database if needed. Import the saved file into the new database. Ensure the data is intact. Check for any errors. If errors occur, fix them. Now your data is on the new server.
Testing And Verification
Ensure your website looks right after transfer. Open each page and check. See if images load and links work. Check for any errors or missing parts. It’s good to test on different devices. Try a phone, tablet, and computer. This helps spot any layout issues. Ask a friend to check too. Fresh eyes catch things you might miss.
Email services must work smoothly. Send a test email to yourself. Check if you receive it. Try sending from your new hosting account. See if it reaches the old one. Check all email accounts linked to your domain. Also, test email forwarding rules. Make sure nothing gets lost. This ensures you don’t miss important emails.
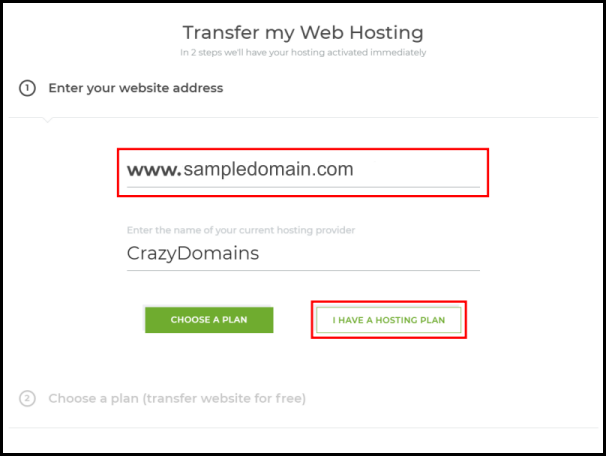
Credit: www.crazydomains.com
Handling Downtime
Keep your users informed. Tell them about the planned downtime. Use emails or social media. This helps to build trust. Make sure your message is clear. Explain the reason briefly. Share the expected time for the website return. Users like to know what’s happening.
Consider using a temporary webpage. This page can show a simple message. “We are updating. Please check back soon.” This keeps users in the loop. Another option is a backup site. This site can handle basic tasks. Users appreciate any effort to stay connected.
Finalizing The Transfer
Canceling your old hosting account is crucial. First, check if your new site works well. Ensure all files and databases are moved. Double-check settings and links. Test every feature of your site. Once satisfied, proceed to cancel the old hosting. Contact the provider for cancellation steps. Some might need written notice. Others offer online cancellation. Make sure to get confirmation of cancellation. Avoid paying for unused services.
Monitoring performance is vital after the transfer. Regularly check your site’s speed. Look for any errors or broken links. Use tools to track visitor statistics. Ensure the site loads quickly for users. Address any issues promptly. Good monitoring ensures a smooth experience. Happy users visit more often. Keep an eye on server uptime too. A reliable host boosts site success.
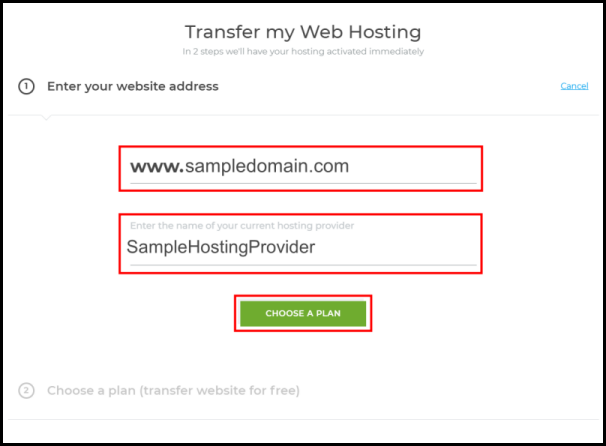
Credit: www.crazydomains.com
Frequently Asked Questions
Can I Transfer My Website From One Host To Another?
Yes, you can transfer your website to another host. Backup your files and database first. Choose a new hosting provider, migrate the files, and update your domain’s DNS settings. Ensure all data is transferred correctly and test your website thoroughly after the move to ensure everything functions properly.
How To Transfer From One Host To Another?
To transfer hosts, back up your website files and databases. Update DNS settings to point to the new host. Upload files and import databases to the new server. Test your website on the new host. Once confirmed, finalize DNS changes and ensure everything functions correctly.
How Easy Is It To Change Website Hosting?
Changing website hosting is straightforward with the right steps. Choose a new host, transfer files, and update DNS settings. Backup your website before starting. Many hosts offer free migration services. Ensure minimal downtime for a smooth transition. Research host reviews for reliability.
How Do I Transfer A Website To A New Owner?
Transfer website ownership by updating domain registration, transferring hosting account, and sharing login credentials. Update legal documents.
Conclusion
Transferring your web hosting can be simple. Start by choosing a reliable host. Backup your website files carefully. Double-check the new host’s requirements. Ensure all data is migrated properly. Test your site thoroughly before going live. Keep your old host active until everything works perfectly.
This prevents potential downtime. Remember to update your domain’s DNS settings. This directs traffic to the new host. Stay patient during the process. It takes time for changes to propagate. With these steps, you maintain your site’s performance. Enjoy a smooth transition with minimal disruption.
Your website deserves a stable home.


