
Imagine transforming a small, affordable Raspberry Pi into a fully functional web server. You might think it’s complicated, but it’s simpler than you imagine.
Whether you’re a tech enthusiast or just looking to start a new project, hosting a web server with a Raspberry Pi is an exciting and rewarding endeavor. Not only does it save you money, but it also gives you complete control over your digital content.
Are you ready to take charge and dive into the world of Raspberry Pi web servers? In this guide, you’ll discover step-by-step instructions that are easy to follow, even if you’re a beginner. You’ll learn how to harness the power of this tiny device to host your own website, all from the comfort of your home. This project is not only cost-effective but also a great way to enhance your tech skills and unleash your creativity. By the end of this article, you’ll be equipped with all the knowledge you need to get started. So, let’s unlock the potential of your Raspberry Pi together!
Getting Started With Raspberry Pi
Raspberry Pi has many models. Raspberry Pi 4 is a great choice. It is fast and has more memory. Memory helps run programs smoothly. Speed matters for web servers. Raspberry Pi Zero is small and cheap. Good for simple tasks. Choose the model that fits your needs.
First, gather all parts. You need a Raspberry Pi, power supply, and SD card. The SD card is important. It stores the operating system. You also need a case. It protects the Raspberry Pi. Connect a monitor and keyboard for setup. Once connected, you can see your Raspberry Pi working. Make sure everything is secure. A loose connection can cause problems.
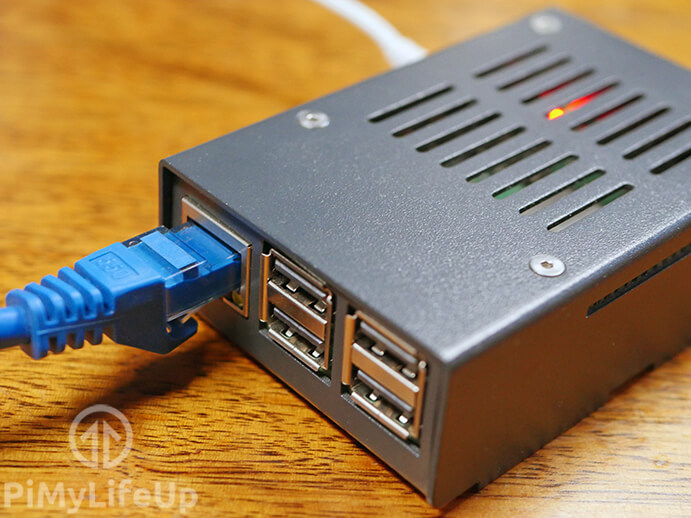
Credit: pimylifeup.com
Installing The Operating System
Choose an OS that is compatible with Raspberry Pi. Many users prefer Raspberry Pi OS for its simplicity. This OS is easy to install and use. Other options include Ubuntu and Arch Linux. Each has its own benefits. Consider your needs before making a choice. Remember, some OS versions use more memory. Ensure your Raspberry Pi can handle it.
To flash the SD card, you need a computer. Download the OS image from its official website. Use a tool like Balena Etcher or Raspberry Pi Imager to flash the image. Insert the SD card into your computer. Open the flashing tool and select the OS image. Choose the SD card as the destination. Click “Flash” to start the process. Wait until it completes. Remove the SD card safely. Now, it’s ready for the Raspberry Pi.
Configuring The Network
First, find the Wi-Fi settings on your Raspberry Pi. Open the network menu. Choose your Wi-Fi network from the list. Enter the Wi-Fi password carefully. Once connected, check if the internet works. Try opening a webpage. If it loads, the connection is fine. This step is simple and fast.
Open the terminal on your Raspberry Pi. Type the command to edit the network file. Change the IP setting from dynamic to static. Set your desired IP address. Make sure it doesn’t conflict with other devices. Save the changes and restart your Pi. This ensures the IP remains constant every time you connect. A static IP helps in easy server access.
Setting Up The Web Server
Apache is a popular web server software. First, open the terminal on your Raspberry Pi. Type sudo apt-get update and press enter. This updates the package list. Next, type sudo apt-get install apache2. Press enter again. Wait for the installation to complete. Apache is now installed.
Configuration is important for your web server. Locate the Apache configuration file. Type sudo nano /etc/apache2/apache2.conf in the terminal. This opens the file in a text editor. Make changes as needed. Save your changes by pressing Ctrl + O. Close the editor with Ctrl + X. Restart Apache with sudo systemctl restart apache2. Your settings are now active.
Adding Php And Mysql
Set up a web server on a Raspberry Pi by adding PHP and MySQL. These tools enable dynamic content and database management. Perfect for small projects or learning how servers work.
Installing Php
PHP is a server language. It makes web pages interactive. Use the command line to install PHP. Type sudo apt-get install php. This command gets PHP on your Raspberry Pi. Ensure all dependencies are installed. You can check by running php -v. This shows the PHP version. PHP works best with Apache.
Setting Up Mysql
MySQL stores data. It’s a database system. Install MySQL using command line. Type sudo apt-get install mysql-server. This command installs MySQL. After installation, secure the database. Use sudo mysql_secure_installation to set a root password. Follow prompts to enhance security. MySQL and PHP work well together.
Credit: fireship.io
Securing The Web Server
Hosting a web server on a Raspberry Pi involves securing it against threats. Ensure your server is updated regularly. Use strong passwords and firewall settings for added protection.
Implementing Firewall Rules
A firewall keeps your server safe. It blocks unwanted traffic. Only allow necessary connections. Limit access to ports. For example, open port 80 for HTTP. Keep other ports closed. This prevents attacks. Use a tool like ufw. It’s easy to set up. Type simple commands. Protects your server.
Setting Up Https
HTTPS makes your web server secure. It encrypts data. Stops hackers from stealing it. Use a tool like Let’s Encrypt. It provides free SSL certificates. Install it on your server. Follow the simple steps. Visitors will see a lock icon. It shows the site is safe.
Deploying A Website
First, you need to transfer your website files to the Raspberry Pi. Use SFTP to move files. Connect your computer to the Raspberry Pi. Use your favorite SFTP software. FileZilla is a good choice. Drag and drop your files into the Raspberry Pi folder. Make sure all files are in the right place. Check that images and scripts are where they should be. This ensures your website looks right.
Visit your website using a browser. Type the Raspberry Pi’s IP address. See if the website loads. Check all links and images. Make sure everything works well. If something is broken, fix it right away. Testing is important. It helps you find problems. Ensure visitors have a good experience. Your website should be smooth and fast.
Remote Access And Management
Setting up a web server with a Raspberry Pi is simple and efficient. Use this compact device to host your own website. Learn to manage and access it remotely from anywhere.
Using Ssh For Remote Access
SSH lets you control your Raspberry Pi from far away. It is like a secret door into your computer. You need a special key to open this door. This key keeps your Pi safe. You can use commands to tell your Pi what to do. It’s like talking to your Pi from a distance. Your Pi listens and follows your commands. SSH works over the internet. So, you can access your Pi from anywhere. Using SSH is safe and smart. It helps you manage your web server easily.
Monitoring Server Performance
Checking your server often is important. It helps you know if your server is working well. You can use tools to see how busy your server is. These tools show graphs and numbers. They tell you if your server is tired or healthy. If your server is slow, it might need some rest. You can fix problems before they become big. Monitoring keeps your server happy and fast. Always watch your server to keep it strong.
Troubleshooting Common Issues
Check if your Raspberry Pi is connected to the internet. Use the command ping to test. Make sure your router is working. Sometimes, the Wi-Fi signal can be weak. Move closer to the router. Check the IP settings. Use the command ifconfig to see details. Update your Raspberry Pi. Use the command sudo apt-get update to ensure everything is current. A reboot can help fix network issues.
Check if your server is running. Use the command systemctl status to see the status. Look for error messages in the server logs. These logs can point to the problem. Verify your server configuration files. Incorrect settings can cause errors. Restart the server with sudo systemctl restart if needed. Ensure all software is up to date.

Credit: www.youtube.com
Frequently Asked Questions
How To Host A Website On A Raspberry Pi 5?
Install Raspbian on your Raspberry Pi 5. Set up a web server using Apache or Nginx. Secure your server with SSL certificates. Configure domain settings with your DNS provider. Test your website for accessibility. Regularly update software and monitor performance for optimal hosting.
Can I Run A Web Browser On Raspberry Pi?
Yes, you can run a web browser on Raspberry Pi. Popular options include Chromium, Firefox, and Midori. Installing is simple through Raspberry Pi OS. Performance may vary depending on the model and browser. Use lightweight browsers for better speed on older models.
Can You Use A Raspberry Pi As A Home Server?
Yes, a Raspberry Pi can serve as a home server. It handles tasks like file sharing, media streaming, and web hosting efficiently. With low power consumption, it’s a cost-effective choice. Setup requires installing server software and configuring network settings. Ideal for small-scale projects and learning server management.
What Is The Best Web Server For Raspberry Pi 5?
Apache is a popular web server choice for Raspberry Pi 5 due to its reliability and extensive support. Nginx offers high performance and low resource usage, making it ideal for lightweight applications. Choose based on your specific needs and project requirements.
Conclusion
Setting up a web server with a Raspberry Pi is simple. It offers an affordable and hands-on learning experience. Raspberry Pi’s versatility makes it a favorite for tech enthusiasts. Follow the steps, and you’ll have a working server. This project enhances understanding of networking and servers.
You gain practical skills while having fun. With dedication, your Raspberry Pi server will run smoothly. Explore more projects to expand your knowledge. Keep experimenting and learning. The journey of discovery never ends. Enjoy the world of Raspberry Pi and web hosting!


