
Are you feeling trapped with your current web host and looking for a fresh start? Switching web hosts can feel overwhelming, especially when you’re moving from WordPress to GoDaddy.
But don’t worry—you’re not alone in this! Whether you’re seeking better performance, improved security, or superior customer support, making the switch can be a game-changer for your website. In this guide, we’ll walk you through each step, ensuring a smooth transition without any hitches.
With clear instructions and practical tips, you’ll have your site up and running on GoDaddy in no time. Ready to make your website shine brighter than ever? Let’s dive in!
Assessing Current Hosting Needs
Choosing the right host is important. Understand your website needs first. Does your website need a lot of space? Does it need special features? Think about your website traffic. High traffic sites need strong support. Check if your site uses many plugins. This affects hosting needs. Security is also key. Ensure hosting offers good protection. Look at customer service options. Quick help is useful.
Check your current host’s speed. Fast loading times keep visitors happy. Test how often your site goes down. Reliability matters a lot. Slow or broken sites lose visitors. Check your host’s support team. Quick help is very useful. Read reviews about your host. Customer feedback gives good insights. Compare costs too. Value for money is important. Make sure you’re getting what you pay for.
Choosing The Right Godaddy Plan
Choosing the right hosting plan is important. GoDaddy offers several options. Shared hosting is often cheapest. It is good for small websites. VPS hosting is more powerful. It suits bigger sites. Dedicated hosting is the most powerful. It is best for very large sites.
Each plan has different features. Storage space varies by plan. More space is better for large files. Bandwidth is also important. It affects how fast your site loads. Some plans include free SSL certificates. This keeps your site secure. Customer support is another feature to consider. Good support helps solve problems quickly.
Preparing For Migration
Backing up your WordPress site is very important. It keeps your data safe. You need to save all files and database. This includes your posts and images. You can use plugins to help. Some popular ones are UpdraftPlus and BackupBuddy. They make the process simple. Always check your backups are complete. Missing data can be a big problem. Download backups to your computer. This gives extra protection. Make sure your backup is recent. Old backups might miss new changes.
Securing important data is crucial for your site. Your website has lots of information. This includes user data and comments. Keep everything safe and protected. Use secure methods for downloading. Avoid using public Wi-Fi for this. Encryption adds extra security. Ensure all passwords are strong. Weak passwords can lead to data theft. Regularly update your security methods. New threats appear often. Stay ahead to protect your site.
Setting Up Godaddy Hosting Account
First, visit the GoDaddy website. Click on the “Sign Up” button. Enter your personal details. Use a valid email. Create a strong password. Choose a username. Fill in all fields. Click on “Create Account” to finish. You will receive a confirmation email. Check your inbox. Click the link in the email. This will verify your new account. Now, you have a GoDaddy account ready.
Log in to your GoDaddy account. Navigate to the Domains section. Find your domain name. Click on it. Look for “DNS Settings.” Click to open. You need to update the nameservers. Enter the correct GoDaddy nameservers. Save your changes. Wait for changes to take effect. This might take a few hours. Your domain is now set up with GoDaddy.
Transferring Website Files
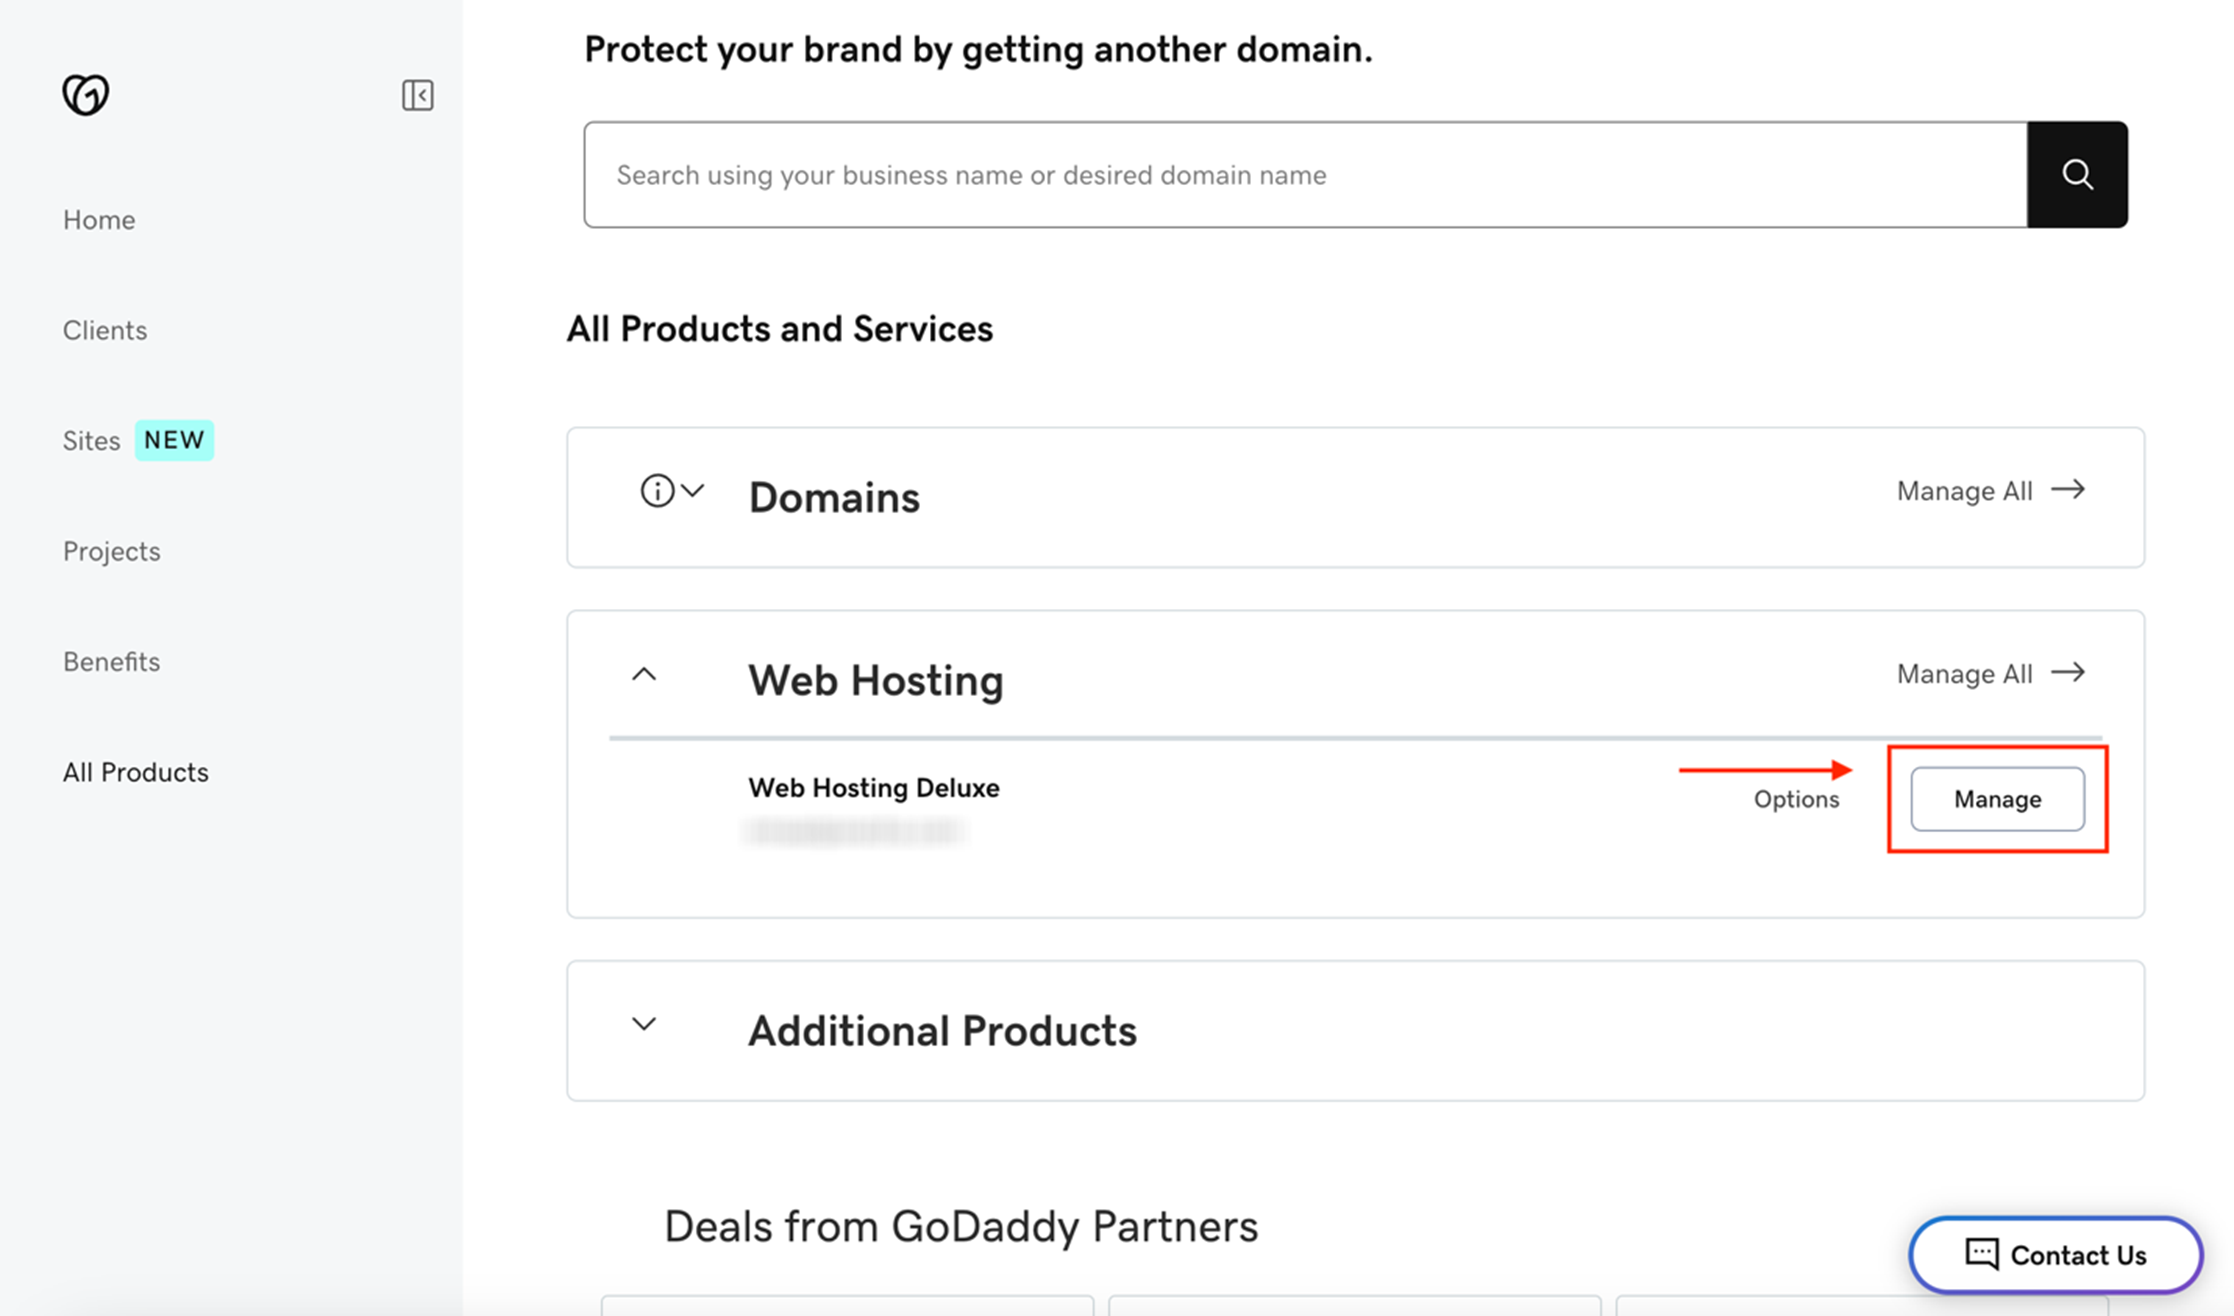
First, open your FTP program. This helps move files fast. Next, enter the GoDaddy server details. You need the username and password. The program will connect to the server. Now, find your website files. These are saved on your computer.
Select the files to upload. Drag them to the GoDaddy server. Watch the progress bar. This shows how much is transferred. Wait until all files are done. Check for any errors. Fix them if needed. Always ensure no files are missing.
FTP stands for File Transfer Protocol. It’s a tool for moving files. You need an FTP program. Many are free online. Install it on your computer. Open the program. Enter server info from GoDaddy. This connects your computer to their server.
Select website files from your computer. Drag and drop to the server. Watch the transfer. This might take some time. Make sure all files upload. Double-check for errors. Fix them quickly. A complete transfer is important.
Credit: www.godaddy.com
Migrating WordPress Database
Start by opening phpMyAdmin on your old host. Select your WordPress database. Click on the Export tab. Choose the Quick export method. Save the file to your computer. This file contains all your important data.
Log in to your GoDaddy account. Open phpMyAdmin for your new database. Click on the Import tab. Choose the file you exported earlier. Click Go to start the import. Wait for the process to finish. Your data is now on GoDaddy.
Updating Dns Settings
Changing name servers is easy. First, log into your domain account. Look for the DNS settings option. Click on it. Find the name servers section. Replace the old name servers with new ones. Save the changes. Remember, this may take some time to update.
DNS propagation needs attention. It can take up to 48 hours. During this time, check if your site is working. Use online tools to monitor DNS changes. This will ensure everything is correct. If issues arise, contact support for help. Patience is key during this process.

Credit: www.godaddy.com
Testing The New Setup
Checking Website Functionality is important after switching web hosts. First, visit the website. Make sure all pages load quickly. Check if images appear correctly. Click on different links. Ensure every link works well. Test forms on your site. Verify if users can submit data.
Next, check the site on different devices. Use a computer, tablet, and phone. See if the site looks good everywhere. Check your site’s speed. Use online tools like GTmetrix or Pingdom. Slow sites can upset visitors.
Resolving Common Issues is essential for smooth functioning. Broken links can be a common problem. Update any outdated links. Fix missing images by uploading them again. Check your site’s plugins. Some plugins may not work with GoDaddy. Update or replace them if needed. Lastly, ensure your site is secure. Look out for any security warnings.
Finalizing The Transition
Cancelling Old Hosting Plan is an important step. First, confirm your new website is live. Double-check all pages and links. Ensure everything works as expected. Once sure, it’s safe to cancel the old plan. Log into your old hosting account. Look for the option to cancel or terminate. Follow the steps provided. Remember, this action is final. So, be 100% sure before proceeding. Keep a backup of any important data. This can prevent data loss.
Monitoring Website Performance is key after switching hosts. Check your site’s speed and uptime. A fast site means happy visitors. Use tools like Google Analytics. This helps you track visitor numbers. Also, watch for any errors or downtime. Address issues quickly to keep users happy. Regular checks ensure your site runs smoothly. Always aim for the best user experience.
Credit: www.godaddy.com
Frequently Asked Questions
How To Transfer Web Hosting To Godaddy?
To transfer web hosting to GoDaddy, back up your site data. Purchase a GoDaddy hosting plan, then access cPanel. Upload your site data using FTP. Update your domain’s DNS settings to point to GoDaddy servers. Test your site to ensure it’s working properly on GoDaddy.
Can I Switch Web Hosting Companies?
Yes, you can switch web hosting companies. Backup your website files first. Choose a new host, then transfer your files. Update your domain’s DNS settings to point to the new host. Confirm the switch by checking your website’s functionality. Test thoroughly to ensure everything works correctly.
Can A WordPress Site Be Hosted On Godaddy?
Yes, a WordPress site can be hosted on GoDaddy. They offer WordPress hosting plans with easy installation. Enjoy features like automatic updates, daily backups, and 24/7 support. This makes managing your WordPress site simple and efficient.
How To Switch Hosting Provider In WordPress?
Switching hosting in WordPress involves backing up your site, choosing a new host, and transferring files. Update DNS settings to point to the new host. Ensure all links and functionalities work properly. Use plugins like Duplicator for easier migration. Always verify migration success before finalizing the switch.
Conclusion
Switching web hosts can seem daunting. But it’s manageable with the right steps. Godaddy offers reliable hosting for WordPress sites. Follow the outlined process to ensure a smooth transition. Backup your data first. Then, transfer files and databases carefully. Test your site before going live.
Check for broken links or missing content. Ensure your domain settings are correct. Keep your audience informed of any downtime. Maintaining site functionality is crucial. With patience and care, your switch will succeed. Enjoy your new hosting experience with Godaddy!


