
Are you looking to host your Web API in IIS 7, but unsure where to start? You’re in the right place!
IIS 7 is a powerful web server that can efficiently manage your Web APIs, providing robust security and seamless performance. Hosting your Web API in IIS 7 might seem daunting at first, but with the right guidance, you can master it quickly.
Imagine the satisfaction of having your API running smoothly, accessible to users and applications without a hitch. This guide will walk you through the steps, making the process easy and straightforward. Let’s dive in and transform your API hosting experience into a breeze!

Credit: www.youtube.com
Prerequisites For Hosting
A computer with at least 1 GHz processor is needed. The memory should be 512 MB RAM or more. Use a hard disk with 10 GB free space. The network card must be working. A keyboard and mouse are required.
Install Windows Server 2008 or higher. Ensure that IIS 7 is installed. Get the .NET Framework 4.0 or newer. Ensure ASP.NET is enabled. Don’t forget to configure the Firewall settings. Check for any updates regularly.
Credit: www.c-sharpcorner.com
Configuring Iis 7
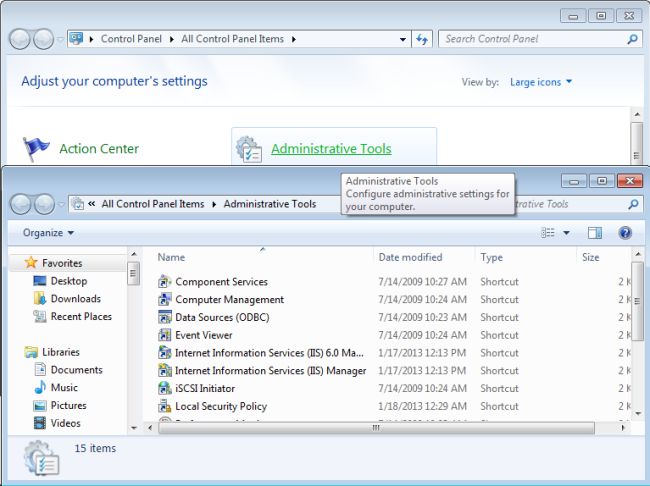
First, open Control Panel on your computer. Click on Programs and then on Turn Windows features on or off. A list will appear. Find Internet Information Services (IIS). Check the box next to it. Expand the Web Management Tools section. Ensure IIS Management Console is checked. Also, check the World Wide Web Services box. This step is essential for hosting.
Launch IIS Manager from the start menu. Find Application Pools on the left. Click on it. Select Add Application Pool on the right. A window will open. Name your pool something simple. Choose the .NET Framework version needed. Click OK. This creates a space for your Web API. Use this space to run your applications smoothly. It’s like a special container for your Web API.
Deploying Web Api
First, open your project in Visual Studio. Click on “Build” and then “Publish”. Choose a publish method. It can be a folder, FTP, or other. Set the target location for the files. Click “Publish” to create the files needed. These files will be used to host the Web API on the server.
After publishing, copy the files to the server directory. Use a file transfer method like FTP. Ensure all files are transferred. Check the server for any missing files. Once copied, the Web API is ready to be hosted. Ensure the server is configured to support it. This setup makes the API accessible to users.
Setting Up Website
First, open the IIS Manager on your computer. Find the “Sites” option. Right-click on it. Choose “Add Website” from the list. A window will pop up. Enter your site’s name in the “Site Name” box. Choose your site’s folder for “Physical Path.” This is where your files are stored. Make sure the folder is correct. This is very important.
In the same window, look for the “Binding” section. Here, you can set your domain and port. Usually, the port is 80. This is for HTTP. If your site uses HTTPS, use port 443. Enter your domain in the “Host Name” box. This helps people find your site. Click “OK” to save. Now your site is ready!
Configuring Application Pool
To set up the Managed Pipeline Mode, open the IIS Manager. Click on the Application Pools. Select your application pool. Choose Integrated or Classic mode. The Integrated mode works well with new features. Classic mode is for older apps.
Identity settings are important for security. Click on your application pool. Choose Advanced Settings. Find Identity under Process Model. Select a built-in account like NetworkService. Or, use a custom account for more control. Ensure the account has required permissions. This helps in accessing resources safely.
Configuring Web Api
Change the web.config file to host Web API. This file tells IIS how to run your app. Find the system.webServer section. Add the handlers entry here. Make sure it has webApiHandler in it. This lets IIS know your app is a Web API. It is important to ensure that the modules section is correct too. Check if aspNetWebApiModule is added. This helps in running Web API smoothly.
Setting routes helps users reach the right parts of your API. Look for the routes.MapHttpRoute section. Define a default route here. Use controller and action keywords. This makes sure each request goes to the correct place. Always check for typos in this section. Typos can lead to errors in navigation. This setup ensures your API works correctly.
Testing The Deployment
Deploying a Web API in IIS 7 involves configuring the server settings for optimal performance. Test the deployment by ensuring all API endpoints are accessible. Verify proper installation and functionality to guarantee seamless integration and operation.
Accessing Api Endpoint
To see if the API is working, type the URL in a browser. Ensure the URL points to your API endpoint. Sometimes, a 404 error may occur. Check the URL again if this happens. Ensure the server is running. The browser should display a response. This confirms the API is live.
Debugging Common Issues
Common issues may arise during testing. A 500 error is a server error. This means something went wrong. Check the server logs for details. Permissions might be the problem. Ensure the API has the right permissions. Firewall settings can block access. Adjust them if needed. Ensure the web.config file is correctly configured. Small errors in this file cause big problems. Fixing these issues ensures smooth API operation.

Credit: learn.microsoft.com
Security Considerations
An SSL certificate keeps data safe. It protects the data between the server and the client. To set it up, get a certificate from a trusted source. Install it on your server. This helps in making sure the data sent is encrypted. Encrypted data is hard to read by others. Always check if the certificate is active. Renew it before it expires. This keeps the connection secure and trusted.
Authentication makes sure the right people access your API. There are different methods to use. One method is Basic Authentication. It asks for a username and a password. Another method is Token Authentication. Here, the server gives a token to the user. The user shows the token when needed. Always choose a method that fits your needs. This keeps the API safe and secure.
Monitoring And Maintenance
Keep an eye on your Web API’s performance. Use tools like Windows Performance Monitor. Track metrics such as response time and CPU usage. A slow API can frustrate users. Regular checks help keep it fast. Make adjustments if you see problems. This ensures smooth operation.
Always update your Web API software. Software updates fix bugs and add features. These updates keep your system secure. Check for updates weekly or monthly. Install them promptly to avoid issues. Regular updates protect against new threats. A well-maintained API is a reliable API.
Frequently Asked Questions
How Do I Host My Web Api?
Host your Web API by choosing a cloud provider like AWS, Azure, or Google Cloud. Set up a server, deploy your API files, and configure security settings. Ensure your API is accessible via a domain or IP address. Use HTTPS for secure communication.
How To Host A Web Service In Iis?
Open IIS Manager. Click “Add Website” under “Connections”. Enter site name, physical path, and binding information. Click “OK” to host.
How To Host A .net Core Web Api?
Host a. NET Core web API using IIS, Docker, or Azure. First, build the API in Visual Studio. Deploy the API by publishing it to your chosen platform. Configure necessary settings like ports and authentication. Ensure the server environment supports.
NET Core runtime for optimal functionality.
How To Host .net Core Web Api As Windows Service?
Install the Microsoft. Extensions. Hosting. WindowsServices package. Configure your. NET Core app with UseWindowsService. Register your application as a Windows Service using PowerShell or SC. Start the service through Windows Service Manager. Ensure proper logging and error handling for stability.
Conclusion
Hosting a Web API in IIS 7 can be simple. Follow the steps carefully. Choose the right settings for your server. Test your API to ensure it works. Make sure the firewall allows access. Keep your server updated regularly. These actions help maintain security.
A smooth setup enhances performance. Users benefit from reliable API access. Always monitor server health. Troubleshooting issues early avoids downtime. With practice, hosting gets easier. Your API can run efficiently. Keep learning and improving your skills. A well-hosted API supports your business needs.
It empowers users with seamless access.


