
Are you feeling stuck with your current web hosting on GoDaddy? You might be experiencing slow load times, frequent downtimes, or perhaps your business has outgrown the current plan.
Whatever the reason, changing your web hosting can seem daunting. But don’t worry! You’ve come to the right place. In this guide, you’ll discover a simple, step-by-step process to seamlessly switch your web hosting on GoDaddy. Imagine the relief of faster load times and a more reliable service, all without losing your website’s data.
Keep reading to unlock the secrets to a smoother, more efficient website experience. Your digital success starts here!
Reasons To Change Web Hosting
Web hosting is crucial for your website. Sometimes, it needs a change. One reason is slow website speed. Slow sites can lose visitors. Another reason is poor customer support. Good support helps solve problems fast. Some hosts may limit your website’s growth. This can stop more visitors from coming. High downtime is another reason. Websites should be online always. High costs can make you switch. Saving money is important.
Security is vital for websites. Some hosts lack strong security features. This can put your site at risk. If your website is not secure, it’s a problem. Lastly, some hosts lack features you need. Features like backups or email accounts are important. Choosing a host with all you need is best.
Preparing For The Transition
Data is very important. Always back up your files. Store them safely. This keeps your website safe. Use tools to help you. GoDaddy offers backup options. Check them out. This is a smart step. Avoid losing files. Keep your data secure.
Explore new hosting services. Check their features. Compare prices and plans. Read reviews online. Look for support. Choose a service that fits you. Make sure it is reliable. Find a plan that meets your needs. Don’t rush this decision. Take your time.
Accessing Your Godaddy Account
First, open your web browser and go to the Godaddy website. Find the login button at the top right corner. Click it. Now, enter your username and password. Make sure they are correct. Then, press the login button. You are now in your account. If you forgot your password, click the “forgot password” link. Follow the steps to reset it.
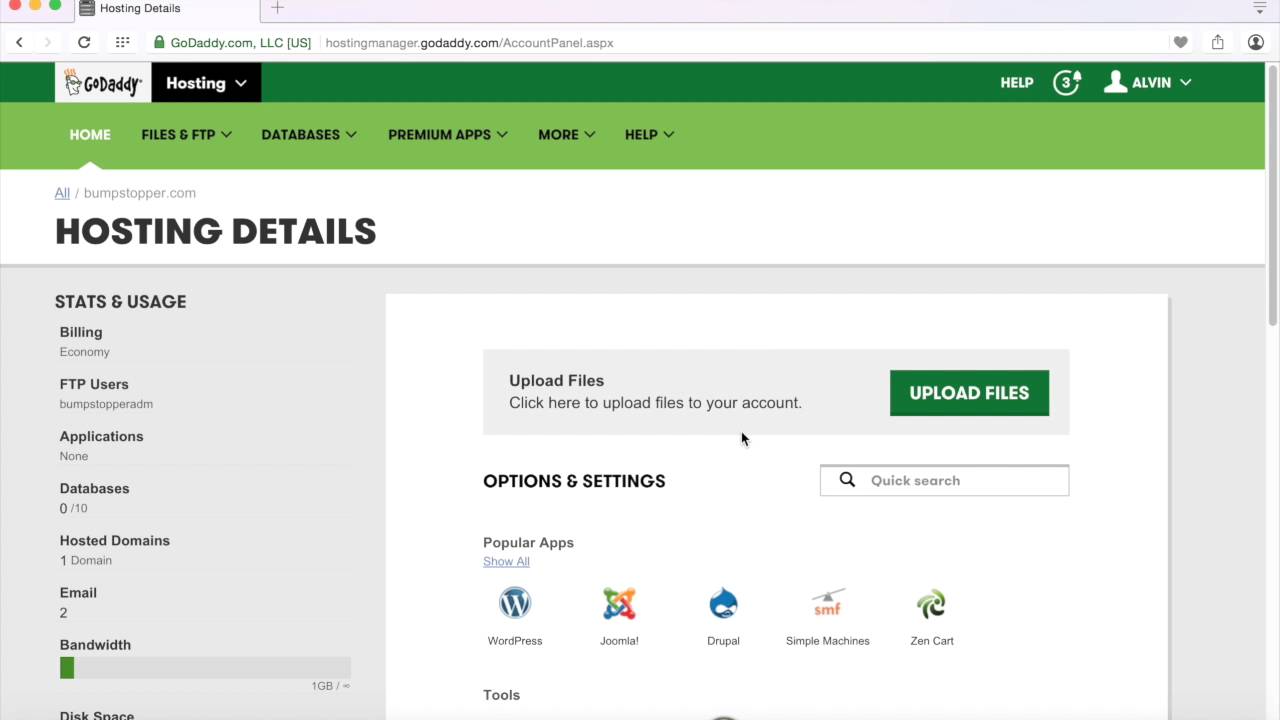
Once logged in, find the My Products section. This is usually on the main page. Click it. Look for the hosting option. It might be under “Web Hosting” or “Hosting Plans.” Click on the hosting plan you want to change. This will take you to the hosting dashboard. Here, you can make changes to your hosting. Make sure to save any changes before leaving.
Credit: www.godaddy.com
Selecting A New Hosting Plan
Switching web hosting on GoDaddy is straightforward. Begin by selecting a new hosting plan that fits your needs. Next, migrate your website data to the new server using GoDaddy’s transfer tools.
Comparing Plans
Different hosting plans have different features. Some plans offer more storage and bandwidth. Others focus on security and support. It’s important to check what each plan provides. Look at the cost and what fits your budget. A good plan has a balance of features and cost. Many people choose plans with 24/7 support. This helps solve problems quickly.
Choosing The Right Plan For Your Needs
Understand your website needs. Is your site small or large? A small site may need basic features. Big sites might need more advanced options. Think about the traffic your site gets. High traffic needs more resources. Choose a plan that matches your site’s needs. This ensures your site runs smoothly. Always read customer reviews before deciding.
Transferring Your Website
Start by downloading all files from your old host. Use an FTP client like FileZilla. Connect to your old server. Select files and save them to your computer. Now, connect to your new host. Use the same FTP client. Upload the files to your new server. Check if all files are there. This step is important. Missing files can break your site. Always double-check.
Export your database from the old host. Use a tool like phpMyAdmin. Save the file as a .sql format. Open phpMyAdmin on your new host. Choose the import option. Select your saved .sql file. Click import to upload it. Check your new host for errors. Database must work properly. Test your website after importing. Make sure everything shows up right.
Credit: www.godaddy.com
Configuring Dns Settings
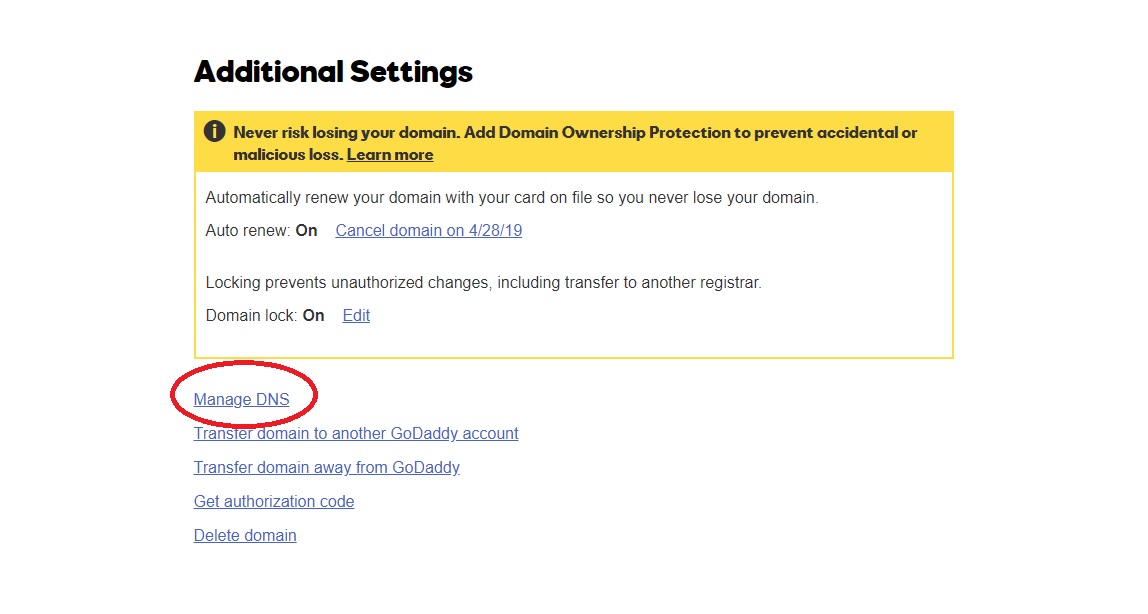
Accessing DNS Management on GoDaddy is easy. First, log in to your account. Find the “My Products” page. Click on “Domains” to see your list. Choose the domain you want to edit. Now, click on “DNS” beside the domain. This opens the DNS Management page. Here, you can make changes. Always be careful with settings. Wrong changes might cause issues.
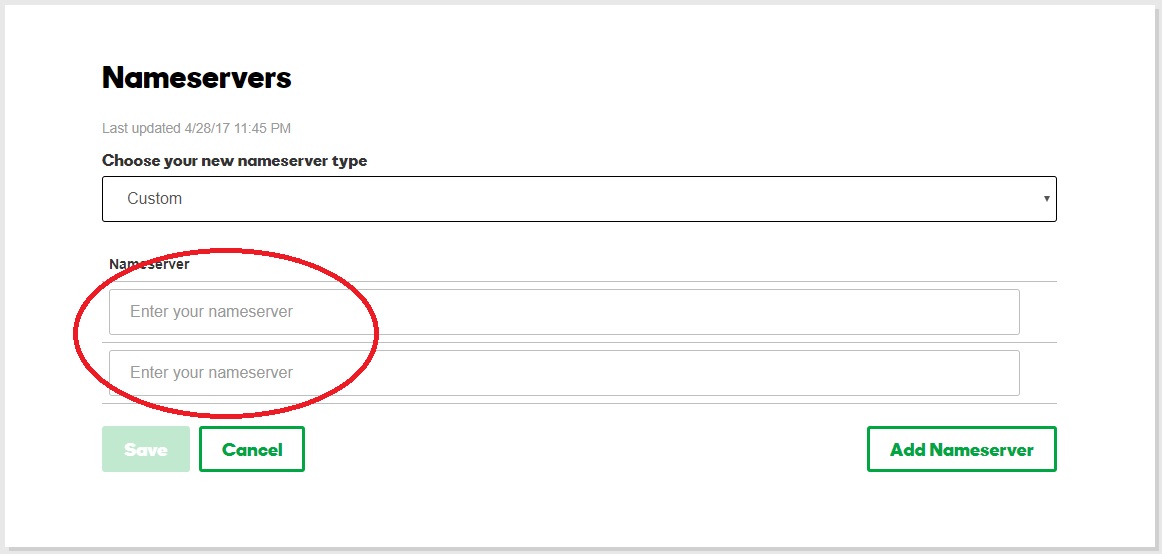
Updating Nameservers is important for changing hosting. Find the nameservers section on the DNS page. You might see two or more nameservers listed. You need to change these to new ones. Get the new nameservers from your hosting provider. Replace the old ones carefully. Click “Save” after you finish. This makes sure your domain points to the right host. Changes might take some hours to update. Be patient while it updates.
Testing The New Hosting Setup
Ensure your website runs smoothly. Open the homepage first. Check if it loads quickly. Visit different pages. Confirm that images appear correctly. Test links by clicking them. Verify that they lead to the right places. Look for any broken links. Make sure forms work properly. Submit a test form. Check if you get the response. Review interactive elements. Ensure they work without errors.
Find any issues? Fix them promptly. Start by identifying the problem. Look at error messages. They often help. Check server settings. Ensure configurations are correct. Look for missing files. Upload them if needed. Contact support if problems persist. They can guide you. Keep backups ready. Restore if necessary. Make sure everything is perfect. Your site should run smoothly.
Credit: www.youtube.com
Finalizing The Hosting Change
Monitoring website performance is very important. Check your site’s speed. Make sure everything loads fast. Slow websites can lose visitors. Use tools to test the speed. This helps keep your site running well. Watch for any downtime. Downtime means your site is offline. This can make visitors unhappy. Fix issues quickly to keep your site available.
Ensuring security protocols is crucial. Keep your site safe from hackers. Use strong passwords. Strong passwords are hard to guess. Update your software often. Updates fix security holes. Install a firewall. A firewall blocks bad traffic. Always back up your data. Backups can save your work if something goes wrong.
Frequently Asked Questions
Can I Move My Website From Godaddy To Another Host?
Yes, you can move your website from GoDaddy to another host. Backup your files and database first. Choose a new hosting provider and transfer your domain. Update DNS settings to point to the new server. Ensure everything functions correctly after migration.
Seek technical support if needed.
How Do I Change My Godaddy Web Hosting Domain?
Log in to your GoDaddy account. Navigate to “My Products” and select your hosting account. Click “Manage” and then “Settings. ” Choose “Domain” and enter your new domain. Save changes to update your hosting domain.
How Do I Change My Web Hosting Provider?
To change your web hosting provider, first backup your website files and database. Choose a new host and migrate your data. Update your domain’s DNS settings to point to the new host. Test your website to ensure everything works smoothly.
Notify your old provider about the cancellation.
How To Transfer Hosting From One Godaddy Account To Another?
Log into both GoDaddy accounts. Initiate a domain transfer from the current hosting account. Accept the transfer in the receiving account. Update DNS settings if necessary. Ensure the domain is unlocked and has no transfer restrictions. Follow on-screen instructions to complete the hosting transfer process smoothly.
Conclusion
Changing web hosting on GoDaddy is straightforward with clear steps. First, select the right hosting plan for your needs. Next, ensure you back up your website files. Transfer them smoothly to the new server. Check everything works as expected. It’s important to keep your website accessible during the transition.
Plan ahead to avoid downtime. With patience and attention, you can successfully change your hosting. Remember to update your DNS settings. This ensures visitors find your site. Feel free to reach out to GoDaddy support if needed. They are there to help you.
Now, enjoy your new hosting experience!


