
Are you ready to take your web API to the next level by hosting it on Azure? Imagine unleashing the full potential of your application, reaching users around the globe with speed and reliability.
Azure’s powerful cloud platform makes it easier than ever to host and manage your web APIs, ensuring they perform optimally and are always available to your users. In this guide, you’ll discover step-by-step instructions on how to seamlessly host your web API on Azure.
Whether you’re an experienced developer or just starting out, you’ll find practical tips and insights to make the process smooth and efficient. Dive in, and let’s unlock the future of your web services together!
Setting Up An Azure Account
Sign up for a free Azure account. You get $200 credits for 30 days. Access many services for free. Azure needs an email and phone number. Use a valid payment method for verification. This helps to ensure security. You can use the Azure portal after setup. Explore and test different services without charges.
Azure offers different subscription plans. These include Pay-As-You-Go, Enterprise, and Student plans. Pay-As-You-Go charges for only what you use. Enterprise plan suits big companies. Student plan is for learners. Each plan has benefits. Choose based on your needs. Some plans offer free services. Compare plans before making a choice.
Preparing Your Web Api
Clean code is easy to read. Remove any extra lines or spaces. Use clear names for your functions and variables. This helps others understand your work. Avoid long functions. Break them into smaller parts. Short functions are easier to test and fix. Always check for errors in your code. Handle errors well. This makes your API stronger. Keep your code simple and tidy. This helps in future changes.
Testing helps find mistakes. Run your API on your computer first. This is called local testing. Use tools like Postman or cURL. These tools send requests to your API. Check if your API gives the right answers. Test different scenarios. Make sure your API handles each one. Fix any problems you find. Testing locally saves time and effort later.
Azure Services For Hosting
Deploying a Web API on Azure is simple and efficient. Azure offers scalable cloud services, ensuring seamless hosting for your applications. With its user-friendly interface, setting up your Web API becomes a hassle-free task.
App Service Vs Virtual Machines
Azure offers two main options for hosting. App Service is easy and quick. It provides a platform for your app. You don’t worry about servers. Just upload your code and it runs. It’s great for small to medium apps. Virtual Machines (VMs) give you more control. You manage the server settings. Perfect for big apps or custom needs. VMs need more setup time. They also require more technical know-how. Choose based on your app size and needs.
Both services have pros and cons. App Service is cost-effective. VMs offer flexibility. For beginners, App Service is easier. Experts may prefer VMs. Make a choice that matches your skills. Also, think of your app’s growth. Azure supports scaling for both services. This means your app can grow over time.
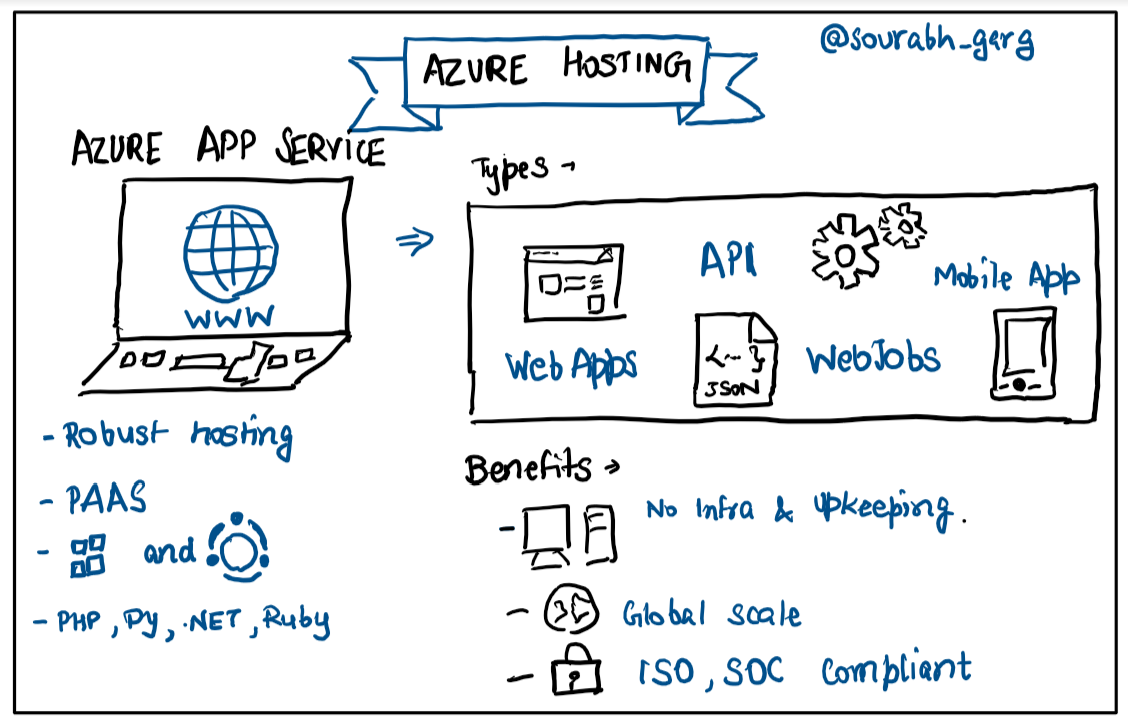
Credit: faun.pub
Deploying The Web Api
First, log in to the Azure Portal. Click on “Create a resource”. Pick “Web App” from the list. Fill in the needed information. You need to choose a subscription and resource group. After that, select an App Service Plan. This defines where your app runs. Finally, click “Review + Create”. Your Web API will be ready soon.
Use Azure CLI for quick deployment. Open the terminal on your computer. Type the command: az login. This logs you into Azure. Use az group create to make a resource group. Then, deploy your app with az webapp up. This command sets up your Web API on Azure. The CLI makes tasks faster and easier.
Configuring Api Settings
Setting up API settings involves deploying the web API on Azure. First, create an Azure account. Then, configure the necessary settings through the Azure portal. These steps ensure your web API runs smoothly and securely.
Setting Environment Variables
Environment variables are crucial for your Web API. They help manage settings and secrets. First, create a new configuration file. Use the Azure portal for this. Add all necessary variables. Make sure to include database connections. These variables must be secure and hidden. Never expose them publicly. Always double-check each entry. Correct mistakes quickly. This ensures smooth operations. Use simple names for variables. This helps in quick identification. Organize them neatly in groups. This makes management easier. Update these variables regularly. Always keep backups in safe locations.
Adjusting Security Settings
Security settings keep your API safe and protected. Use strong passwords for all accounts. This prevents unauthorized access. Enable firewalls and encryption. They guard against attacks. Regularly update security protocols. This keeps your data safe. Always monitor for unusual activity. Act fast if something seems wrong. Use role-based access control. This limits user permissions. Only trusted users get full access. Review these settings often. Make improvements as needed. Documentation helps track changes. Keep records of all adjustments. This ensures transparency and accountability.
Monitoring And Scaling
Azure Monitor helps keep an eye on your API. It shows how well it is performing. You can see logs and metrics. These help you understand your API’s health. Alerts notify you of any issues. They act like a watchful friend. Set them up for quick responses. This helps in fixing problems fast. Azure Monitor is a tool you can trust.
Azure Autoscale adjusts your API resources. Traffic increases? It adds more power. Traffic decreases? It reduces power. This ensures smooth operation. It saves cost and energy. Autoscale needs rules. Set these based on your needs. Always have enough resources. Never too much, never too little. Azure Autoscale is like a smart helper. It balances everything nicely.
Troubleshooting Common Issues
Deploying a Web API on Azure involves common issues like configuration errors and network settings. Fixing these requires checking firewall rules and ensuring correct database connections. Adjusting resource allocations can help optimize performance and prevent timeouts.
Diagnosing Deployment Failures
Deployment issues can be tricky. First, check your error logs. Logs often show the root cause. Look for missing dependencies or typos in the code. Ensure your connection strings are correct. Wrong strings cause many problems. Verify your resource limits on Azure. Too low limits can halt the process. Always update your SDKs and tools. Old versions may not work well.
Handling Performance Bottlenecks
Slow APIs frustrate users. Start by analyzing API response times. Use Azure’s monitoring tools. They help find slow points. Check your database queries. Long queries slow the system. Optimize them for speed. Review your network latency. High latency affects performance. Upgrade your Azure service plan if needed. More resources often mean better speed.

Credit: build5nines.com
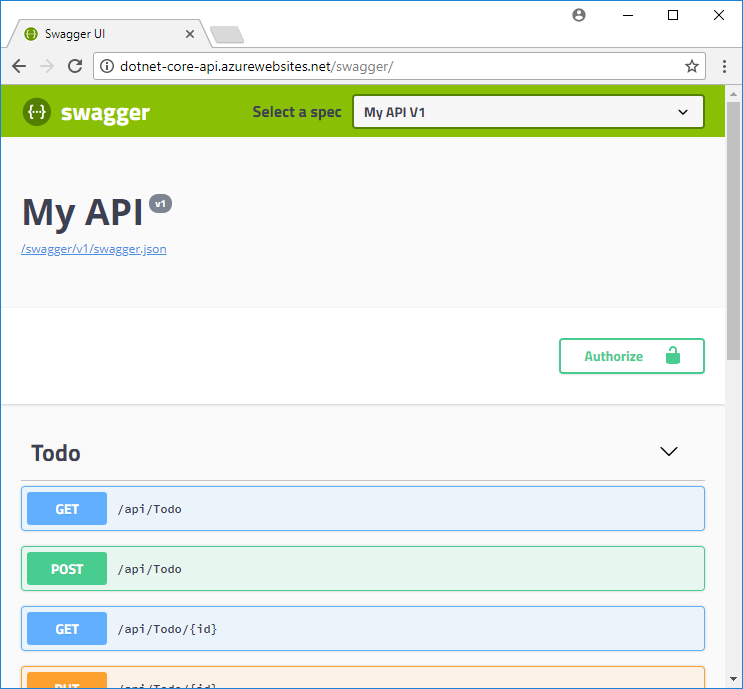
Credit: learn.microsoft.com
Frequently Asked Questions
How Do I Host My Web Api?
Host your web API using cloud platforms like AWS, Google Cloud, or Azure. Choose a server, deploy your code, and configure DNS settings. Ensure security with SSL certificates and manage scalability with load balancers. Regularly monitor performance for optimal results.
How To Set Up An Api In Azure?
Set up an API in Azure by first creating an API Management Service. Import your API using OpenAPI specifications. Configure the backend service and set policies. Test the API using the Azure portal. Secure the API with authentication methods. Monitor performance through Azure Analytics.
How Do I Publish An Api To Azure?
Create an Azure API Management instance. Import your API into the instance. Configure your API settings. Deploy the API. Use Azure Portal for management.
What Is The Difference Between Web Api And Azure Api?
Web API is a framework for building HTTP services, while Azure API provides cloud-based services via Azure’s infrastructure.
Conclusion
Hosting a Web API on Azure can be straightforward. Start with setting up your Azure account. Choose the right service plan. Deploy your API securely. Azure offers tools for monitoring and scaling. This ensures your API performs well. Remember to back up your data.
Regular updates keep your API running smoothly. Explore Azure’s features to improve your API. With practice, hosting becomes easier. Azure’s cloud solutions provide flexibility and reliability. Stay curious. Keep learning. Your Web API can thrive on Azure.


